So here is where we get to the technical side of this engine. Oiling it is a pretty big deal. Since it is outfitted with a dry sump oiling system, there needs to be an external oil tank large enough to store all the oil needed for this massive rotary.
This is the point where the Engineering side really helps. The problem with shoehorning such a large engine into a car like this is finding out you are running out of space. I was told the oil tank needs to have a storage capacity of 7-8 quarts of oil. If you would like some kind of visual reference, run out to your car, pop open the hood and place two gallons of milk on top of each other anywhere you can fit them. Now add additional room for ventilation. Can you fit it? Now you see the challenge I was faced with.
This is where being just a Fabricator or Engineer is not enough. Being a Fabricator helps, but just building a part is not enough to ensure it is the correct design. Just designing a part is not enough to ensure it will get built correctly. It's time to be both.
With some very careful consideration, I broke out the tape measure and meticulously crawled over every section in the engine bay. It was clear right off the get go that there is absolutley no space for an oil tank with that kind of capacity. There is going to have to be some kind of surgery here. The idea came up a few times to cut through the firewall and extend the capacity into the cabin area. While this has been done before, and seems to solve the problem, I didn't really want to pursue the design for a couple reasons. First, there was no design that matched the owners requirements. Any tank that went through the firewall would end up in a mechanical lock. Secondly, aluminum is fantastic at heat dissipation. The oil coming out of the engine back into the oil tank is hot. The amount of heat generated is more than enough to create serious discomfort. We also run into the problem with servicing the tank from inside the cabin area is simply not practical.
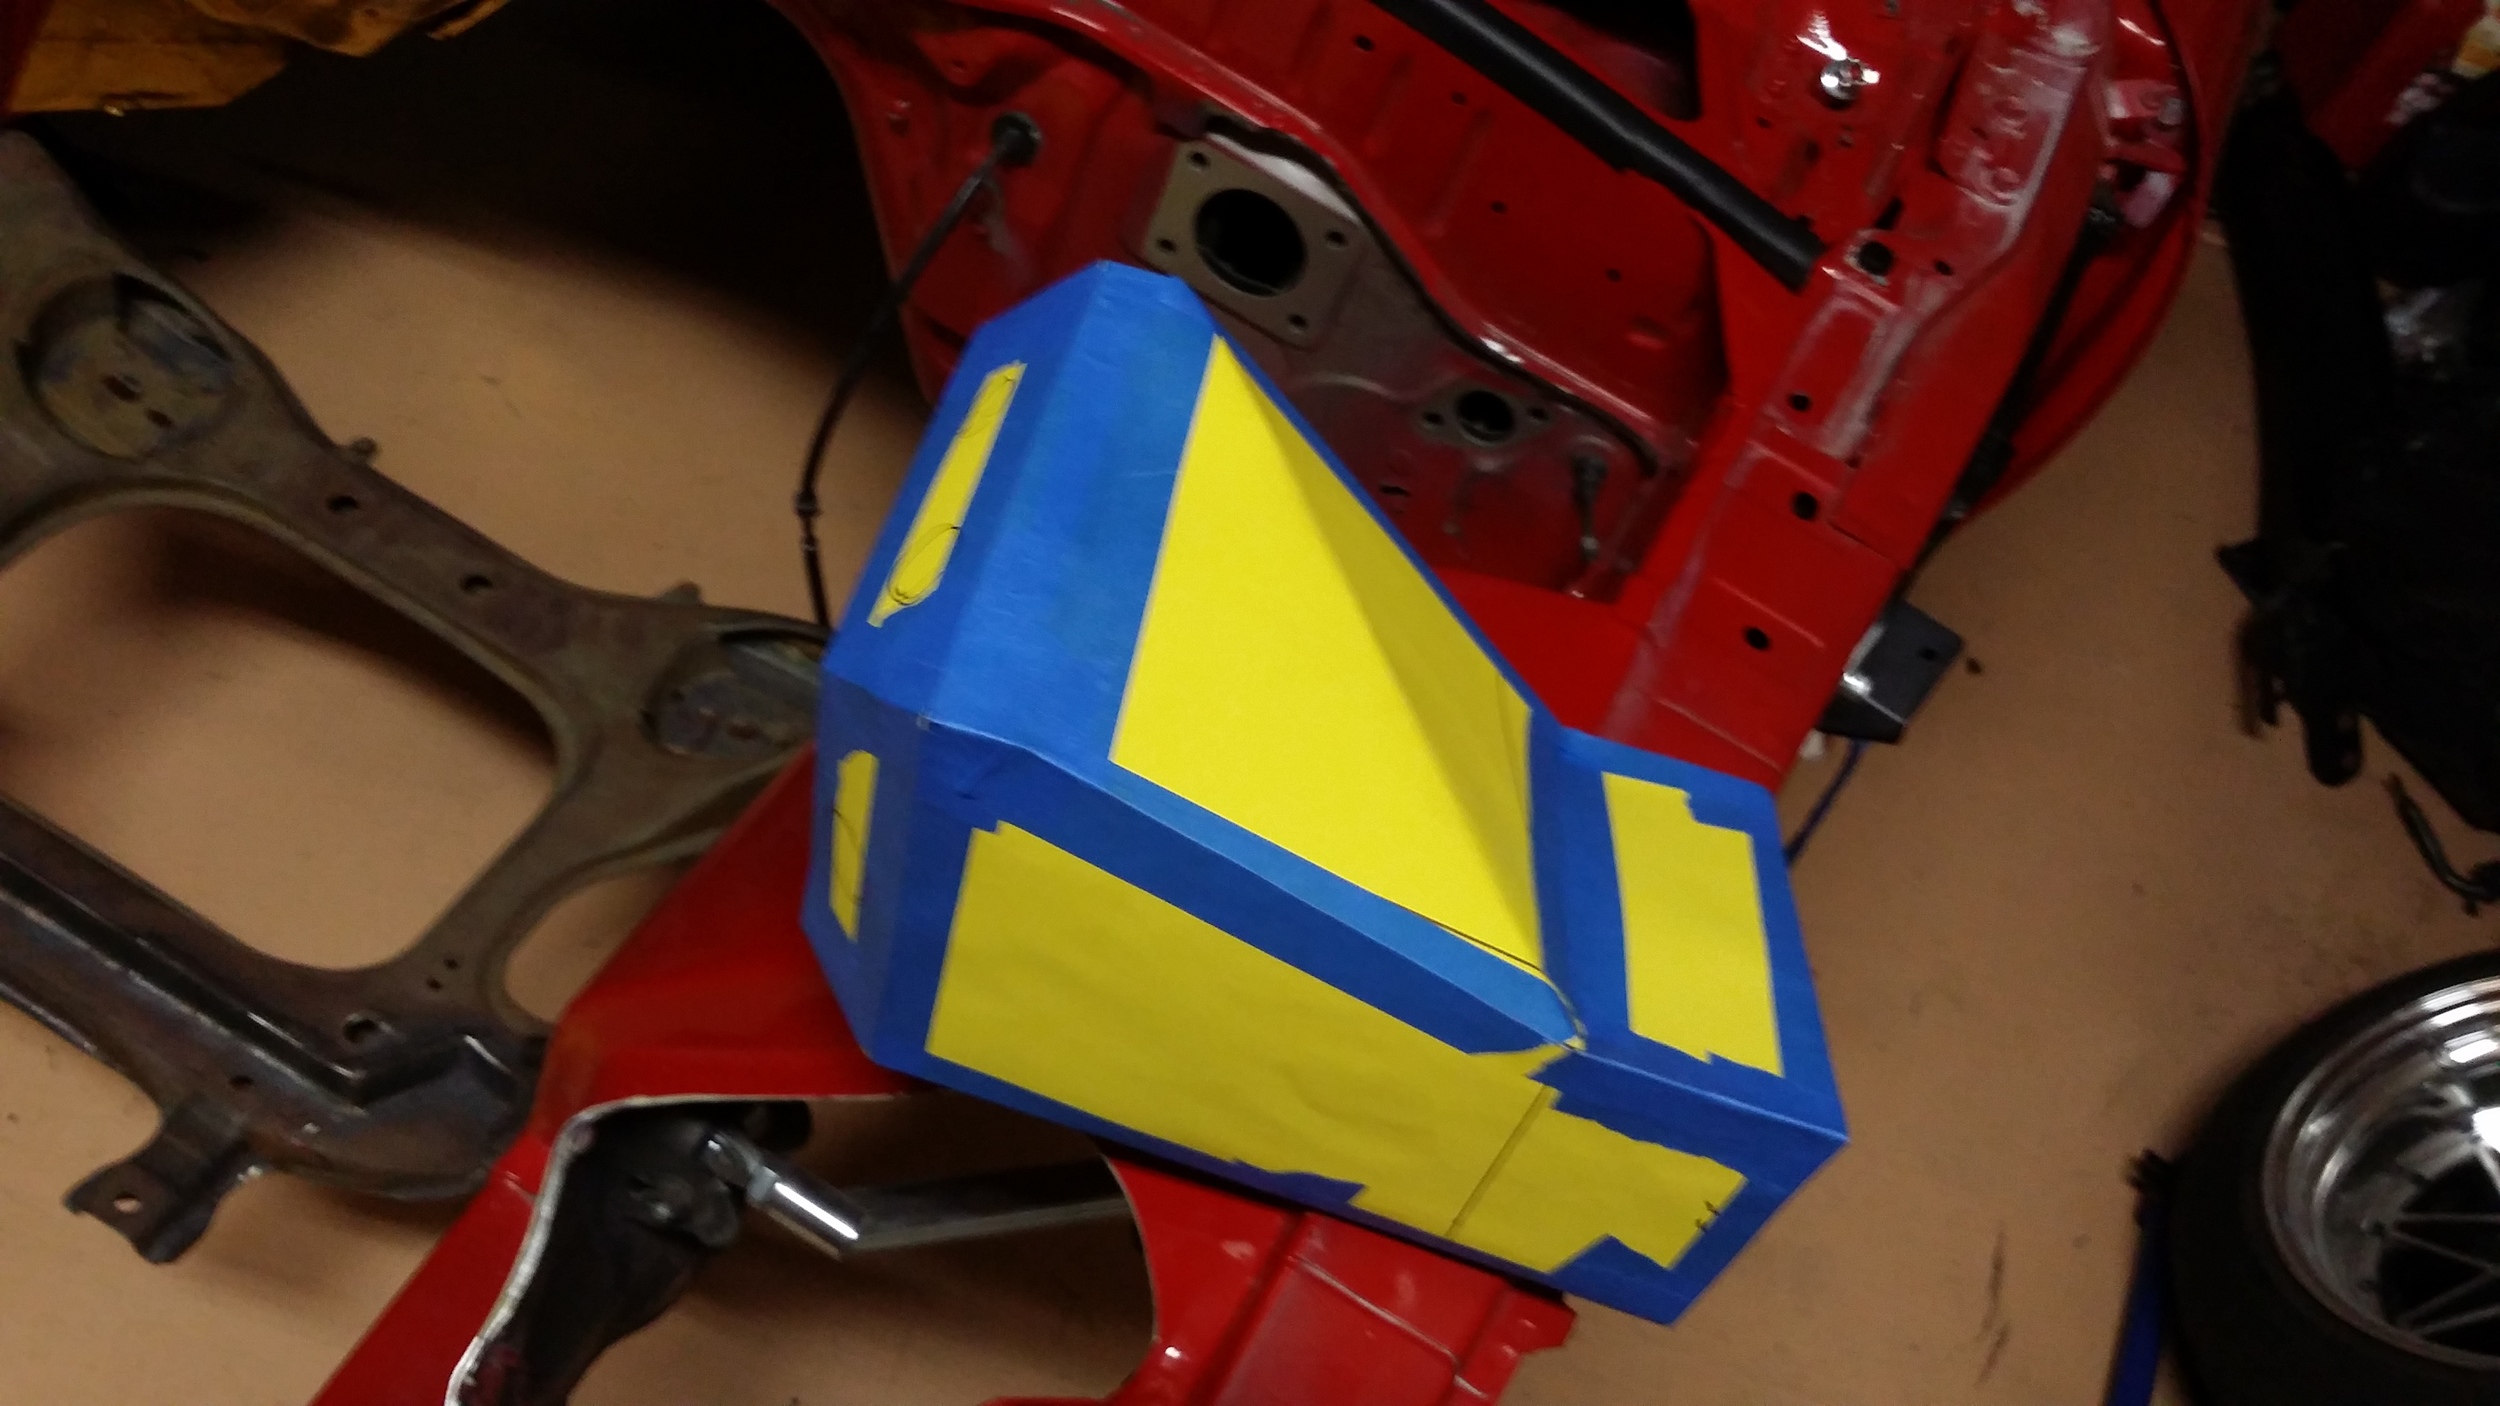
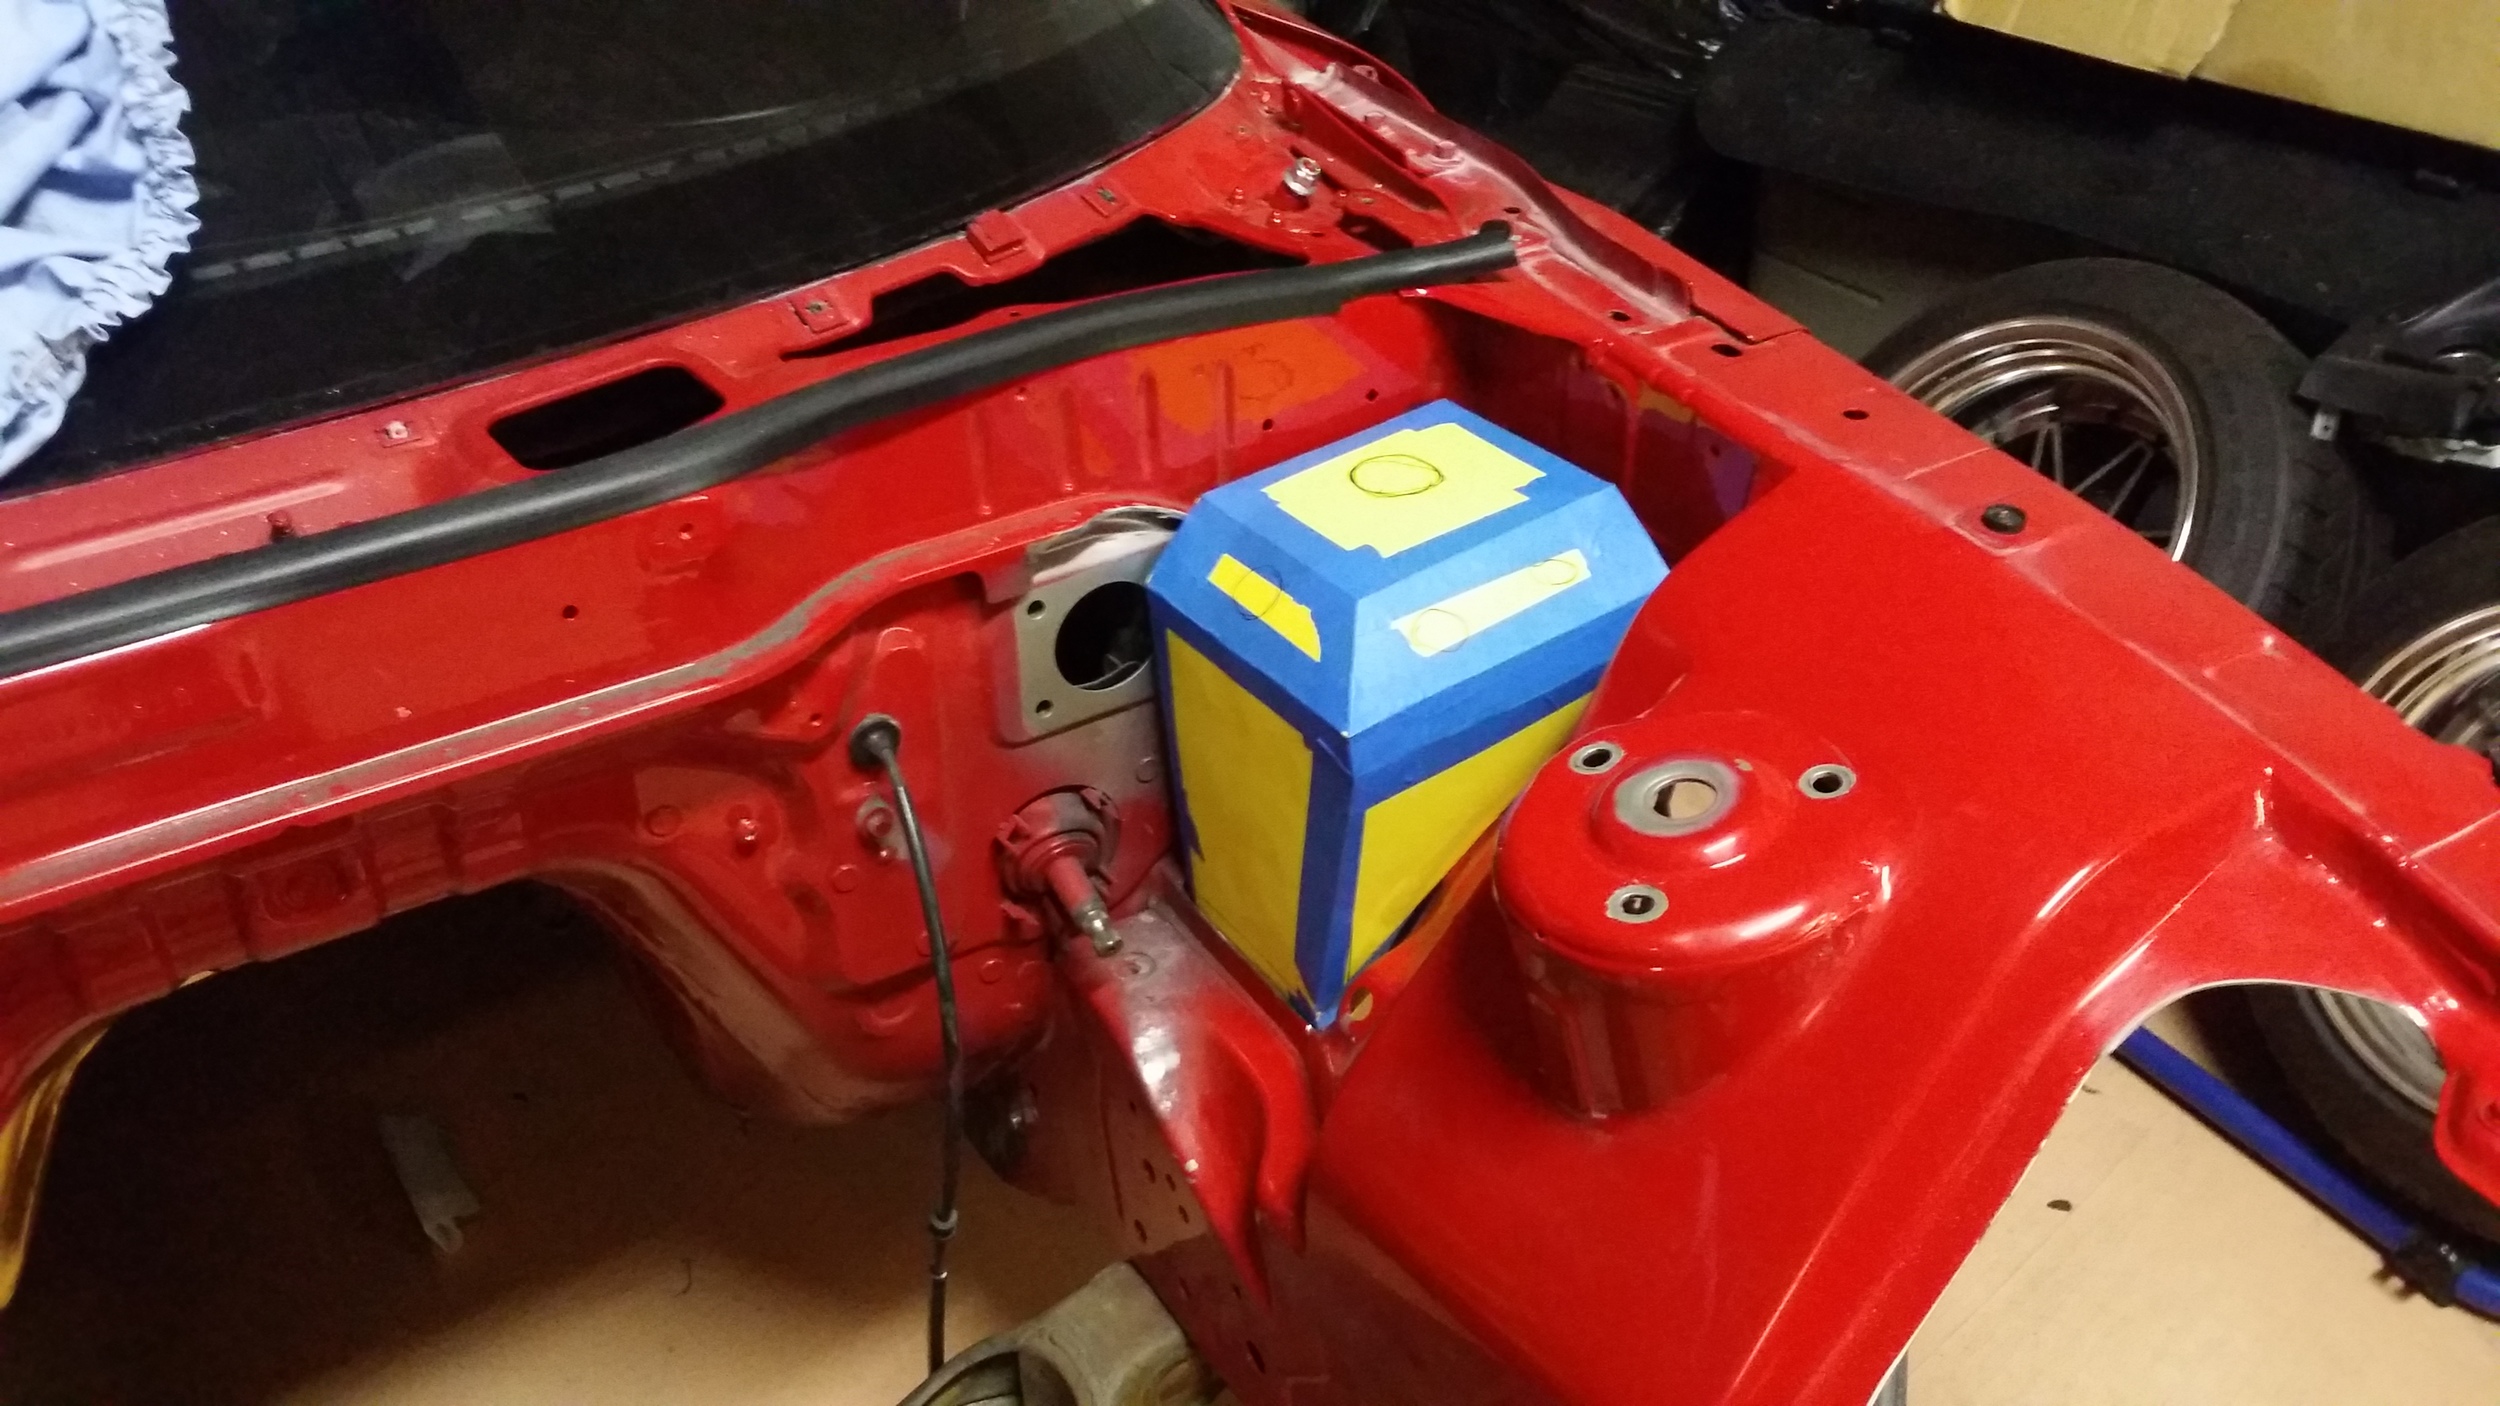
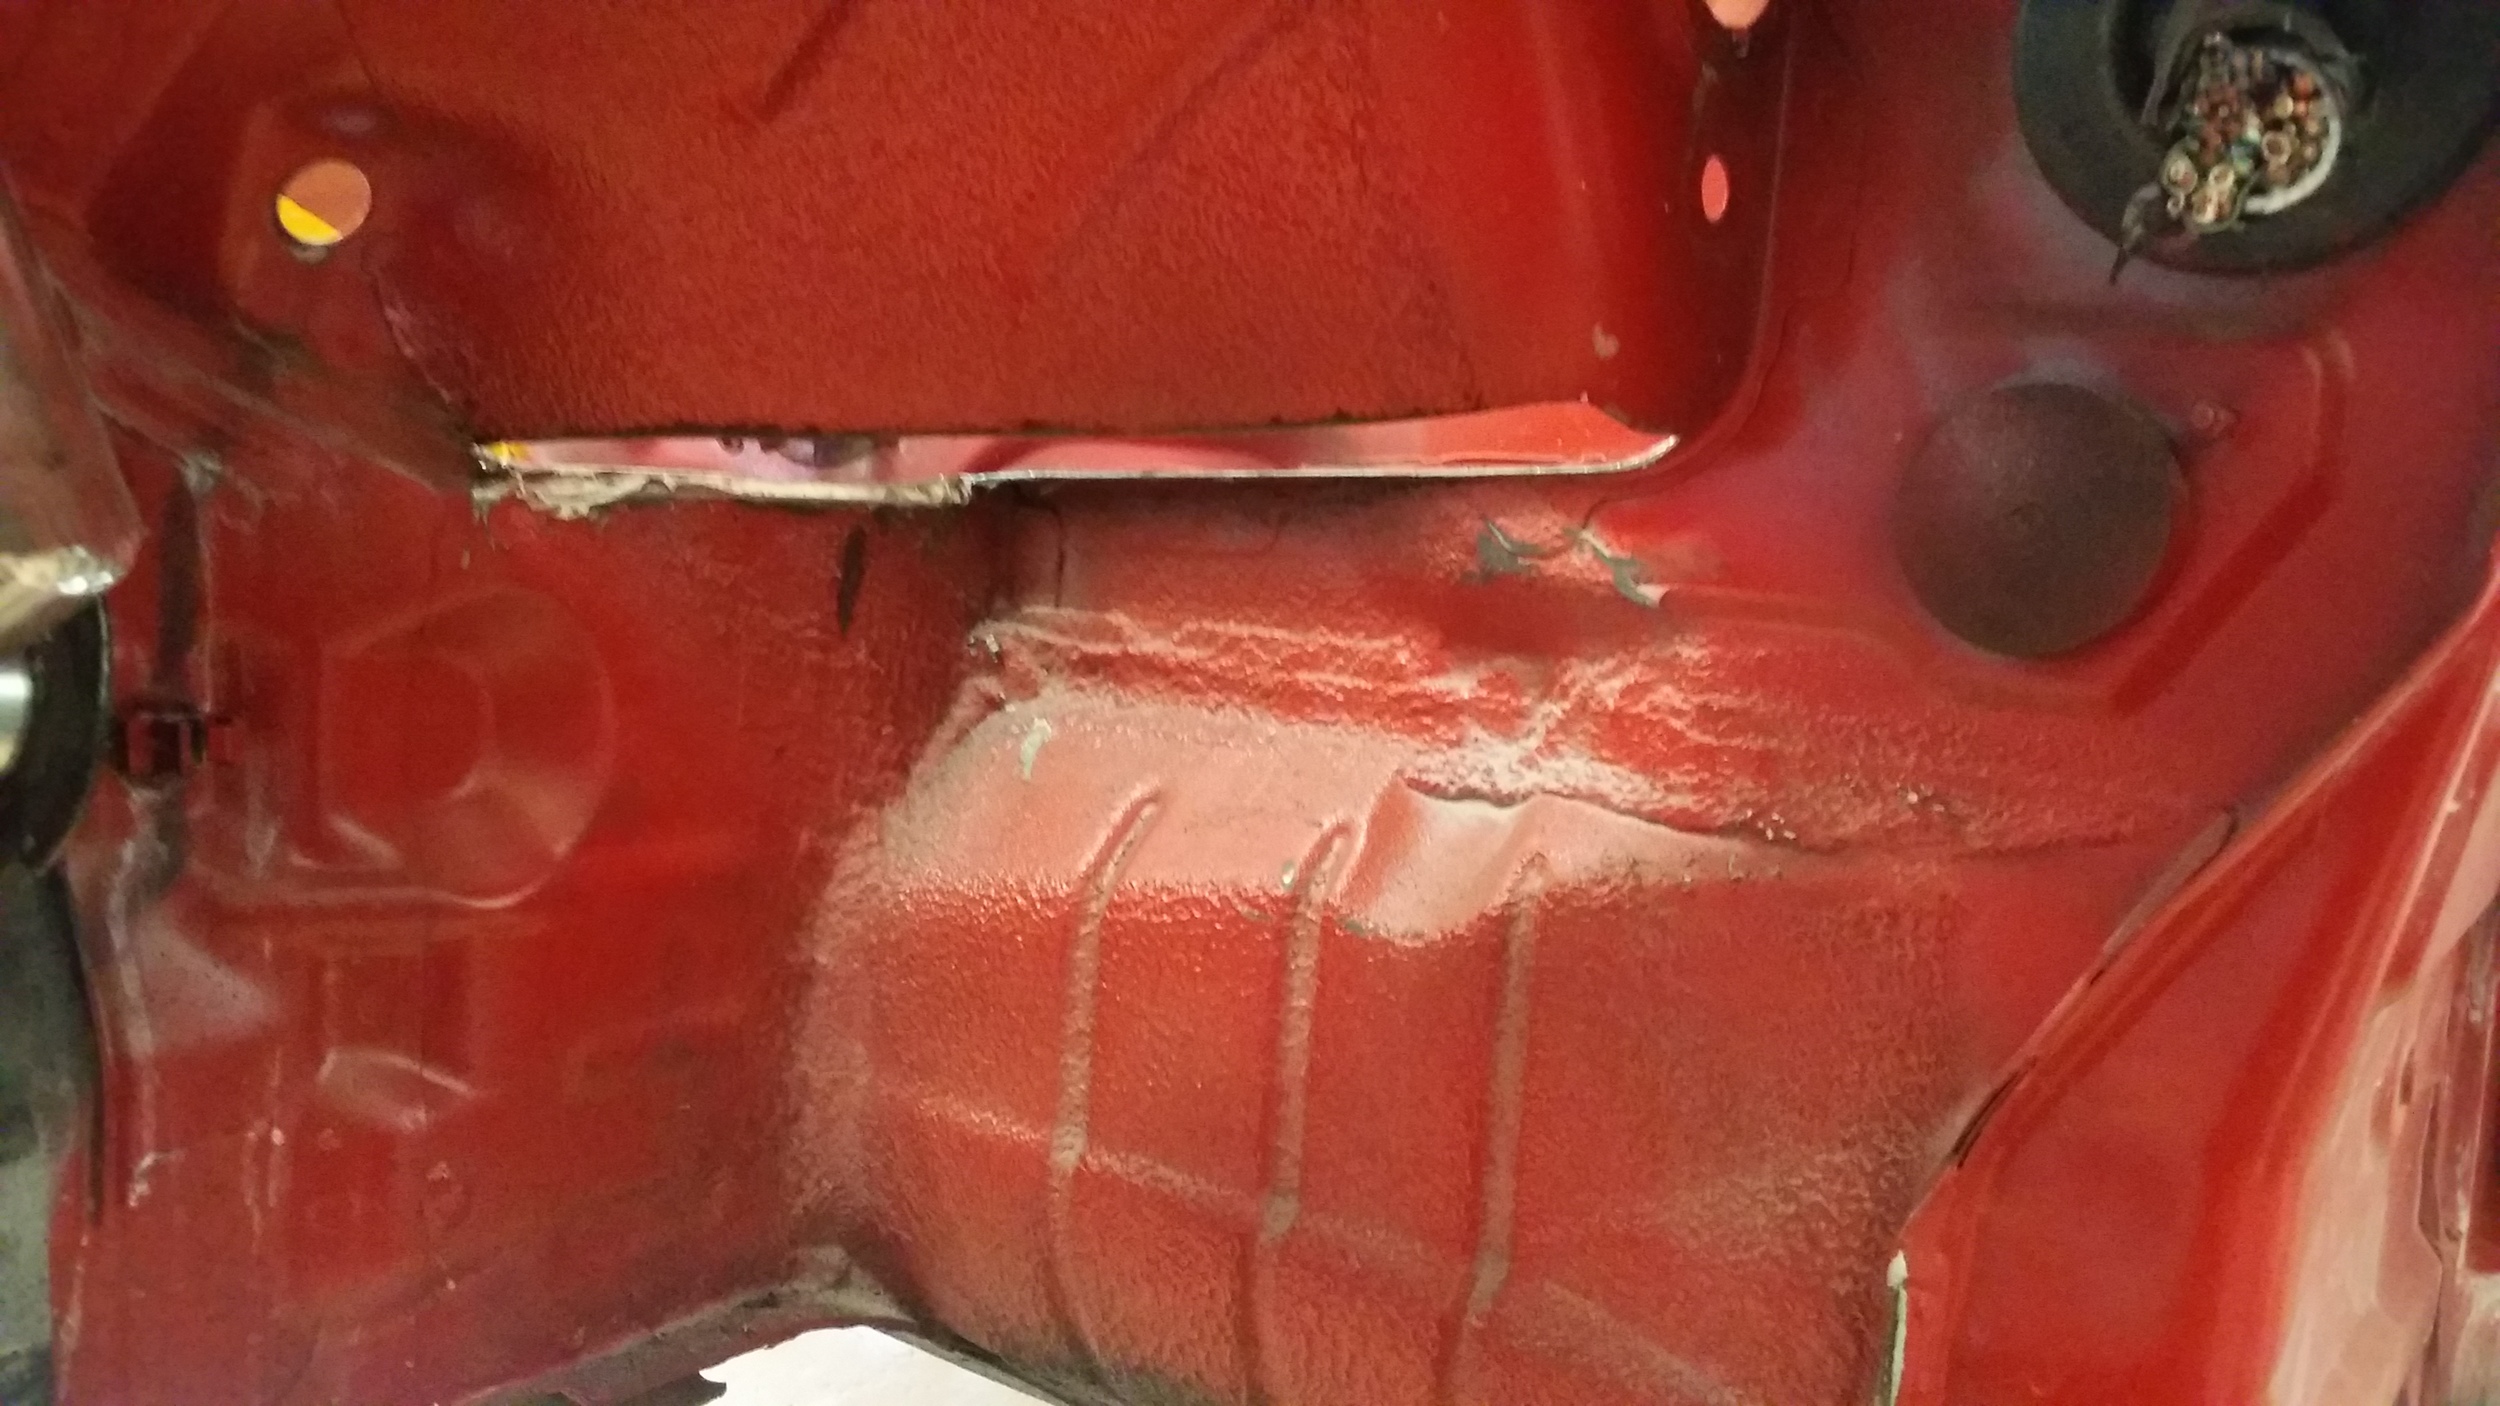
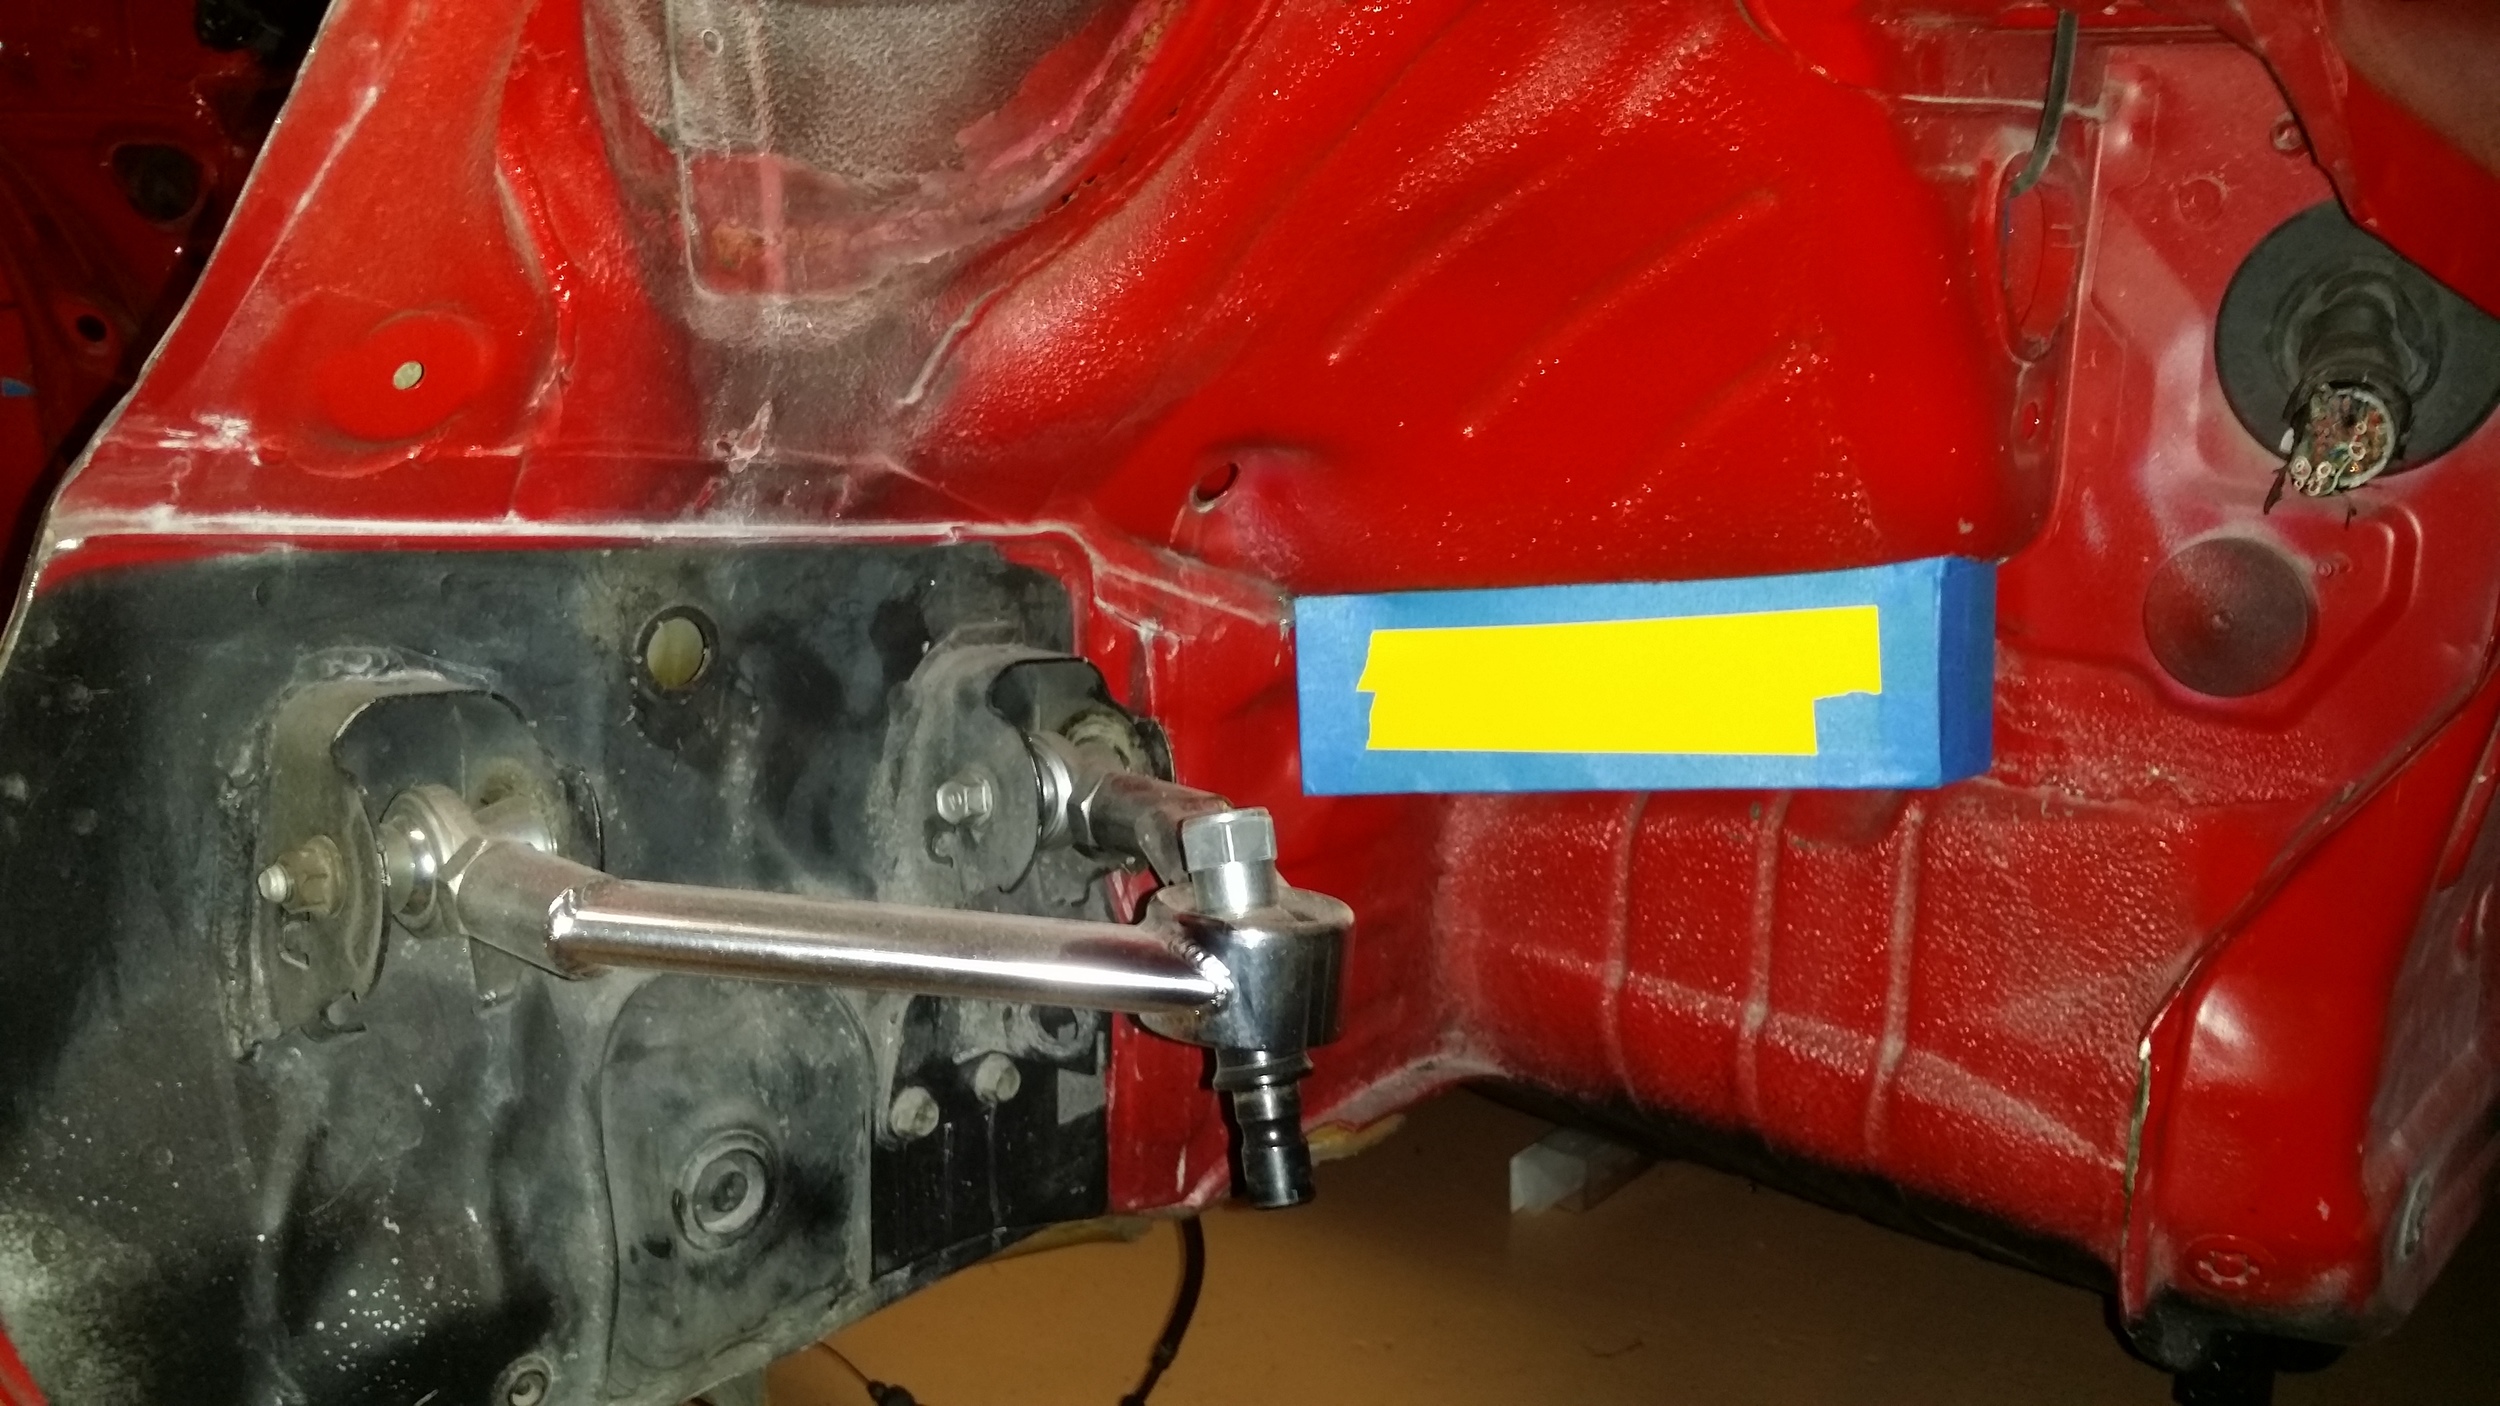
I knew there was plenty of space in the left rear corner of the engine bay since the brake booster will be gone, and the brake and clutch masters will be under the dash inside the car attached to Tilton pedal assemblies. This area is the best area I have to work in. After taking all the measurement I could, in every configuration, I still came up 2 quarts short of meeting capacity requirements. It wasn't until i had a seat next to the car when I discovered a hidden gem: the wheel well - one little pocket of space just in front of the firewall. After a quick fit check of the wheel and tire at maximum suspension travel point, I deemed it the perfect space to add the extra 2 quarts of capacity required.
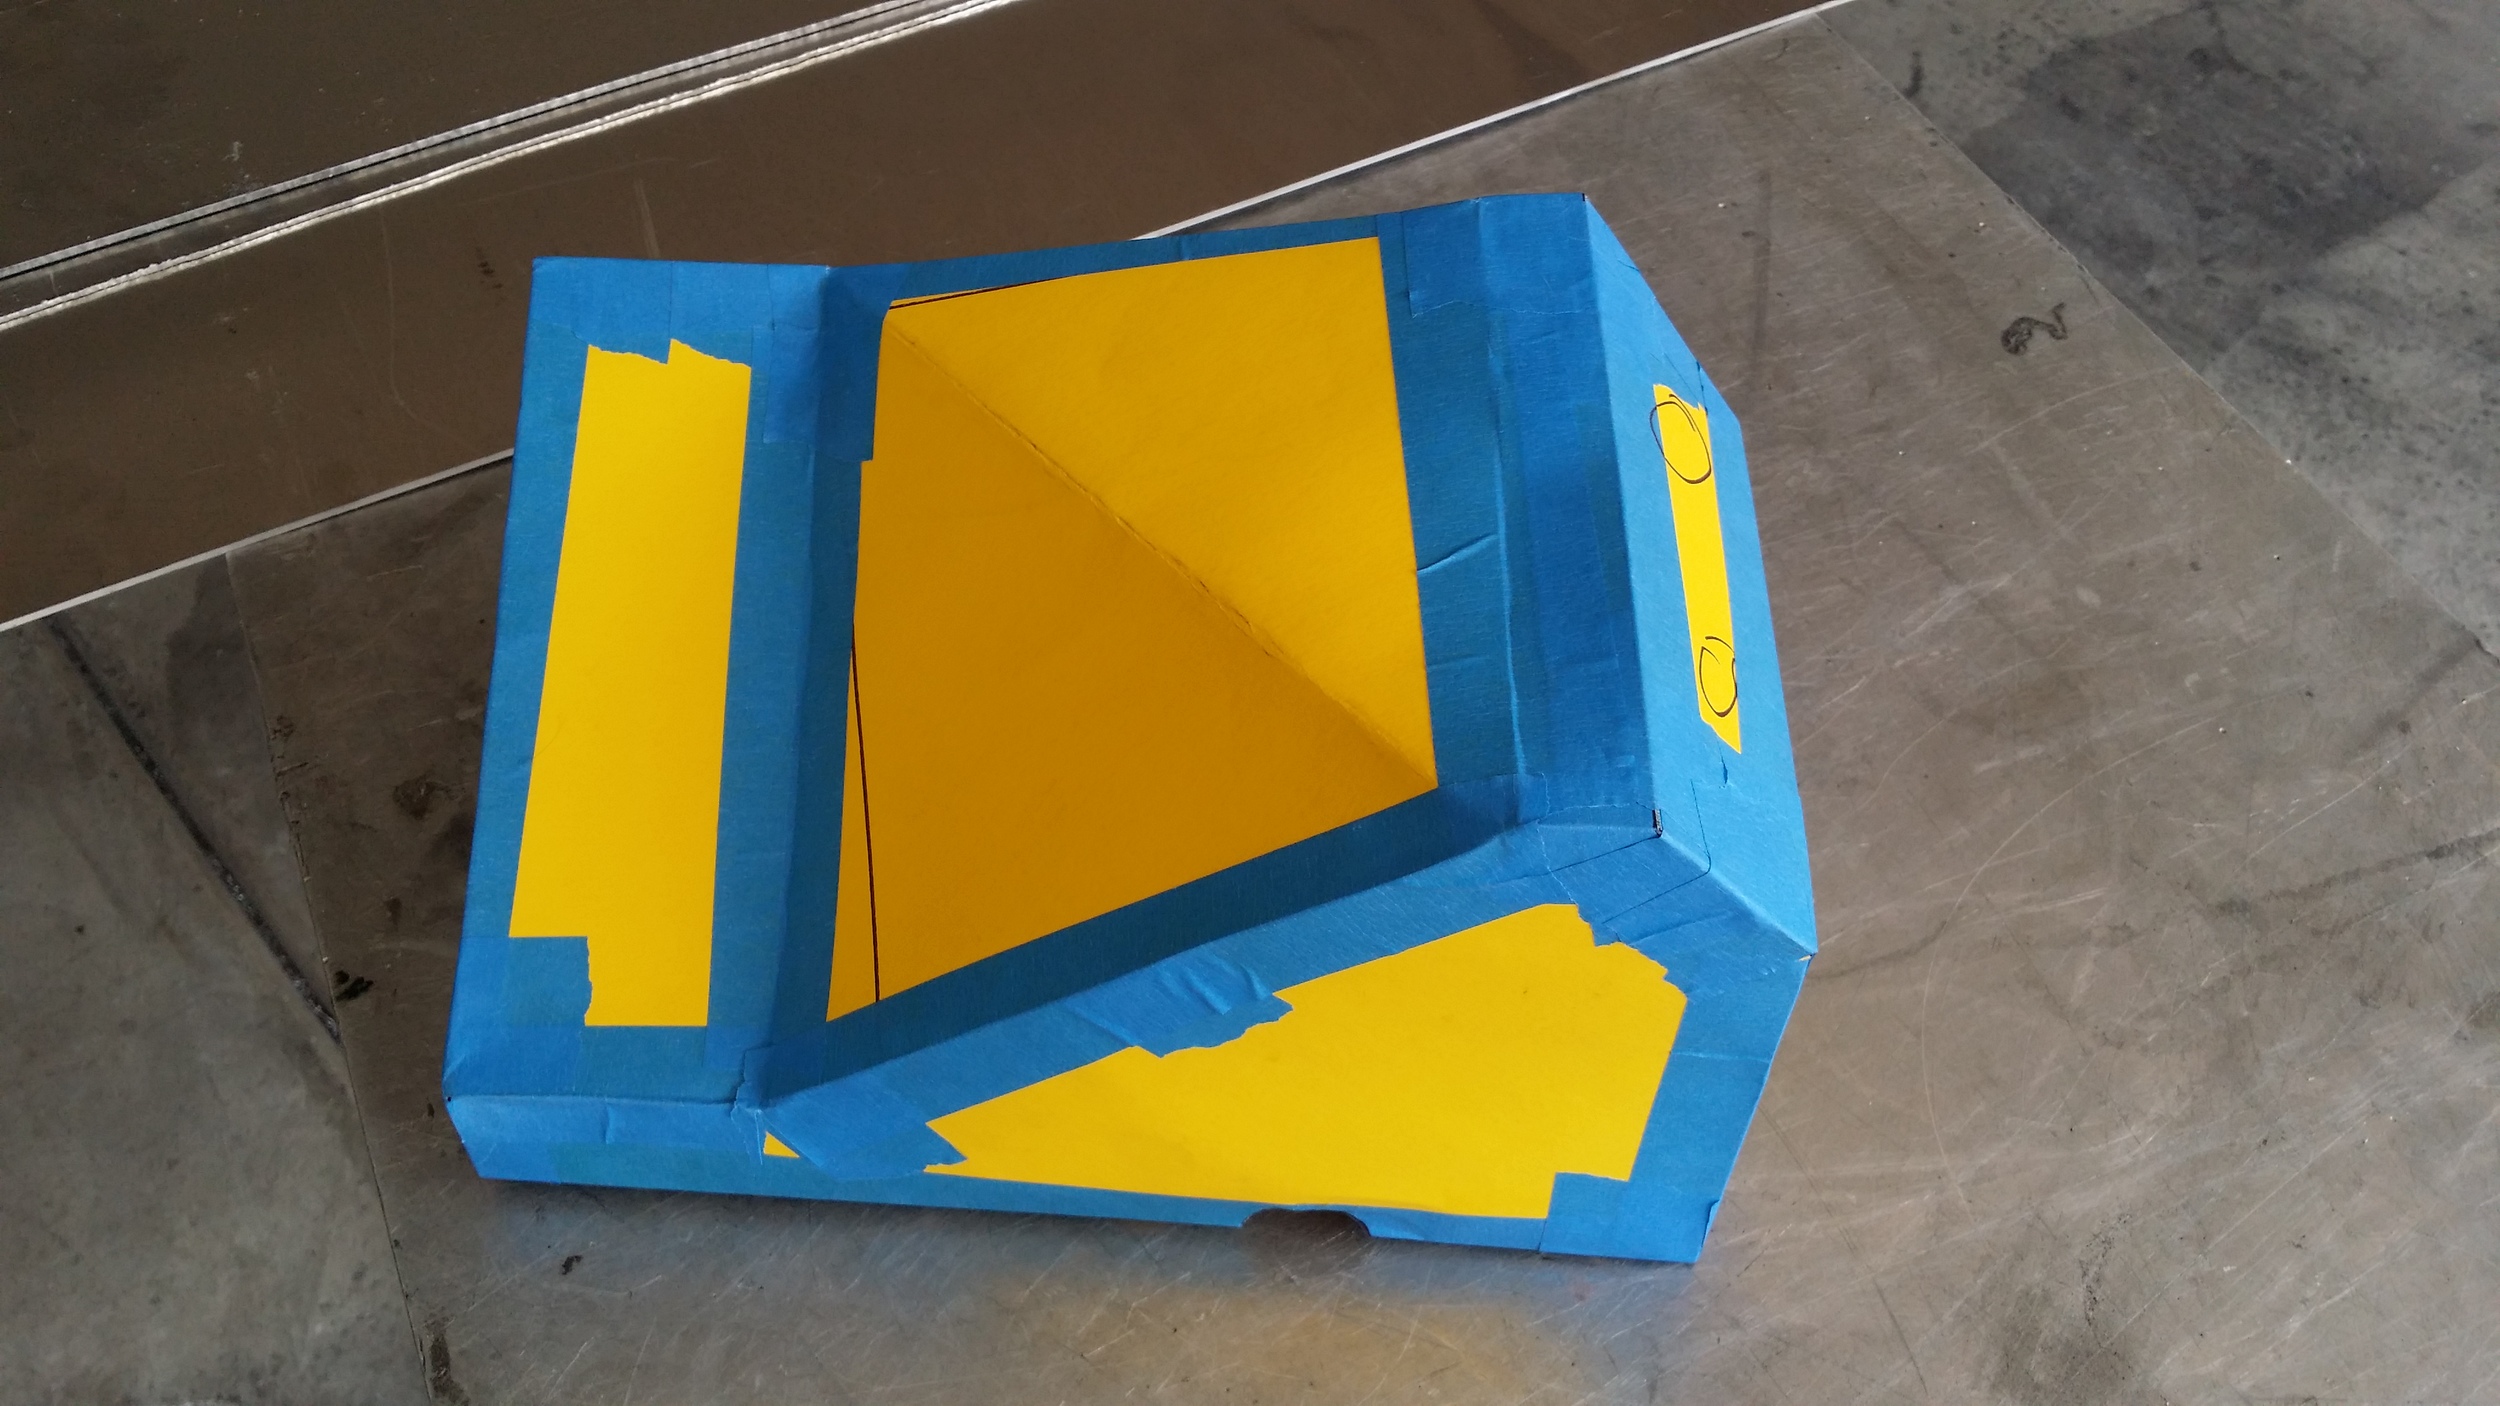
From that point on, it was smooth sailing. After cutting out the corner of sheet metal, I grabbed the poster board and got to work cutting my shapes.
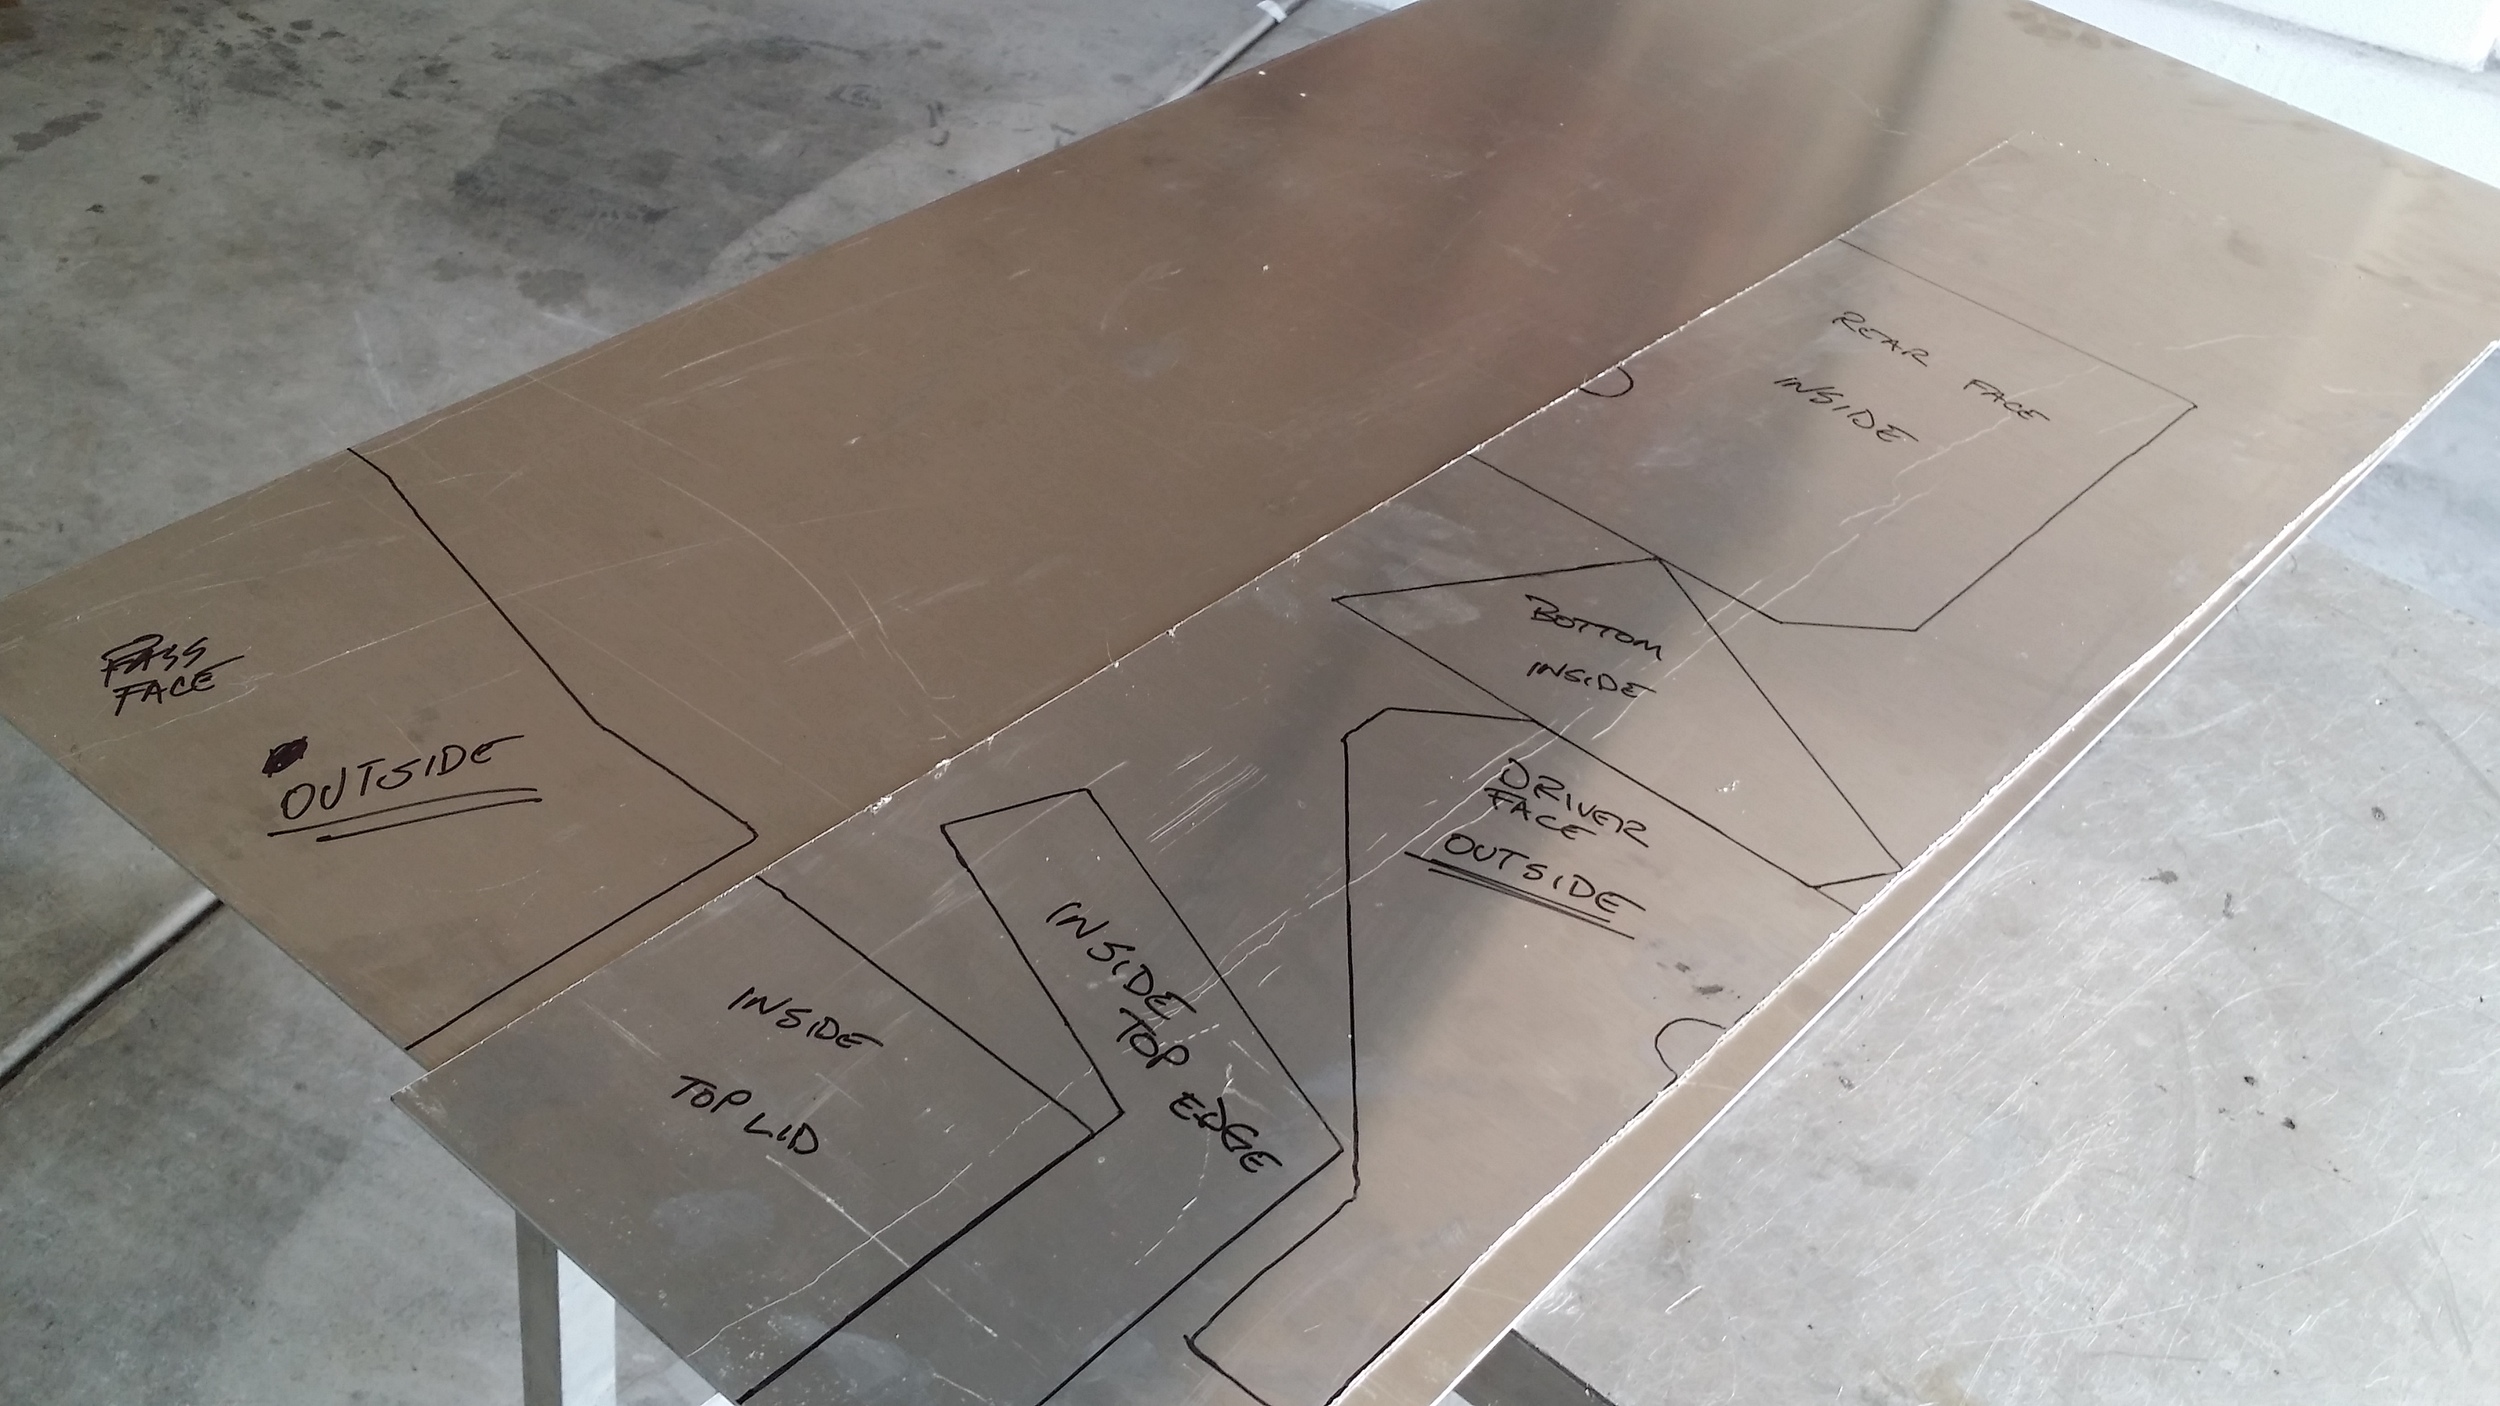
Next it was time to translate the shapes onto some 6061 aluminum sheet metal. I'll let the pics do the talking on this one.


All that's left now is to stick it all together with some guts in between.
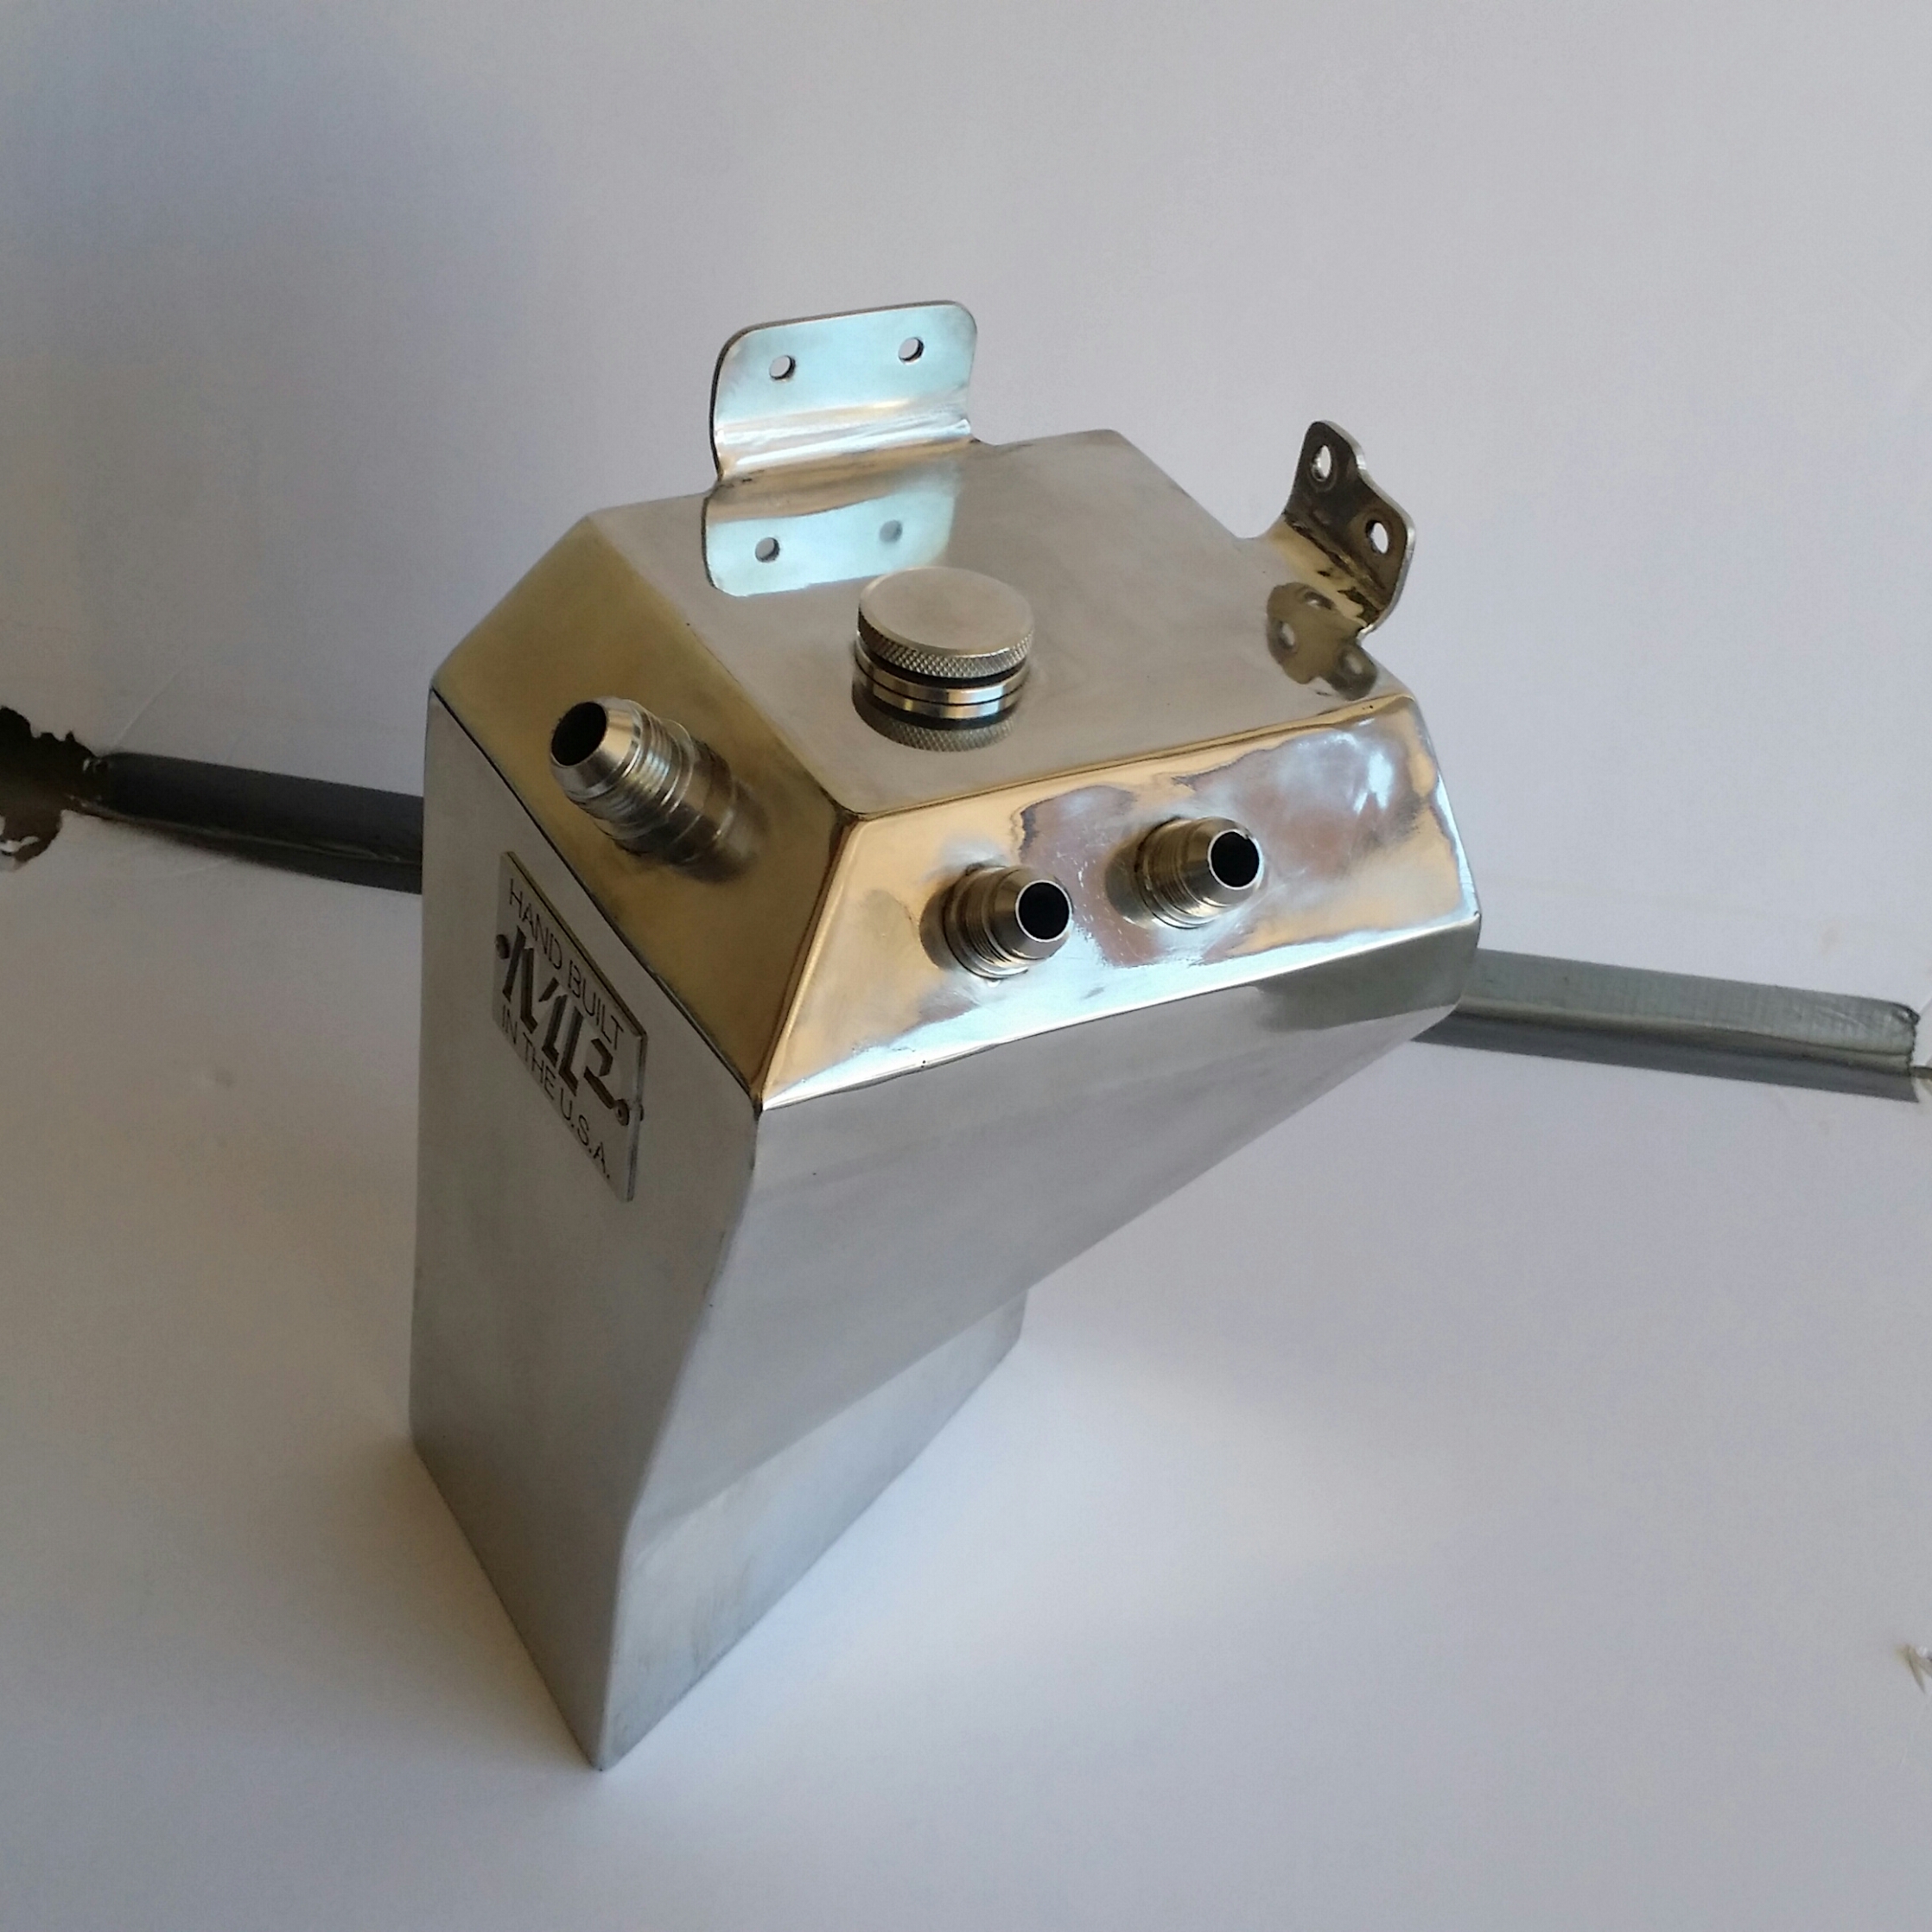
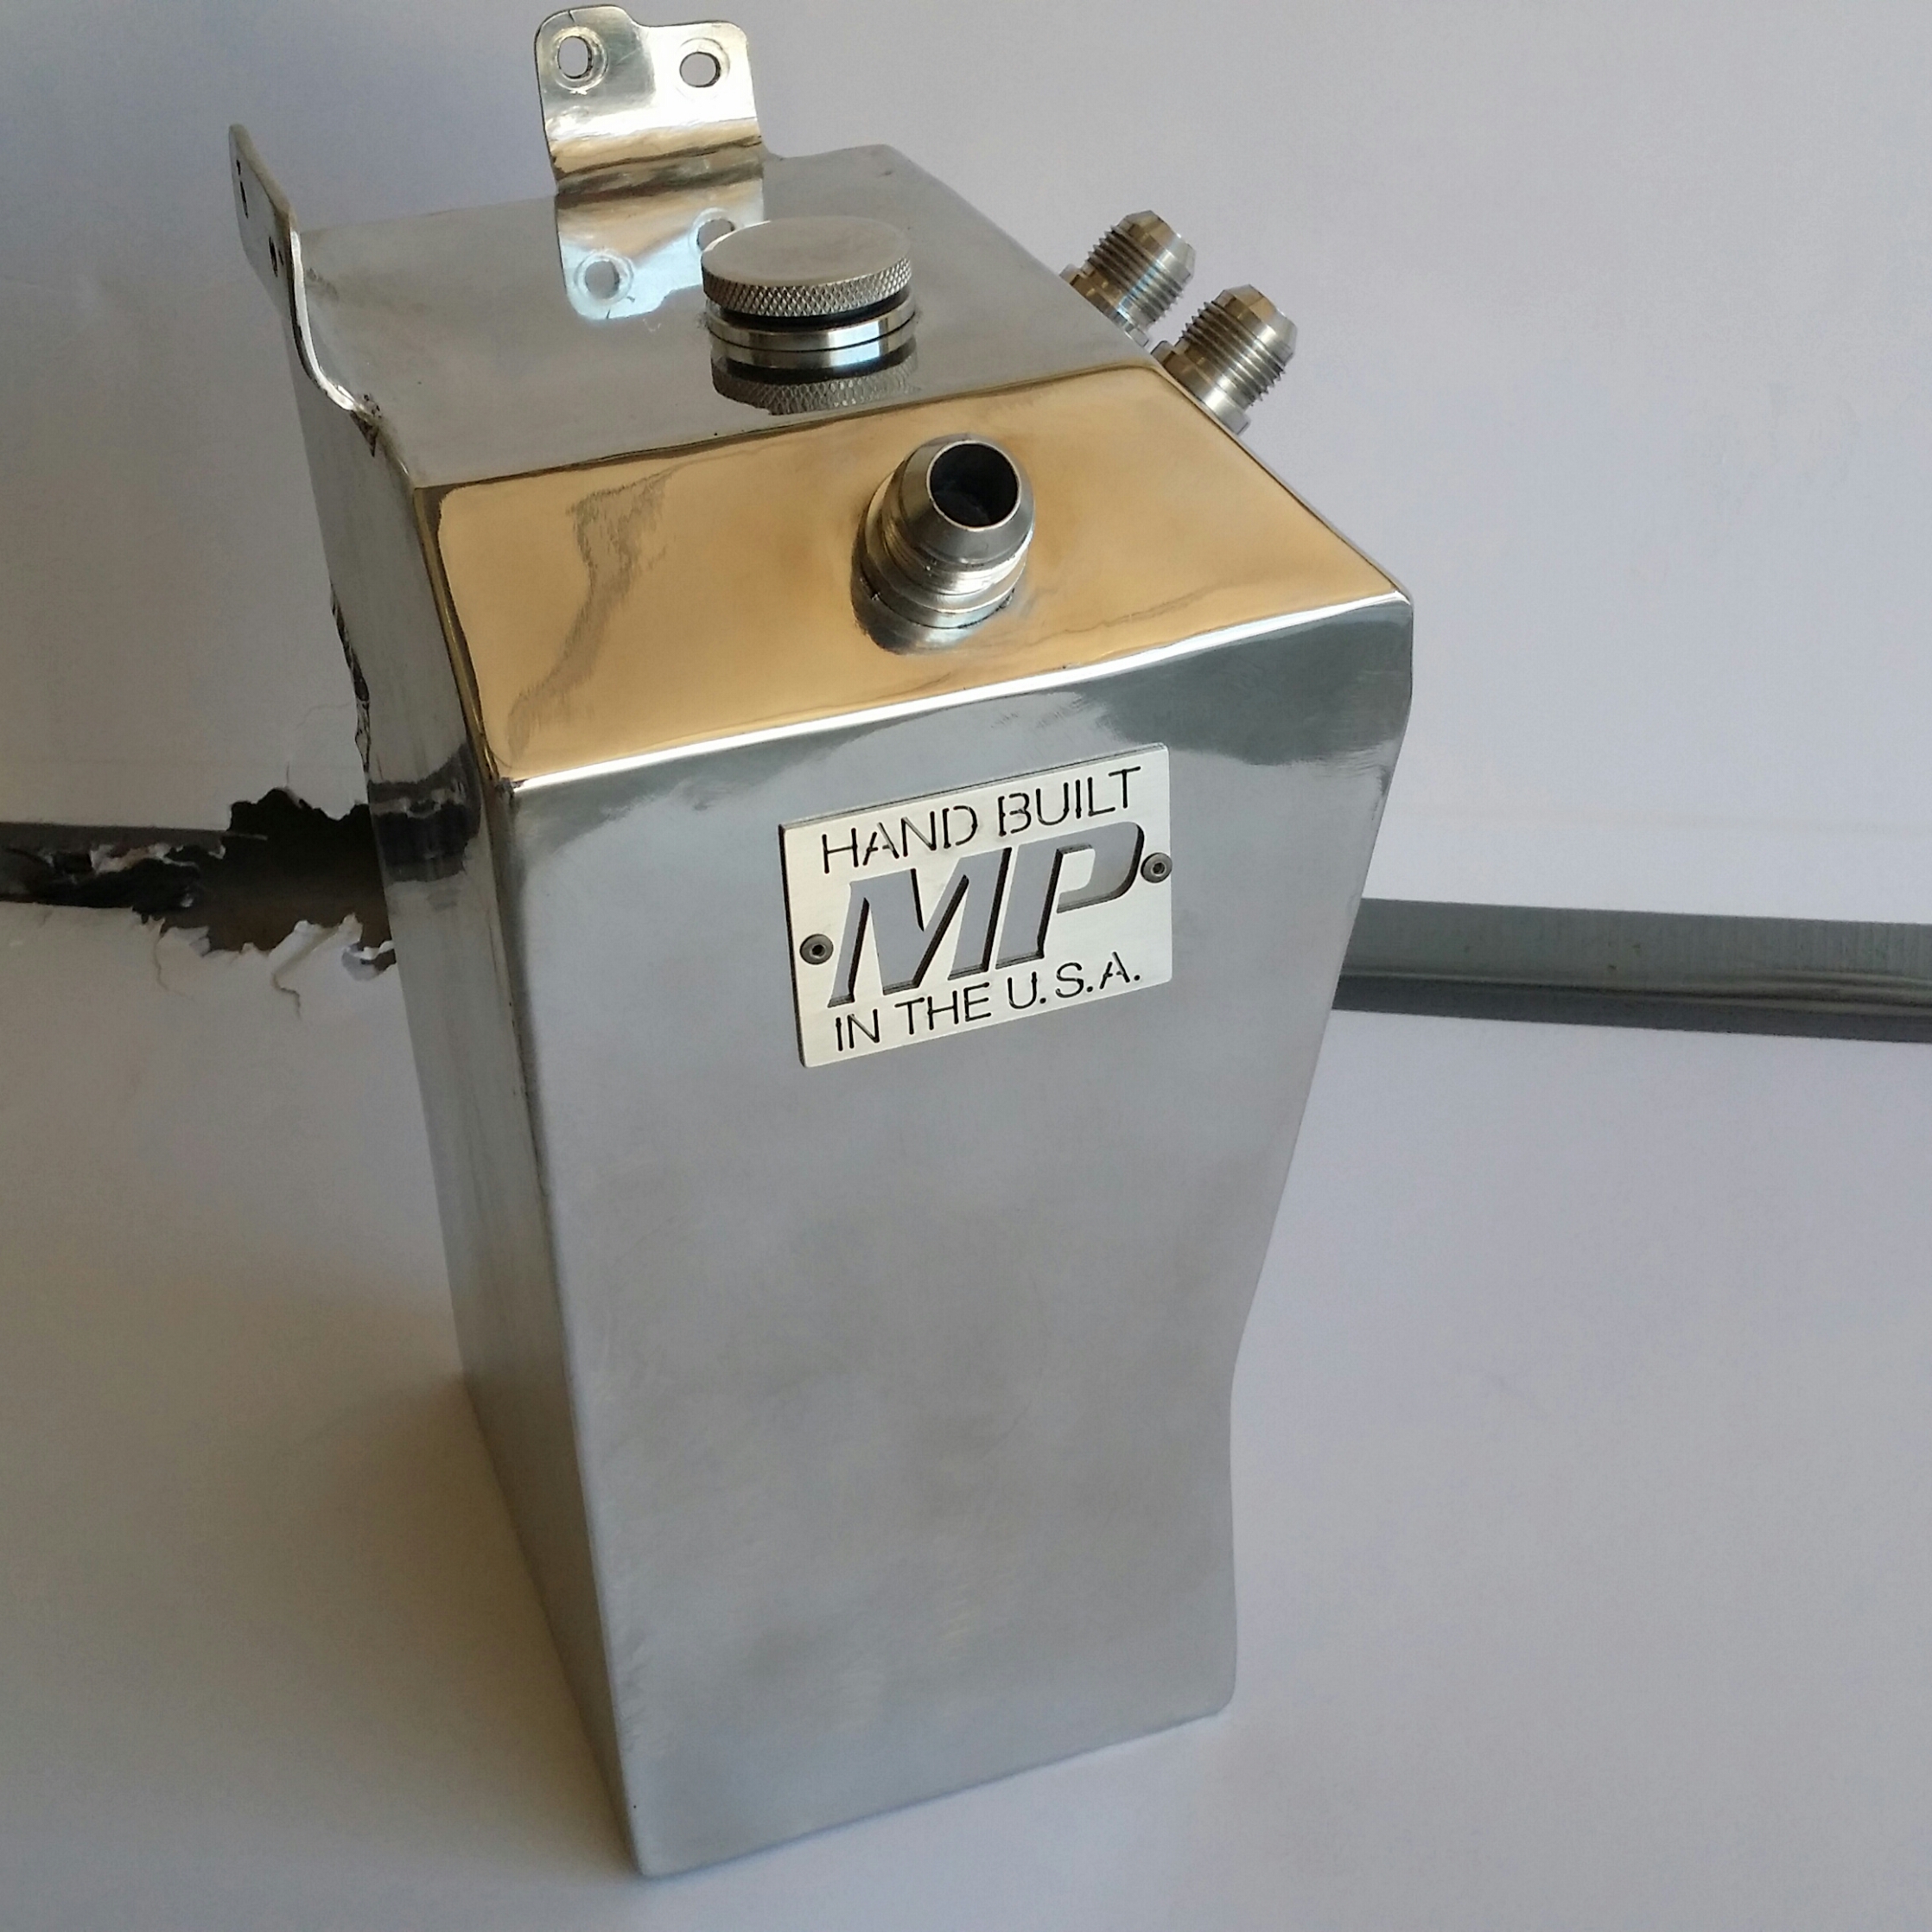
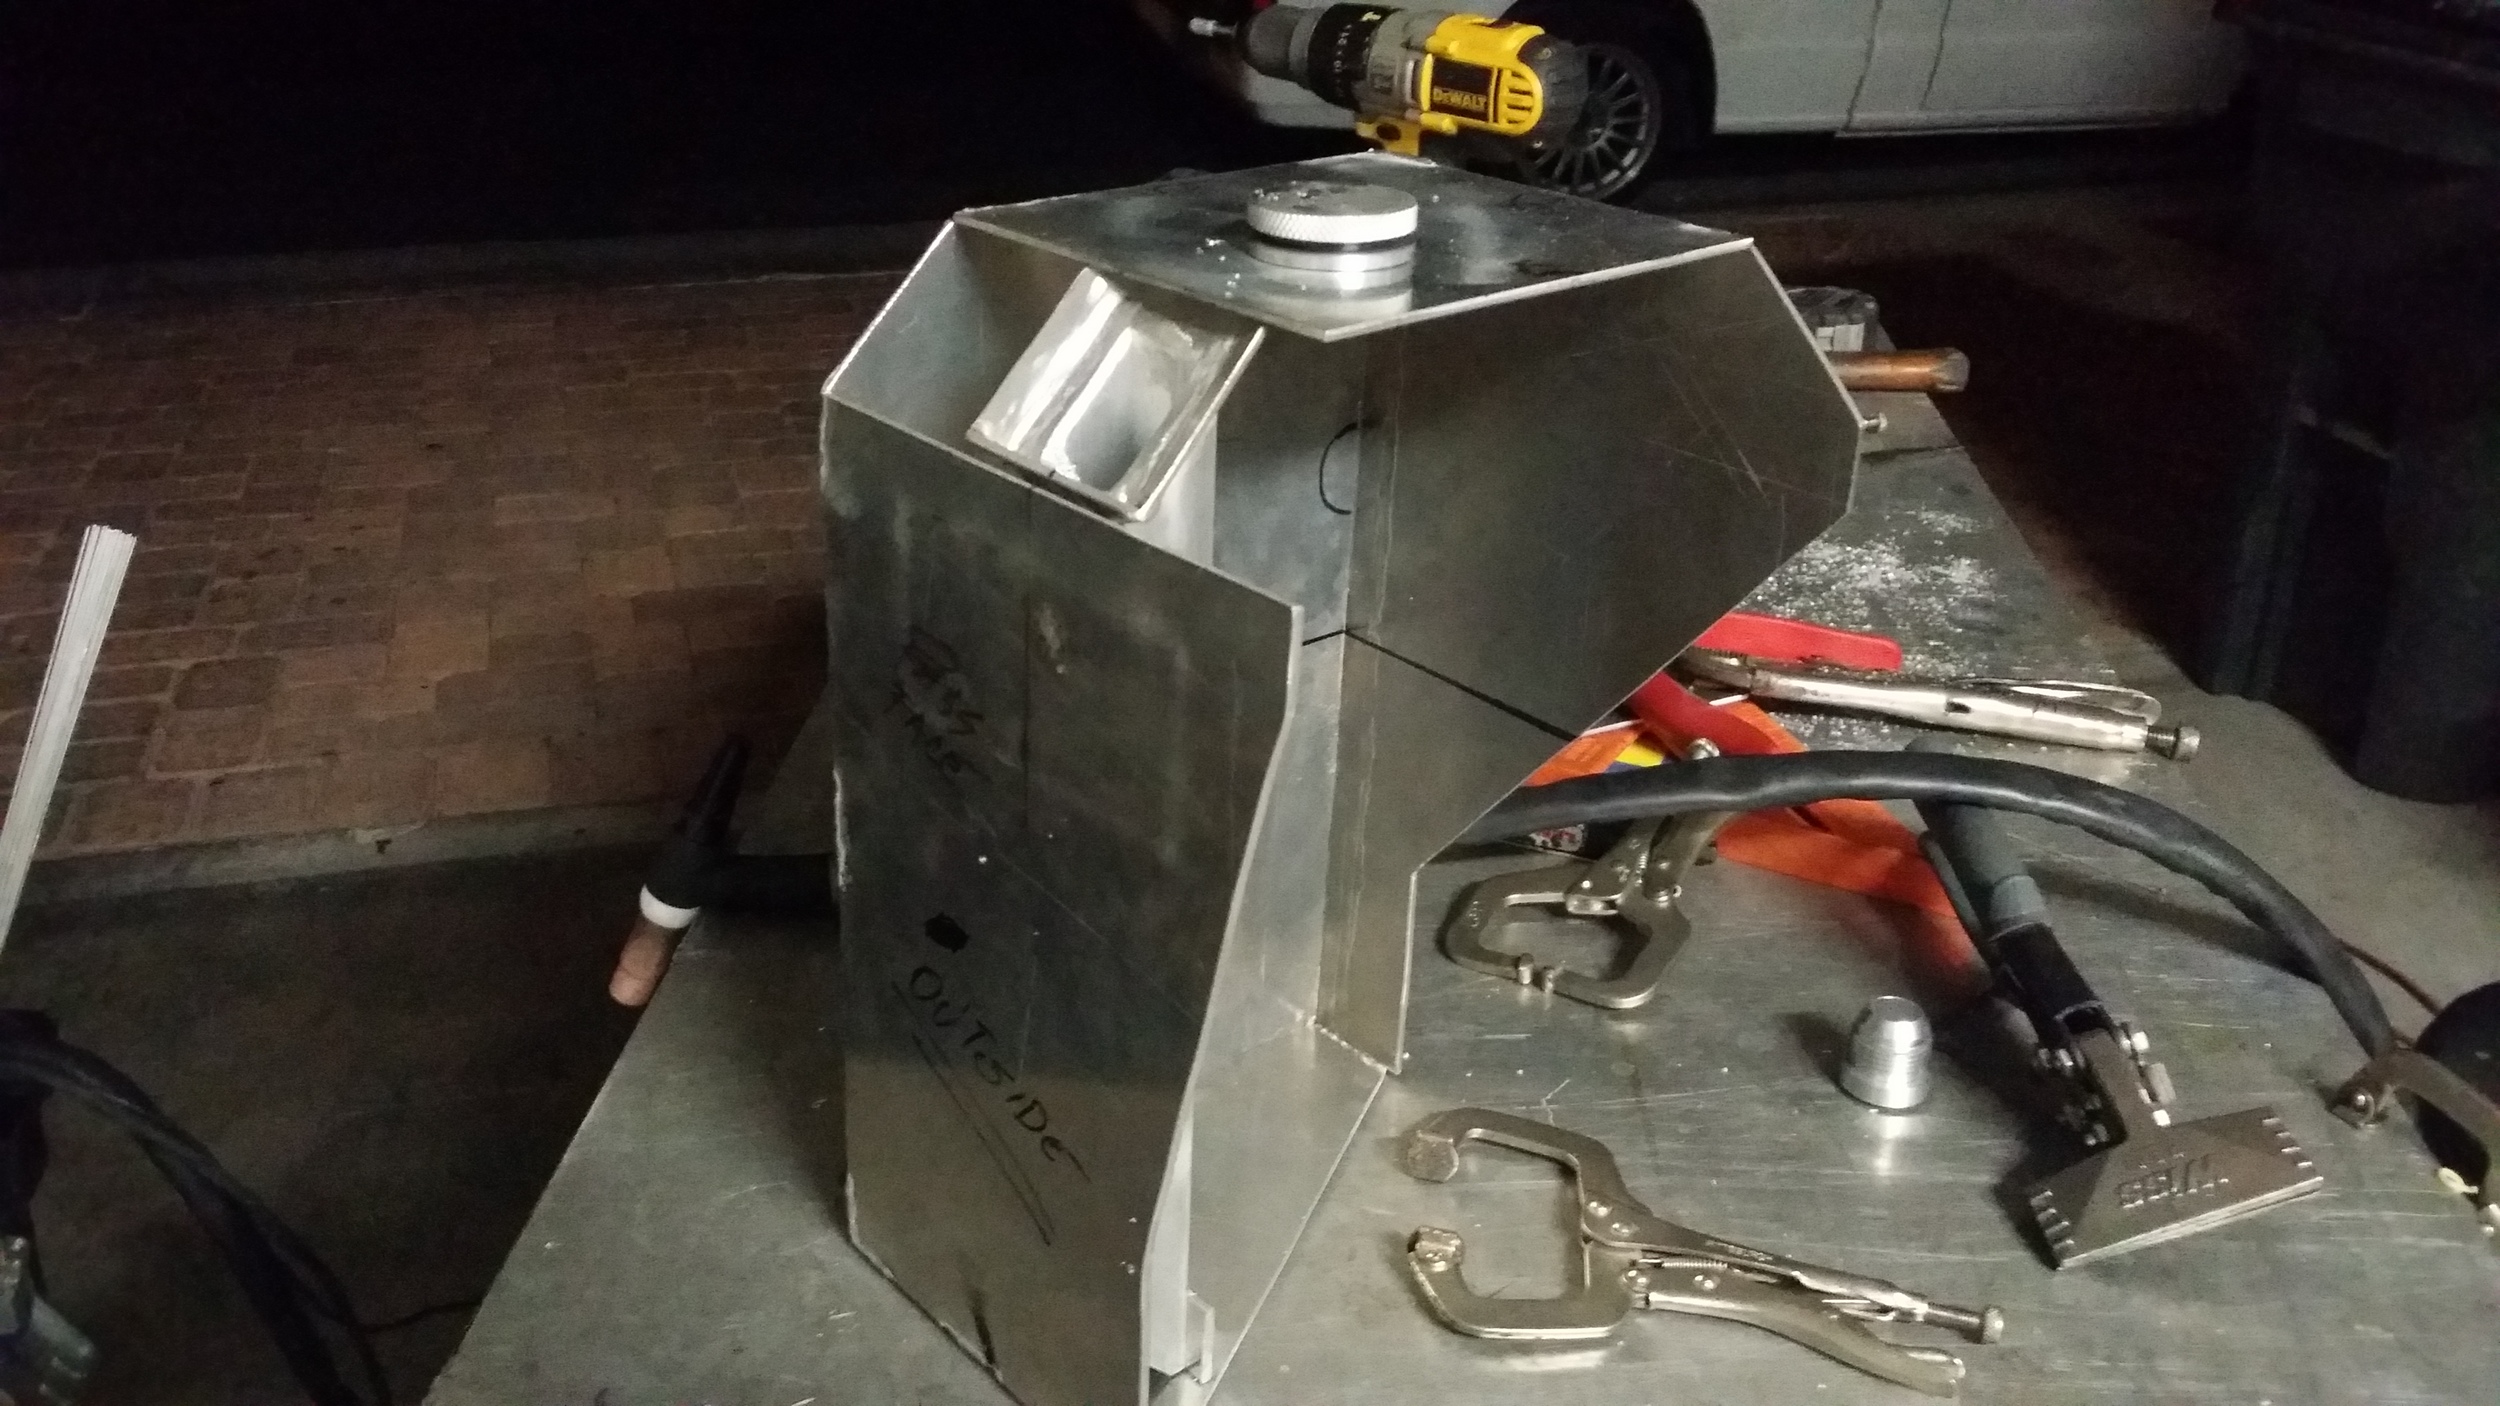
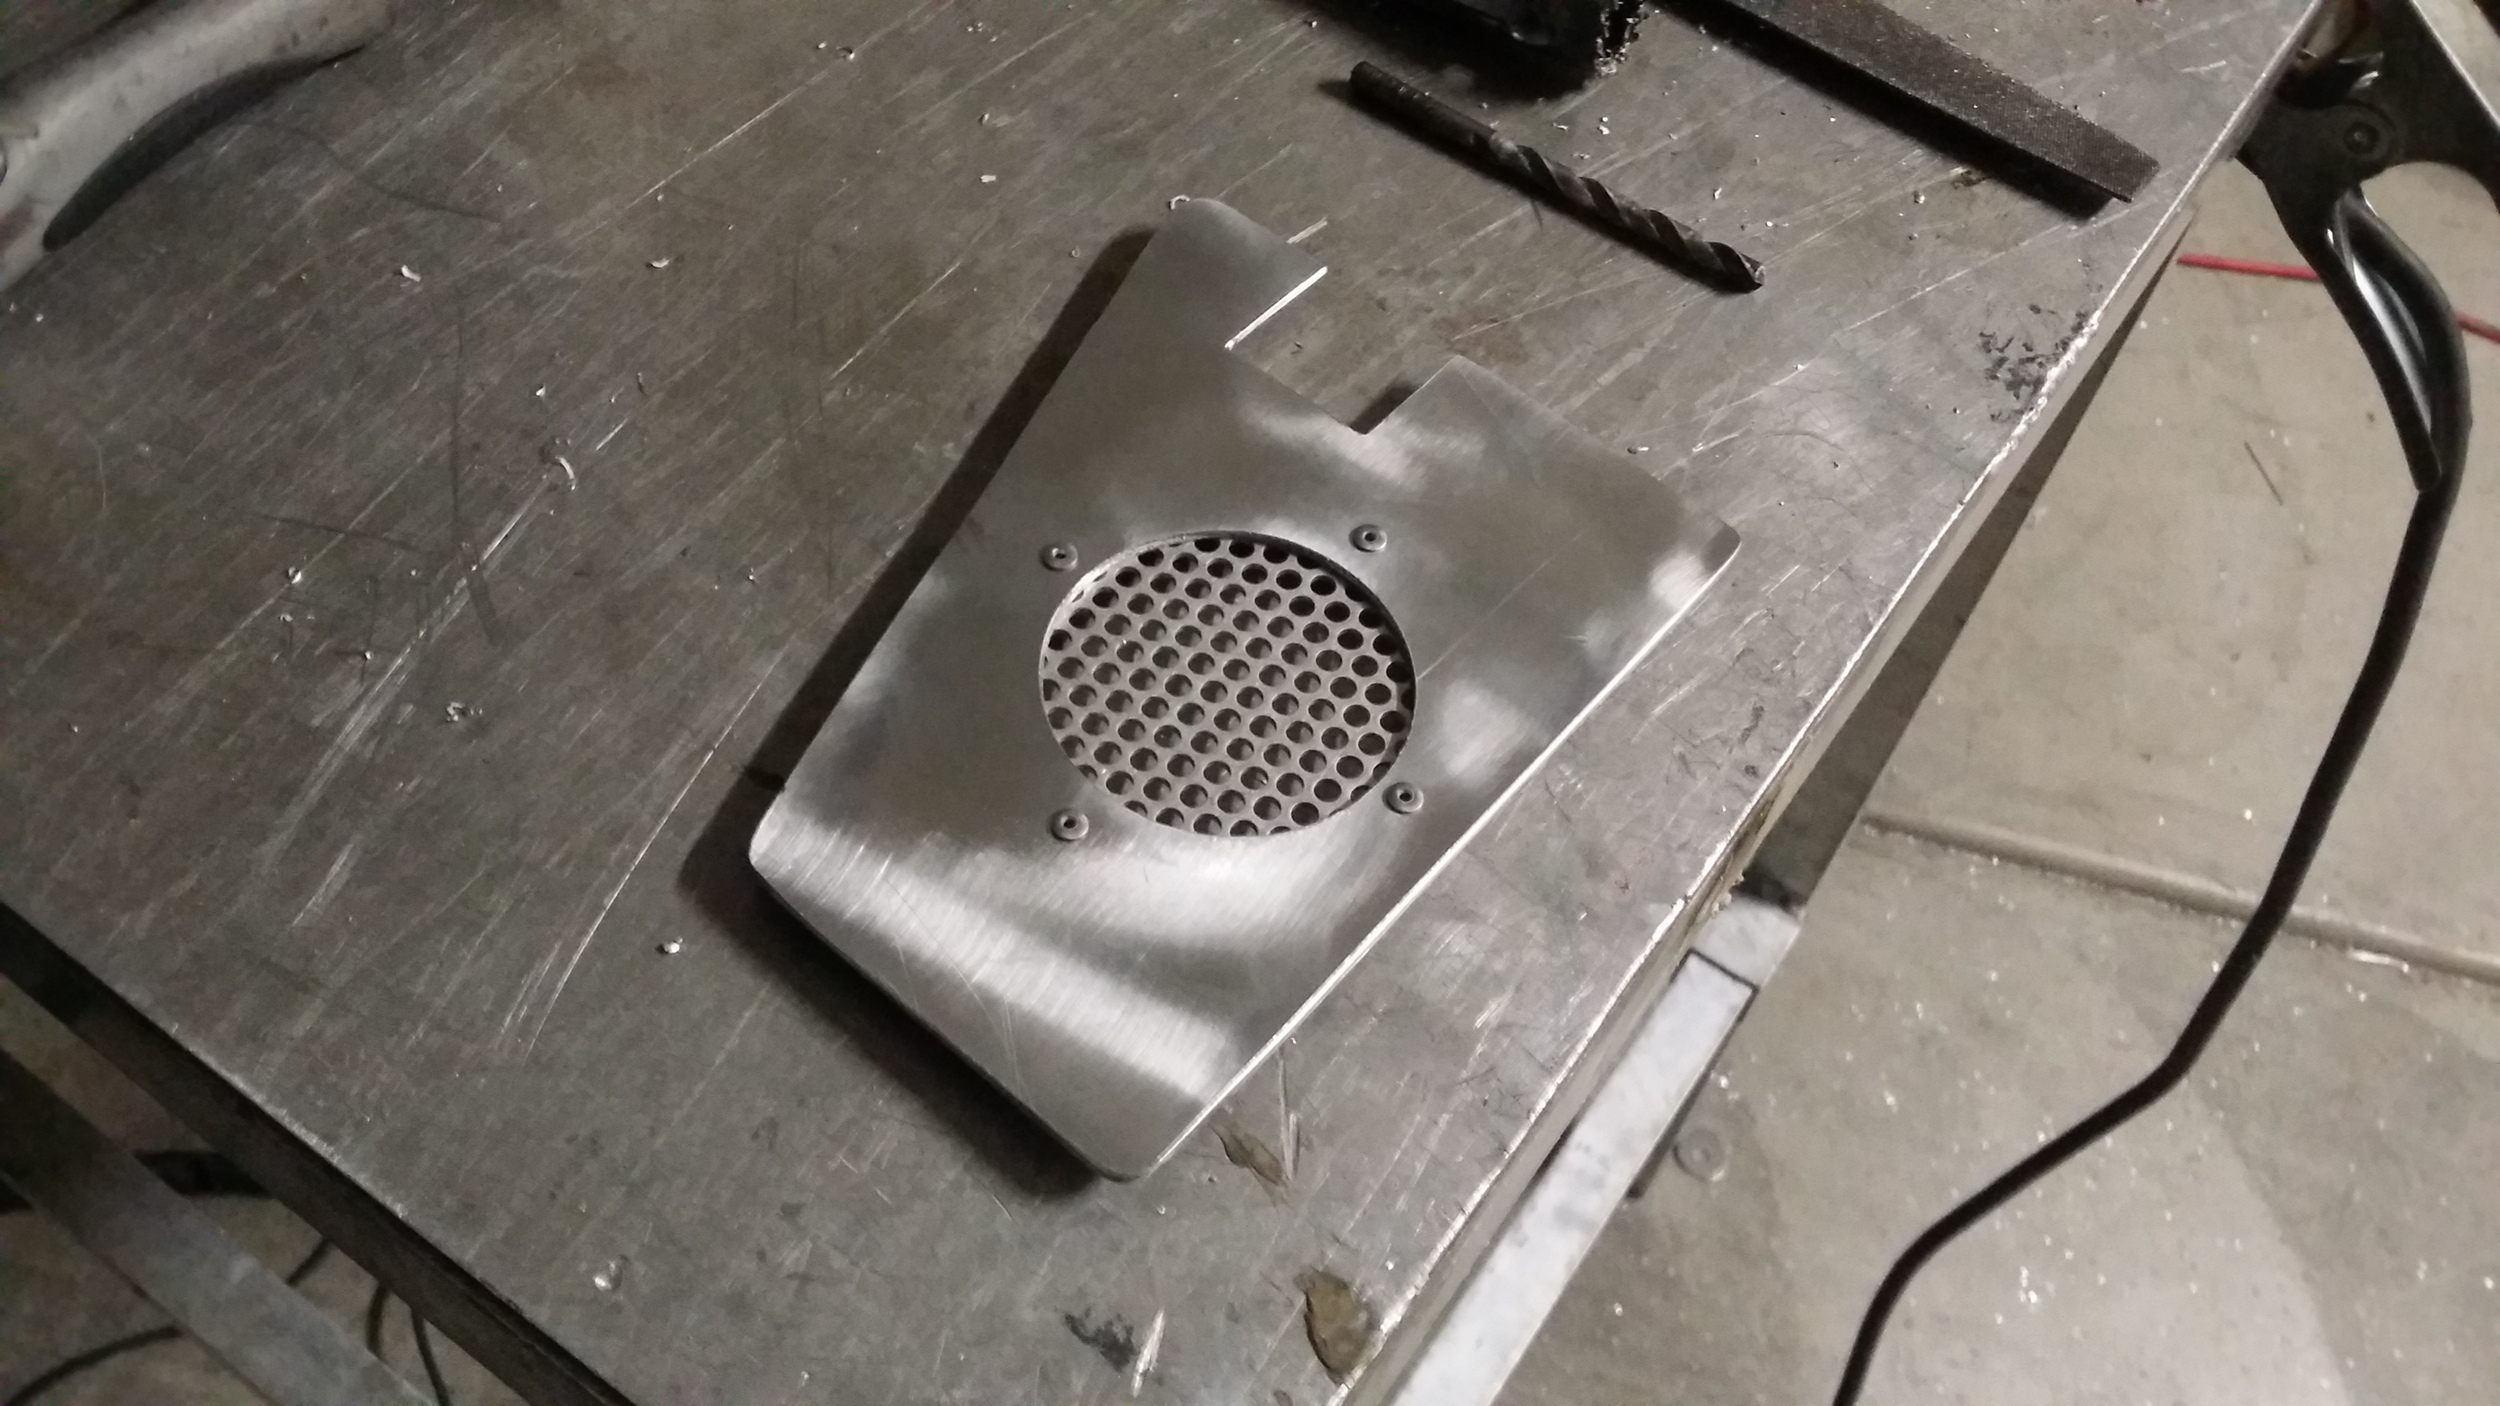
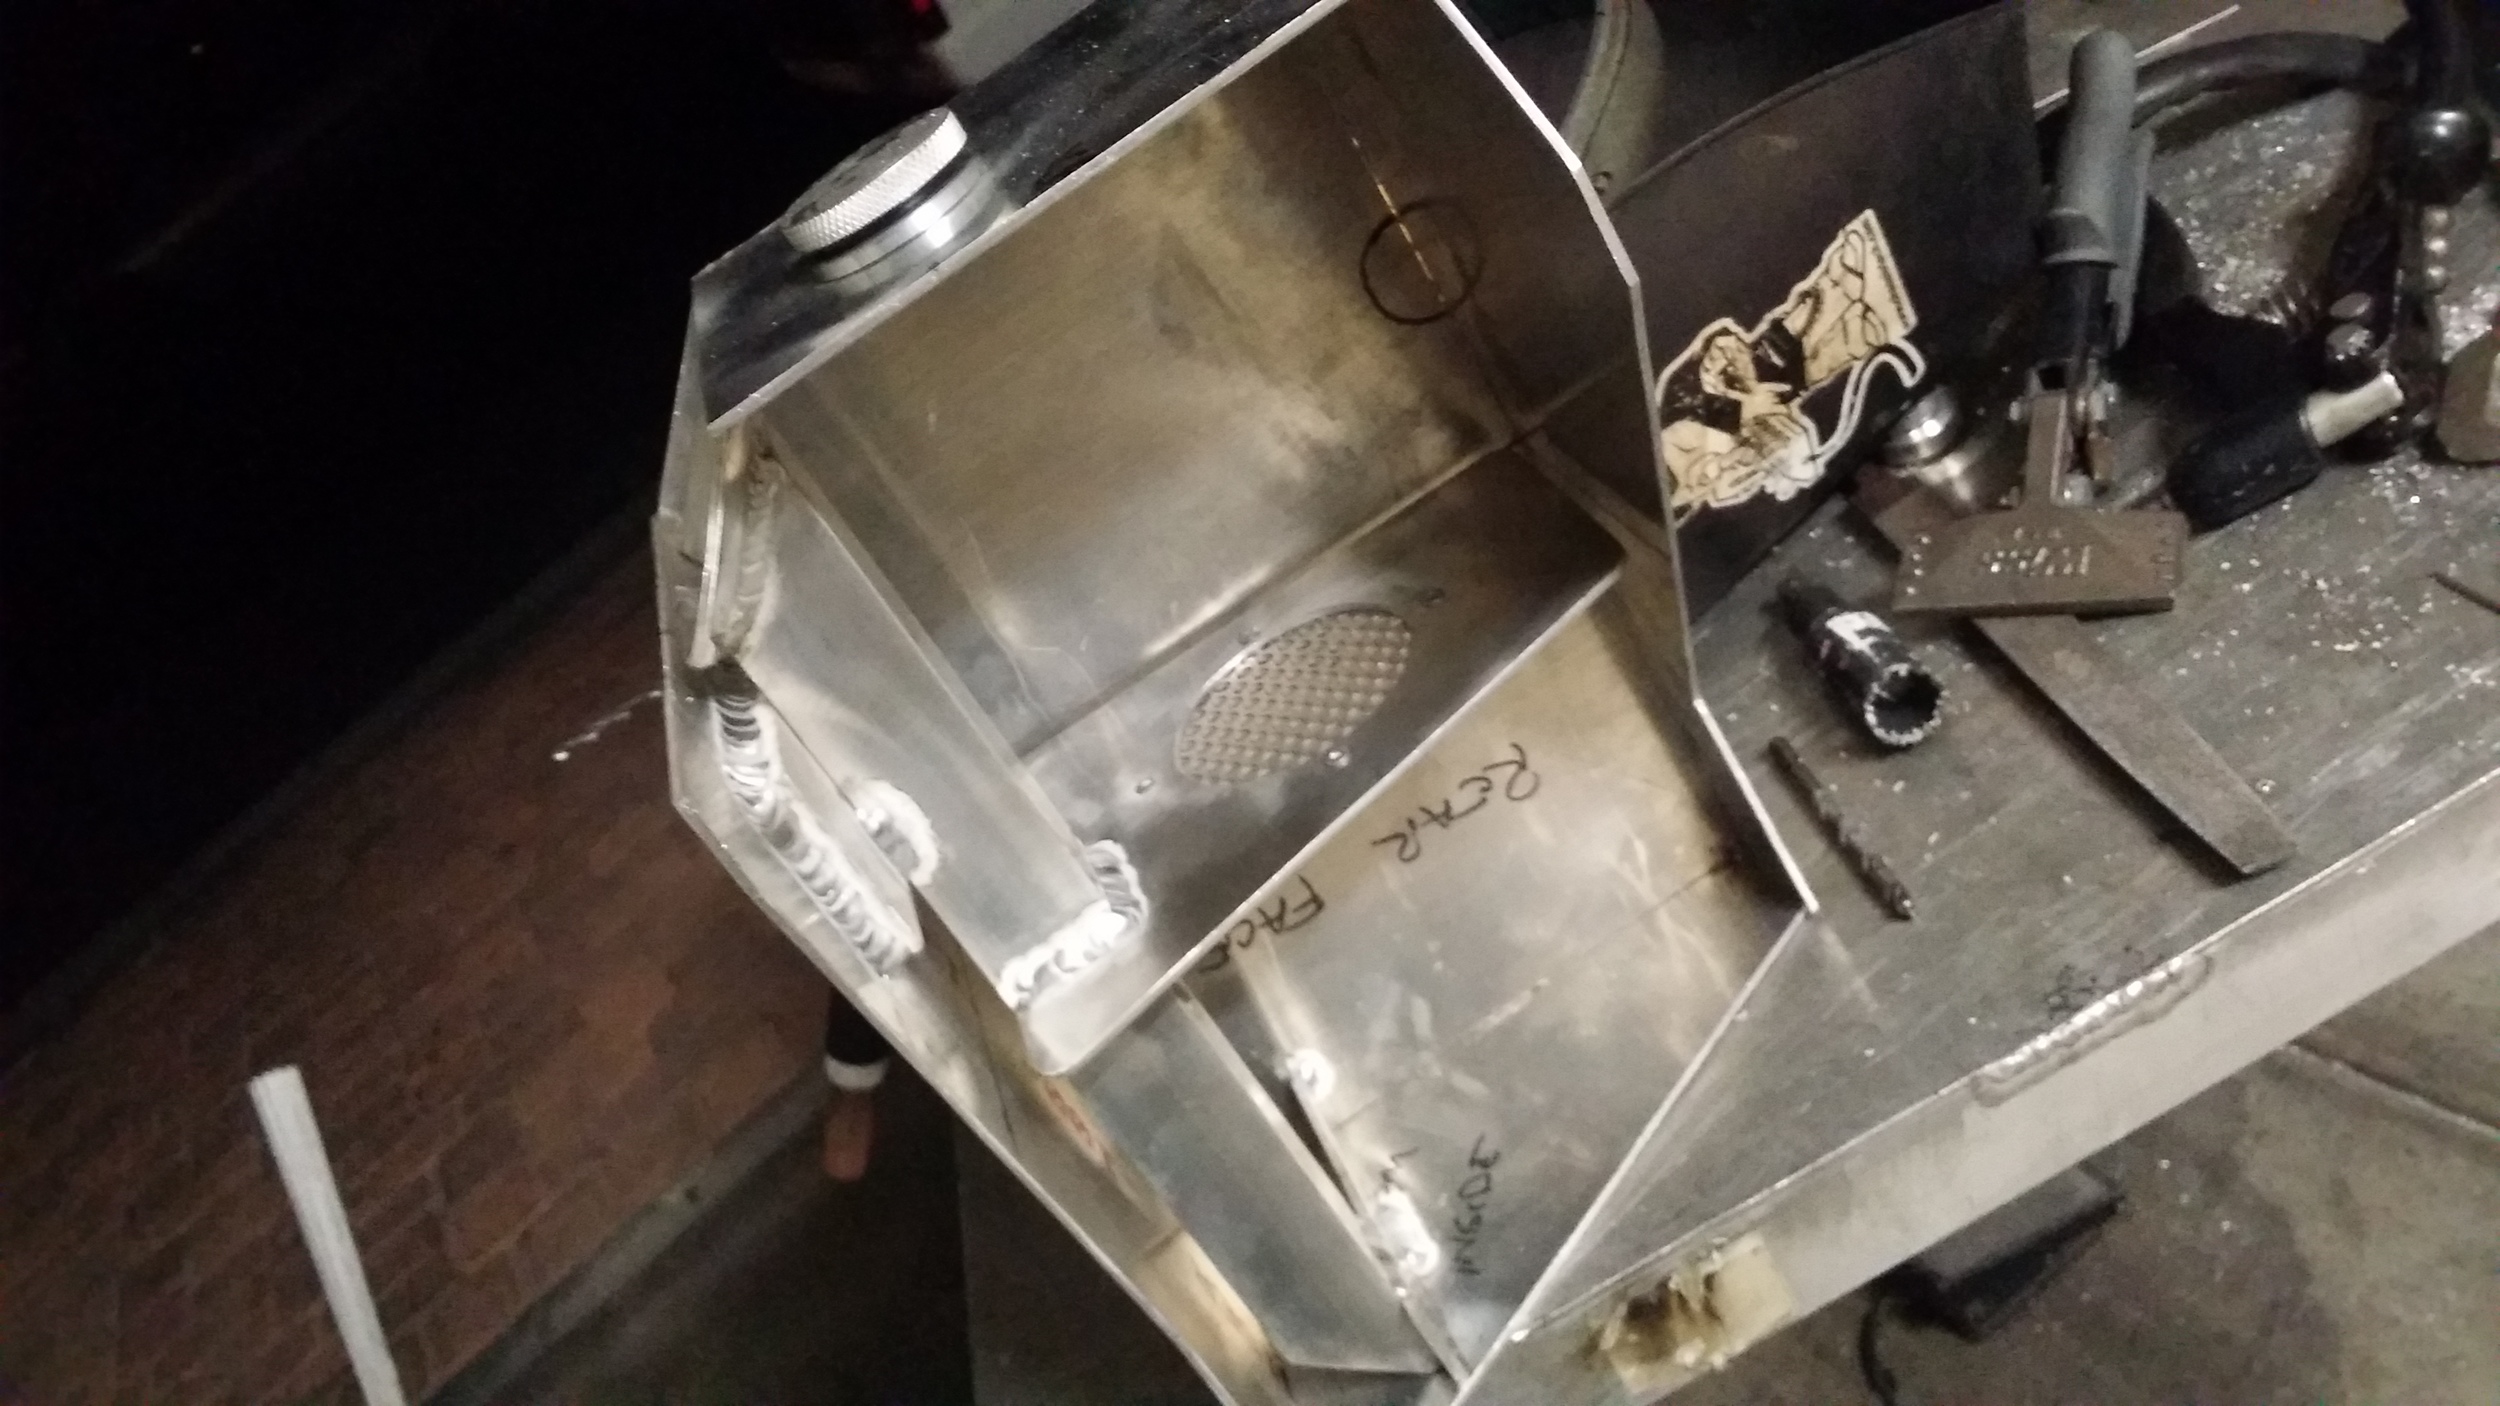
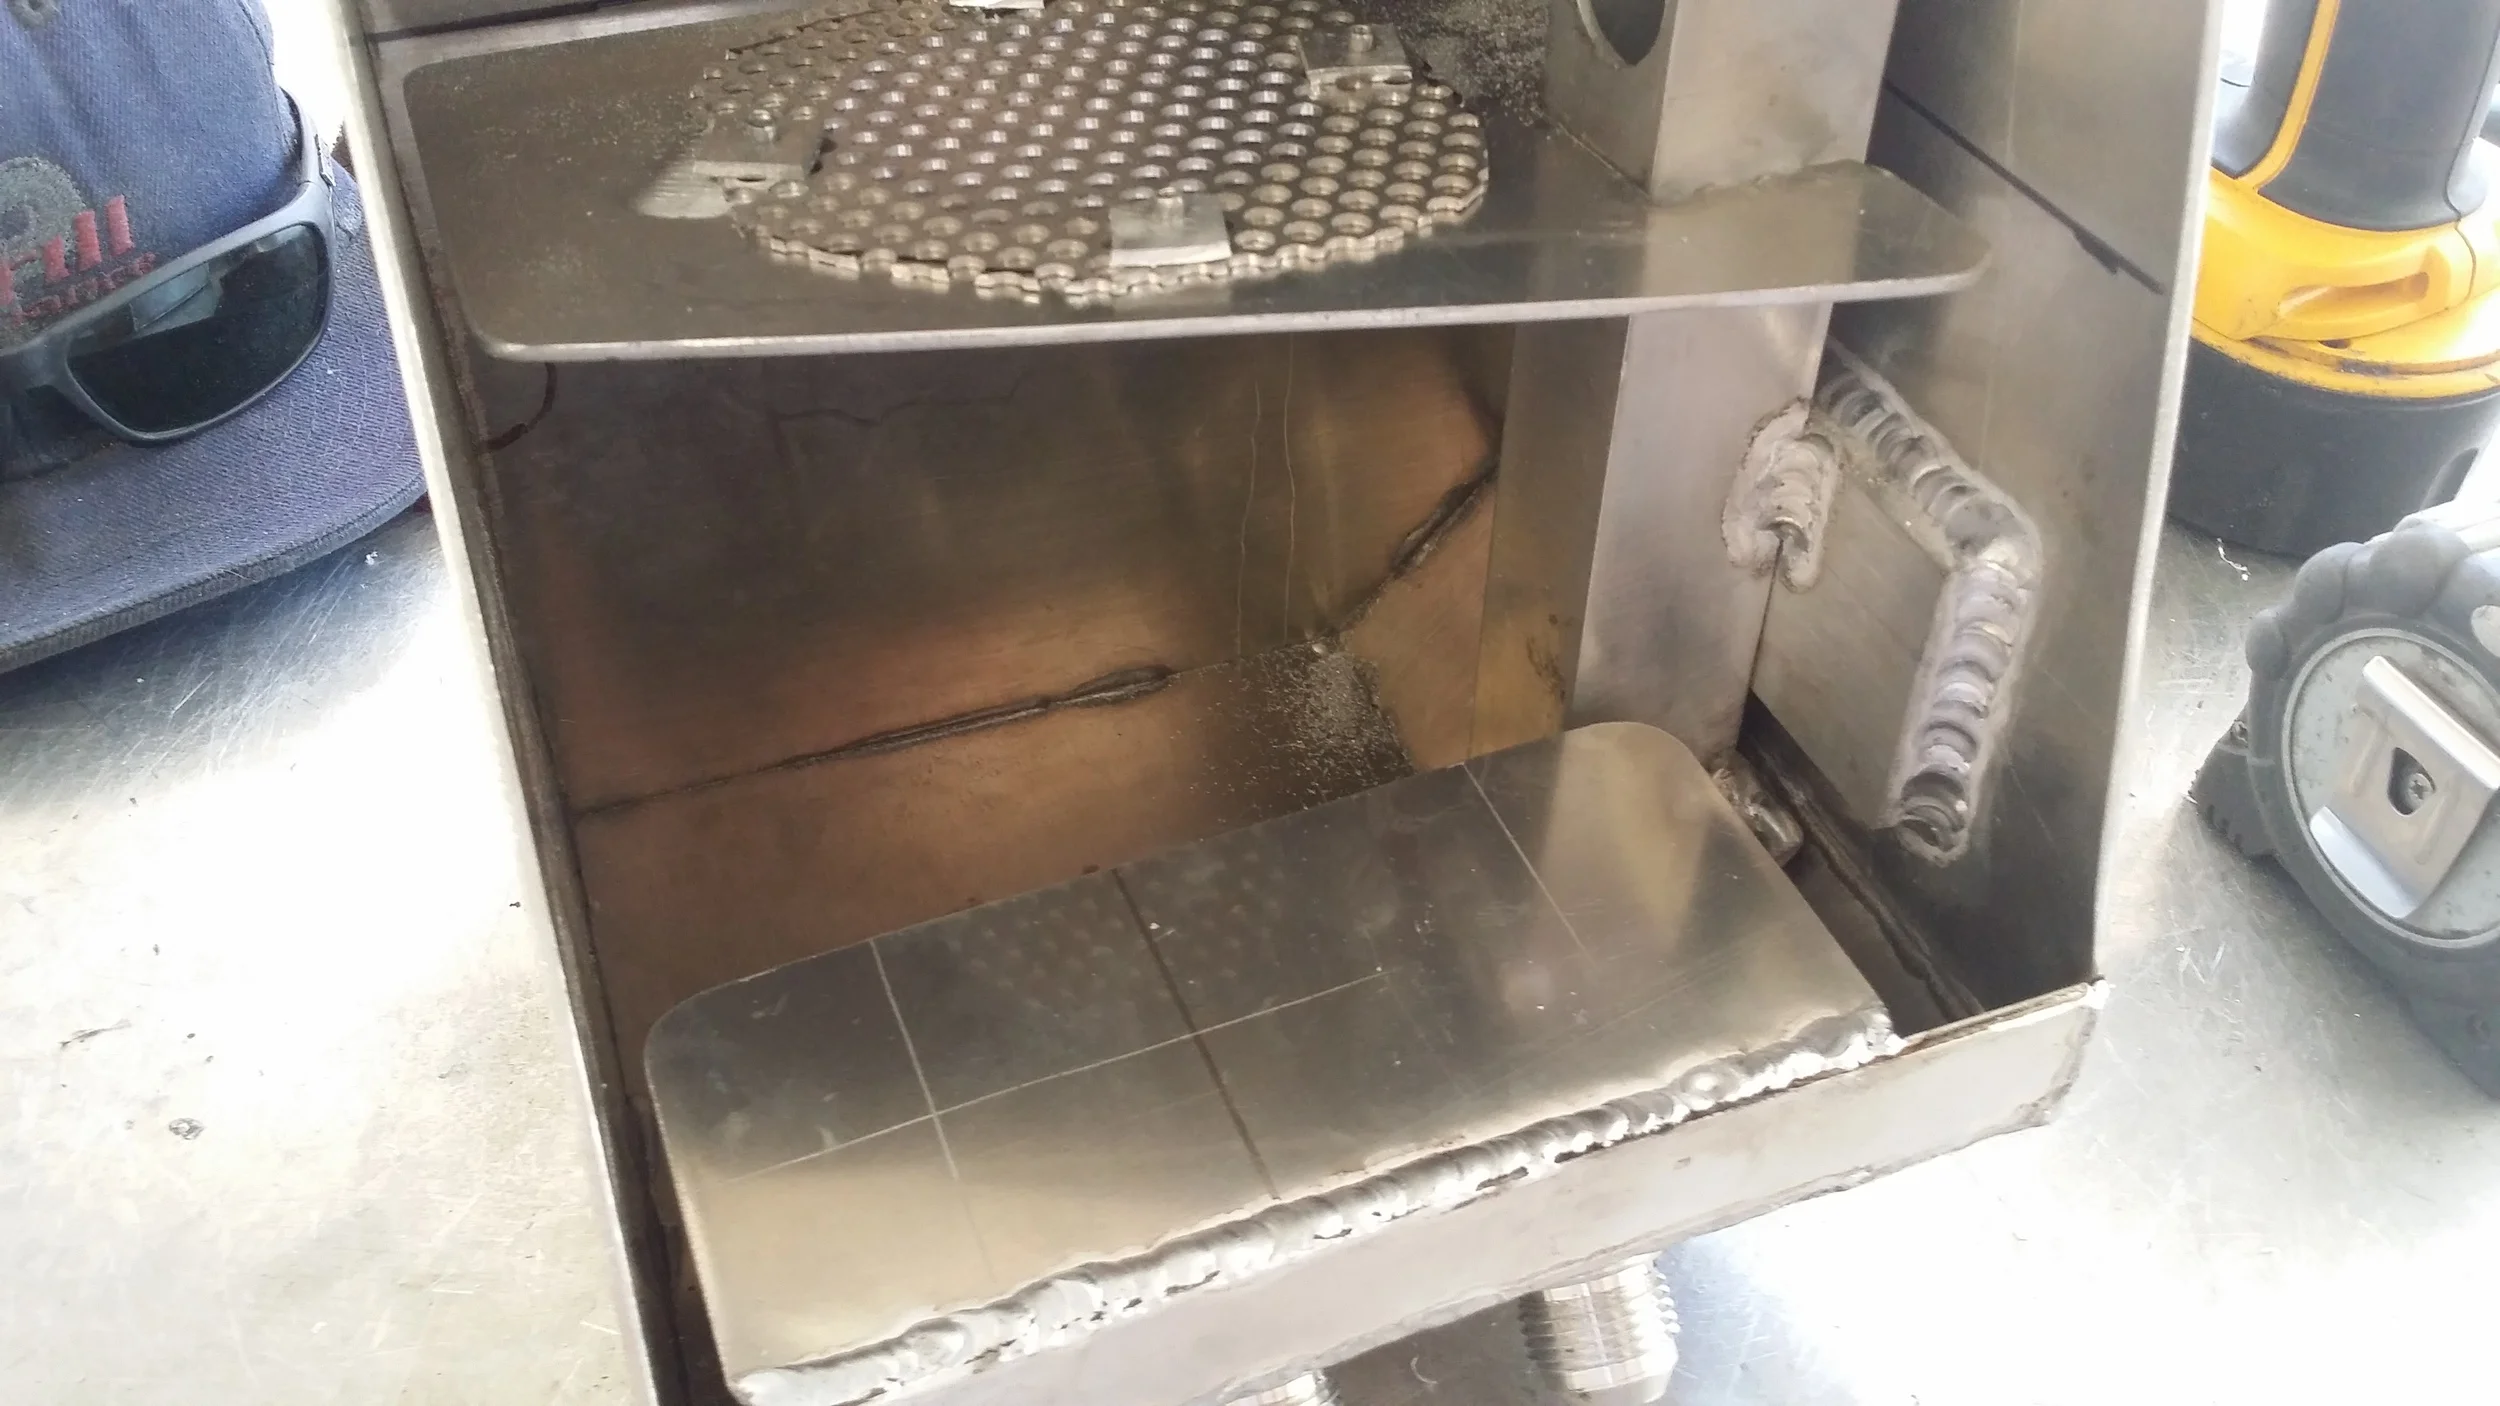
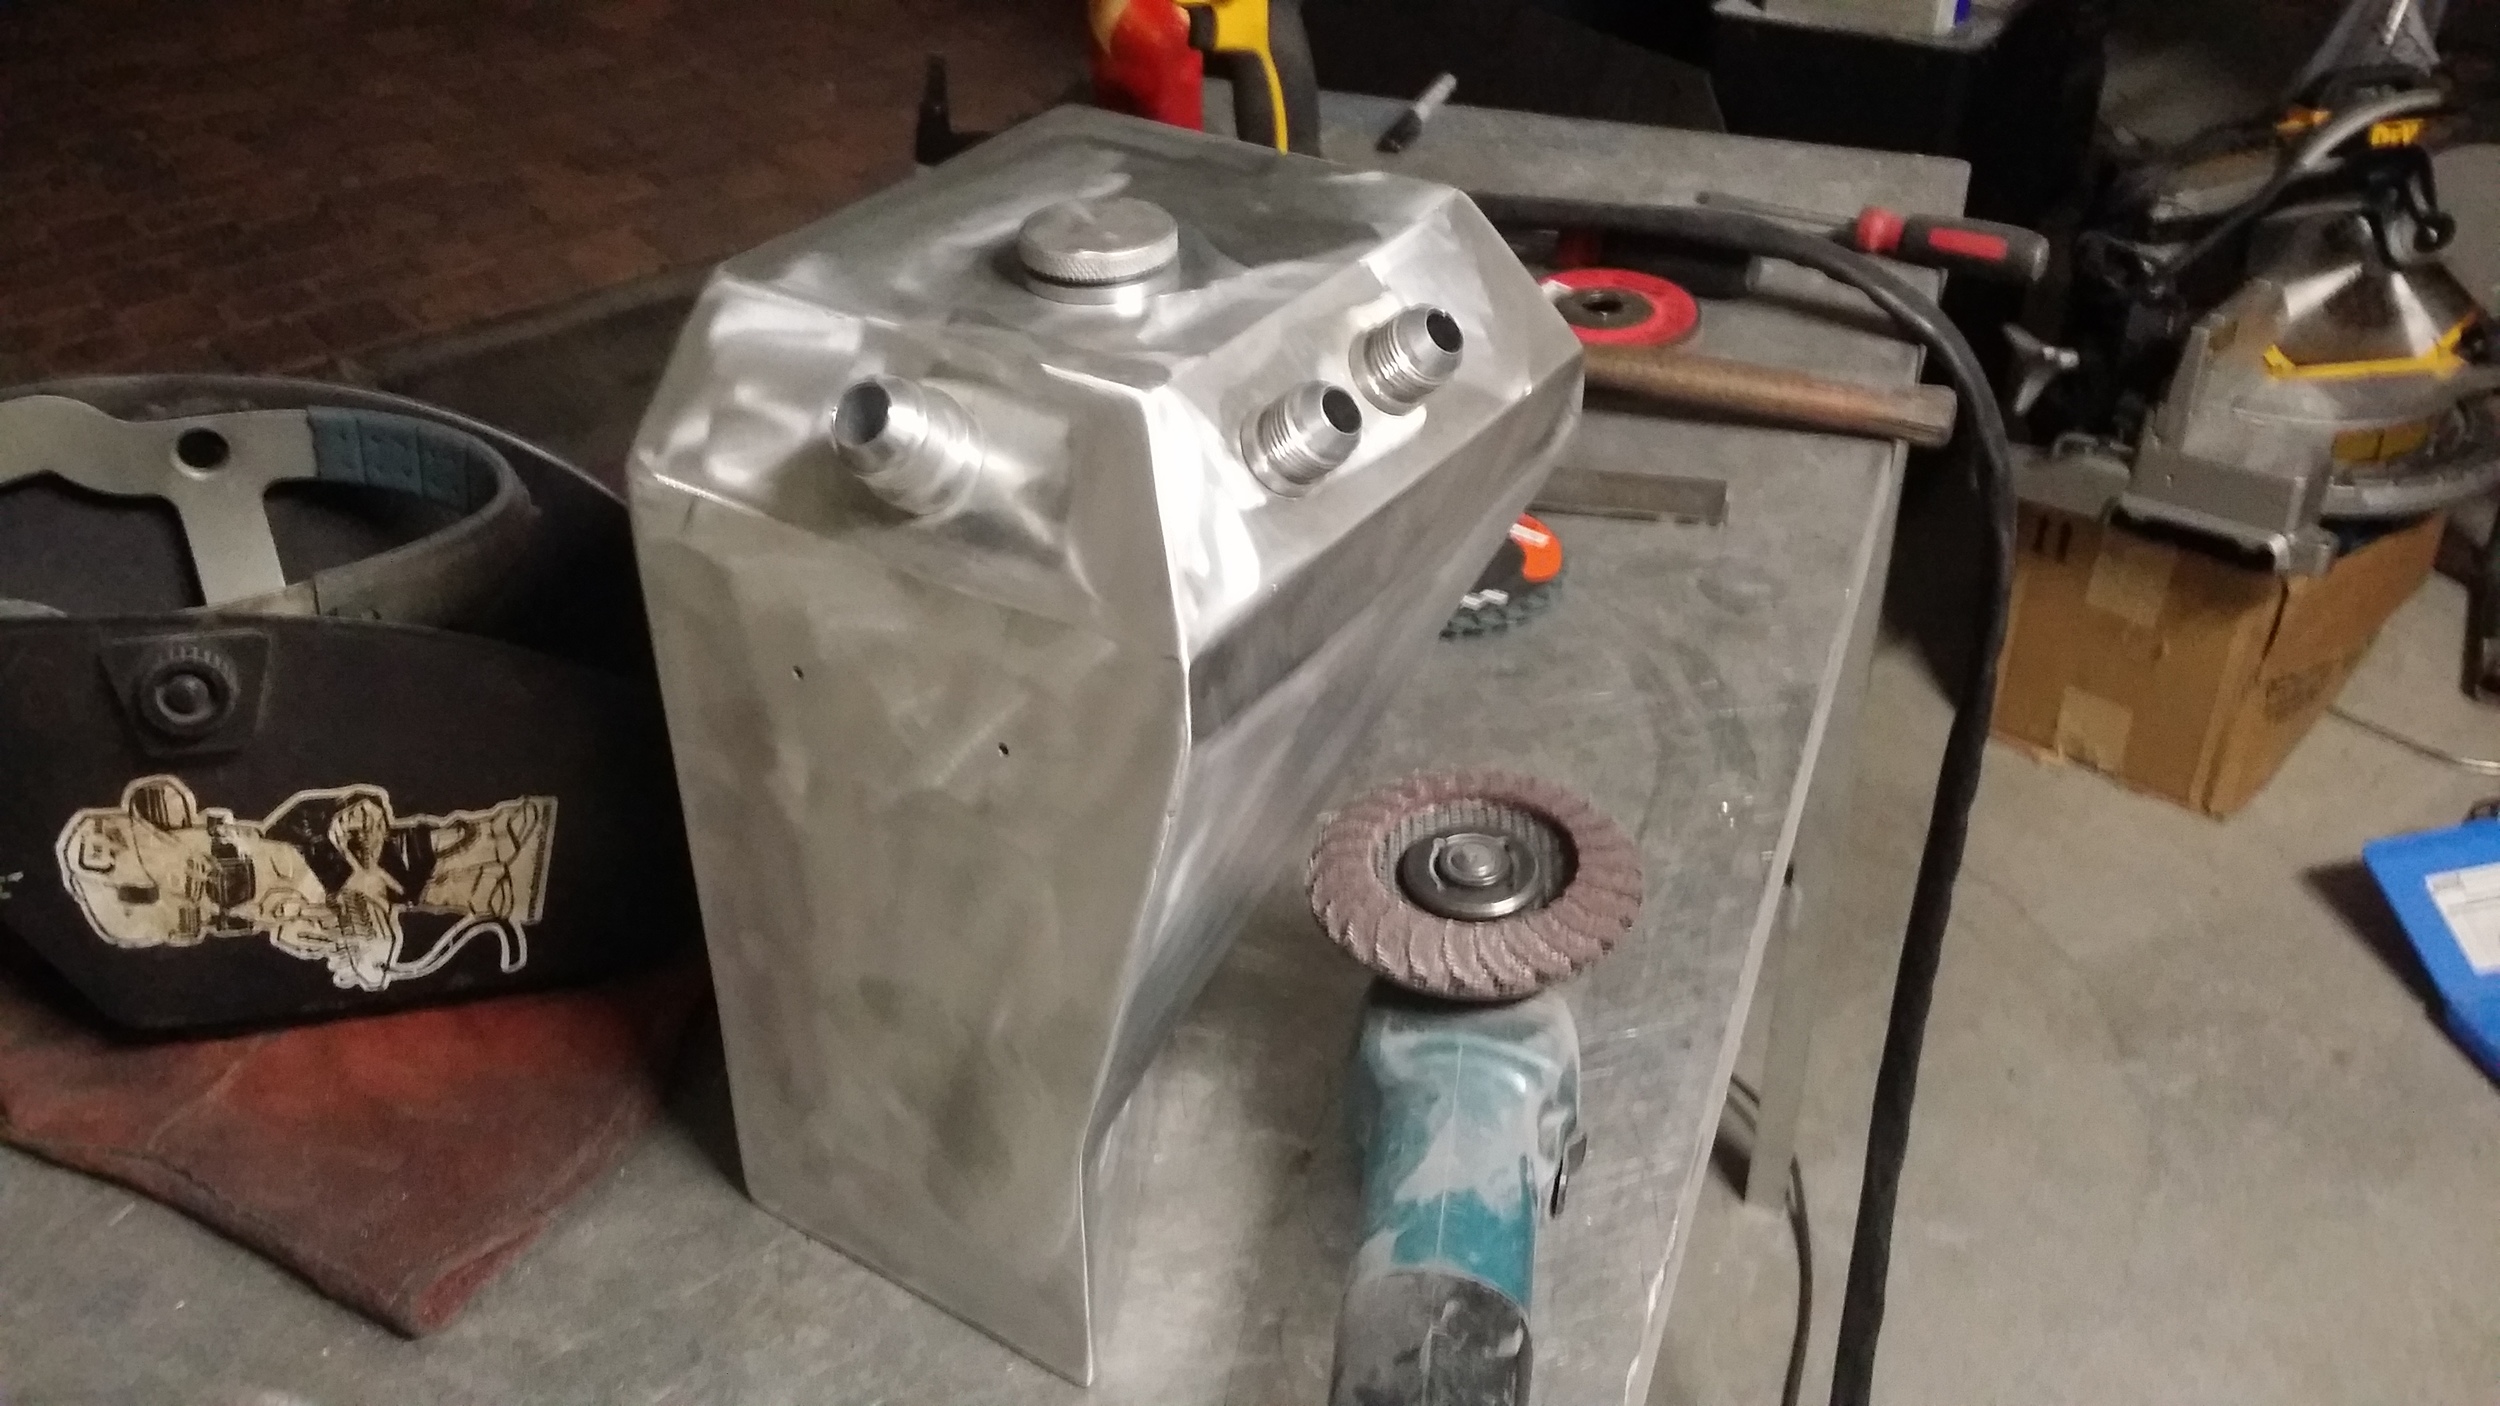
Building an oil tank can be a little bit tricky at times. Internals are a very important part of a tanks design, and of course, this build is one that really needs to be protected due to the extreme rarity of the engine. Storing oil is the tanks primary function, but there are a few additional things I would like this tank to do. The first additional feature is allowing debris to be separated on the return since it is not filtered. This was a little tricky to manage, but the low pressure return tube will allow the return oil and sediment to simply settle at the bottom of the tank. Additionally, the inside needs a baffle. This isn't anything super fancy by design. Even though the internals will never be seen again, I do like to make them look great along with correct function.
Even though the tank is not under pressure, it still needs ventilation. To ensure any excess pressure easily escapes into the catch can, dual AN-10 fittings were added followed by some baffling and a splash guard to finish off the insides of the tank.


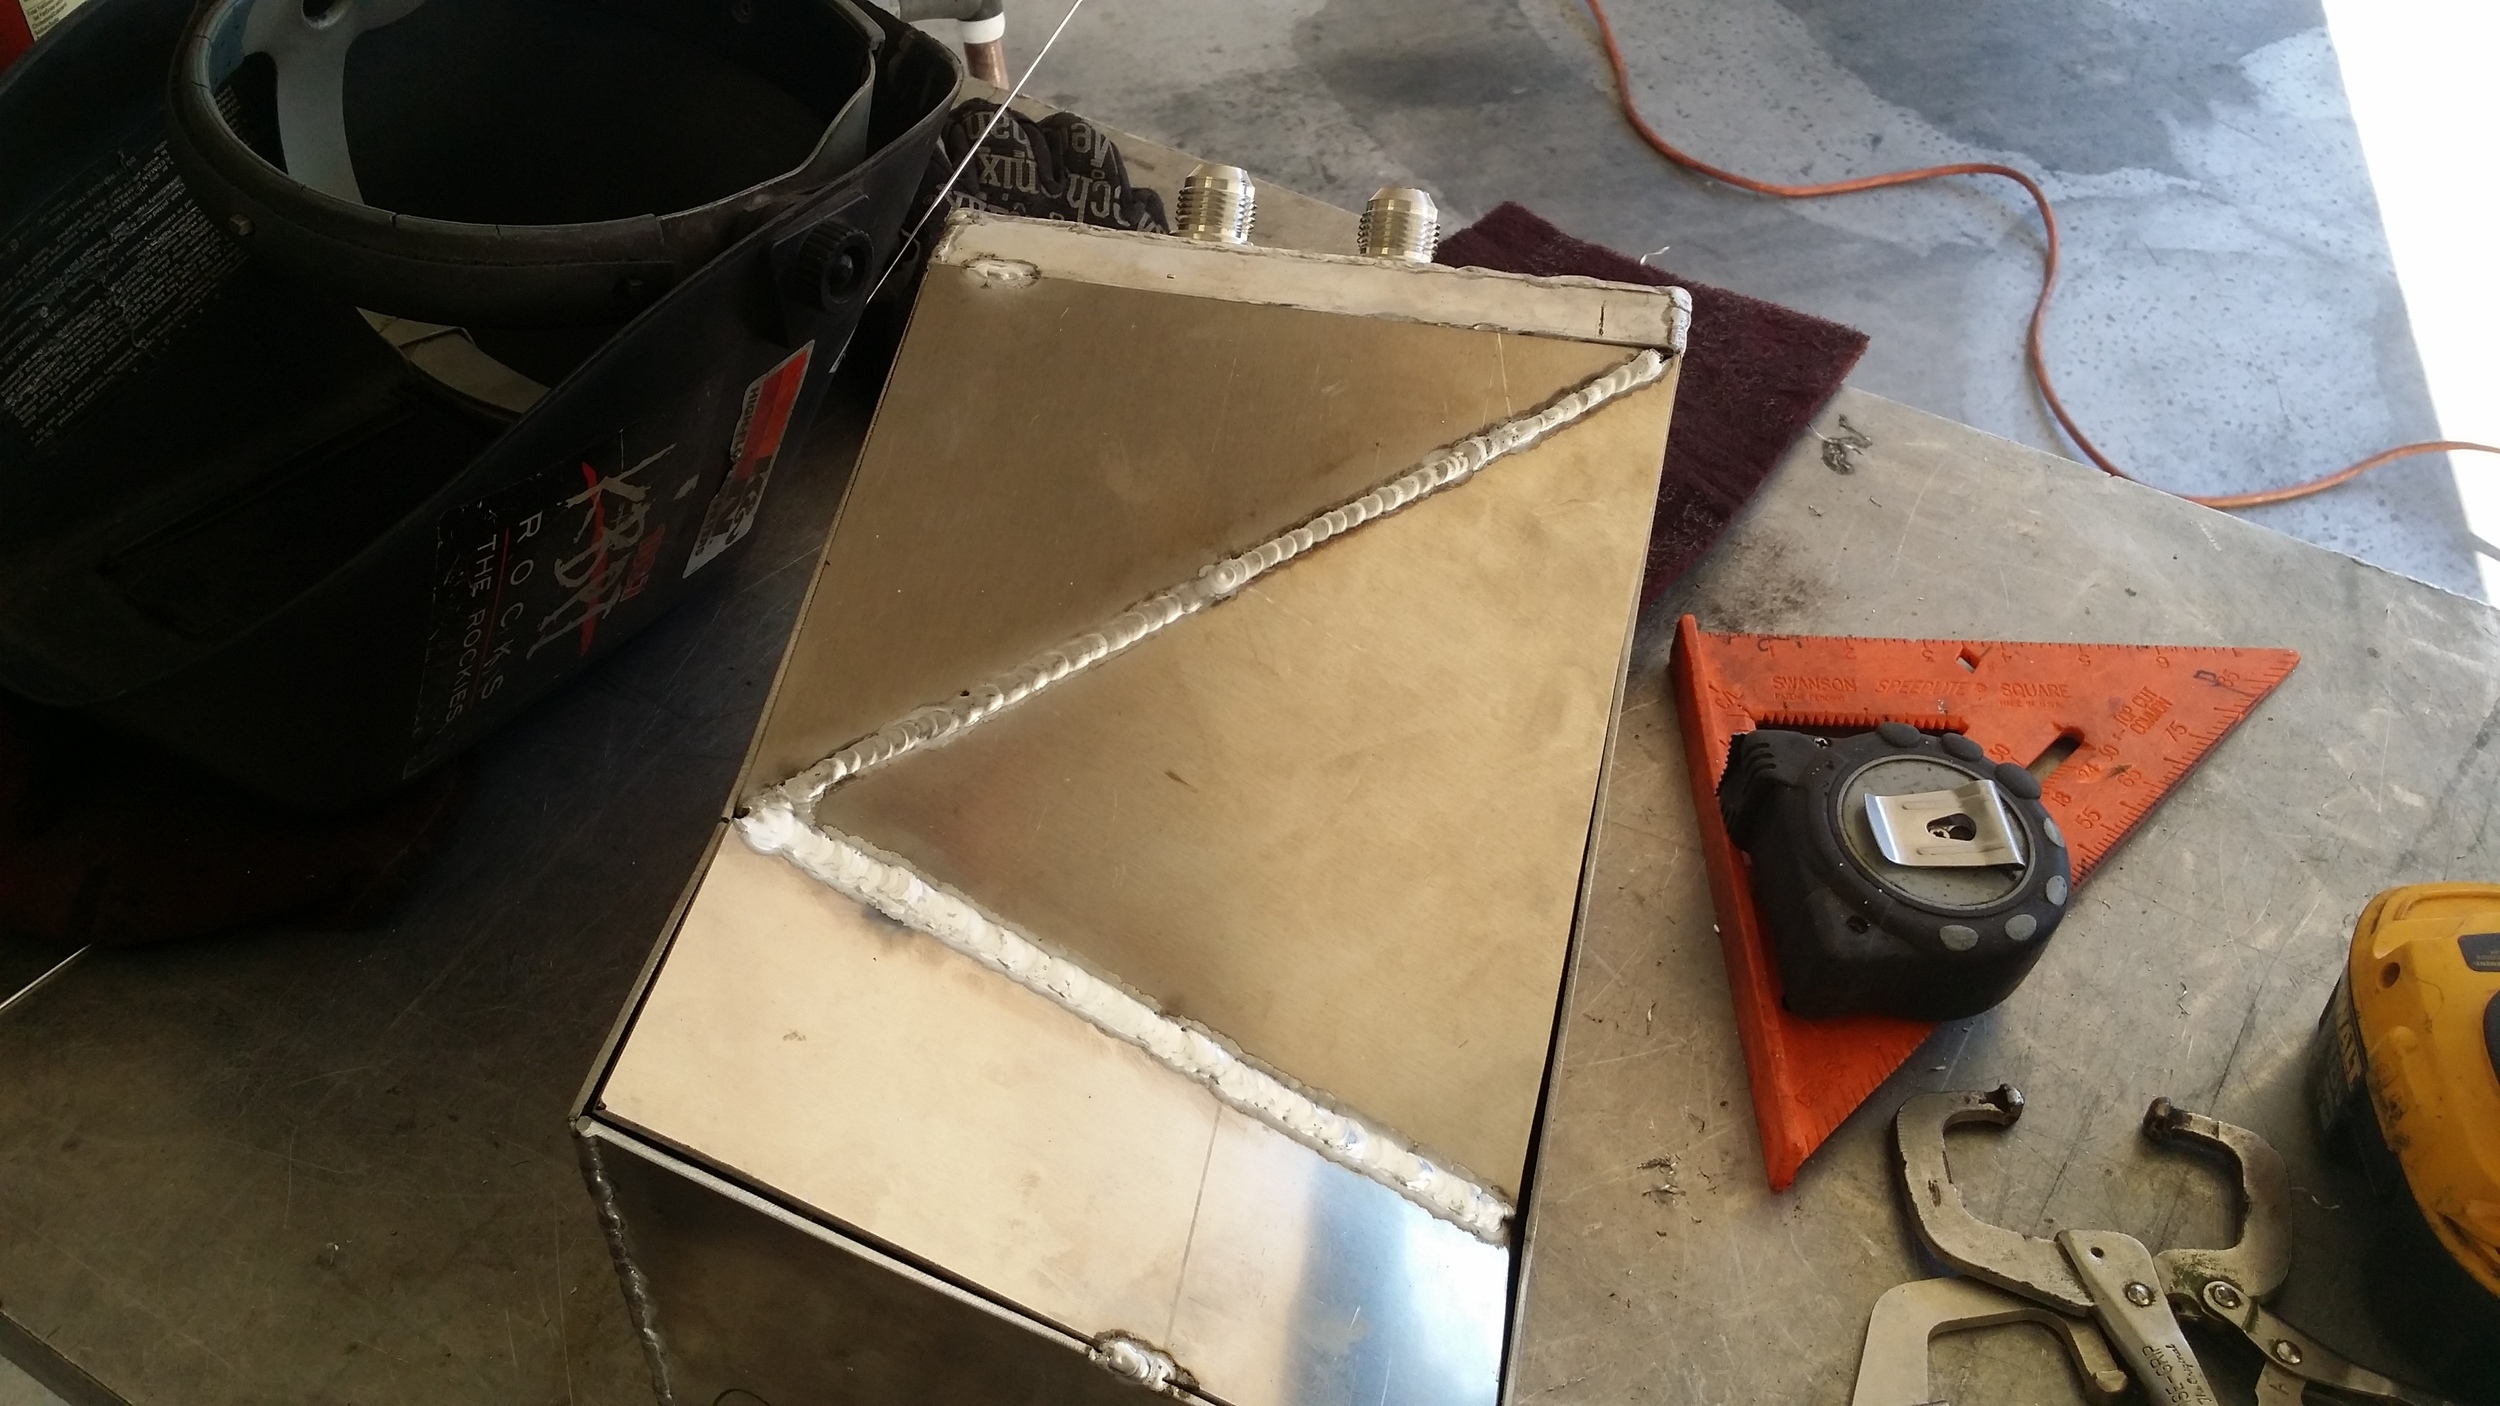
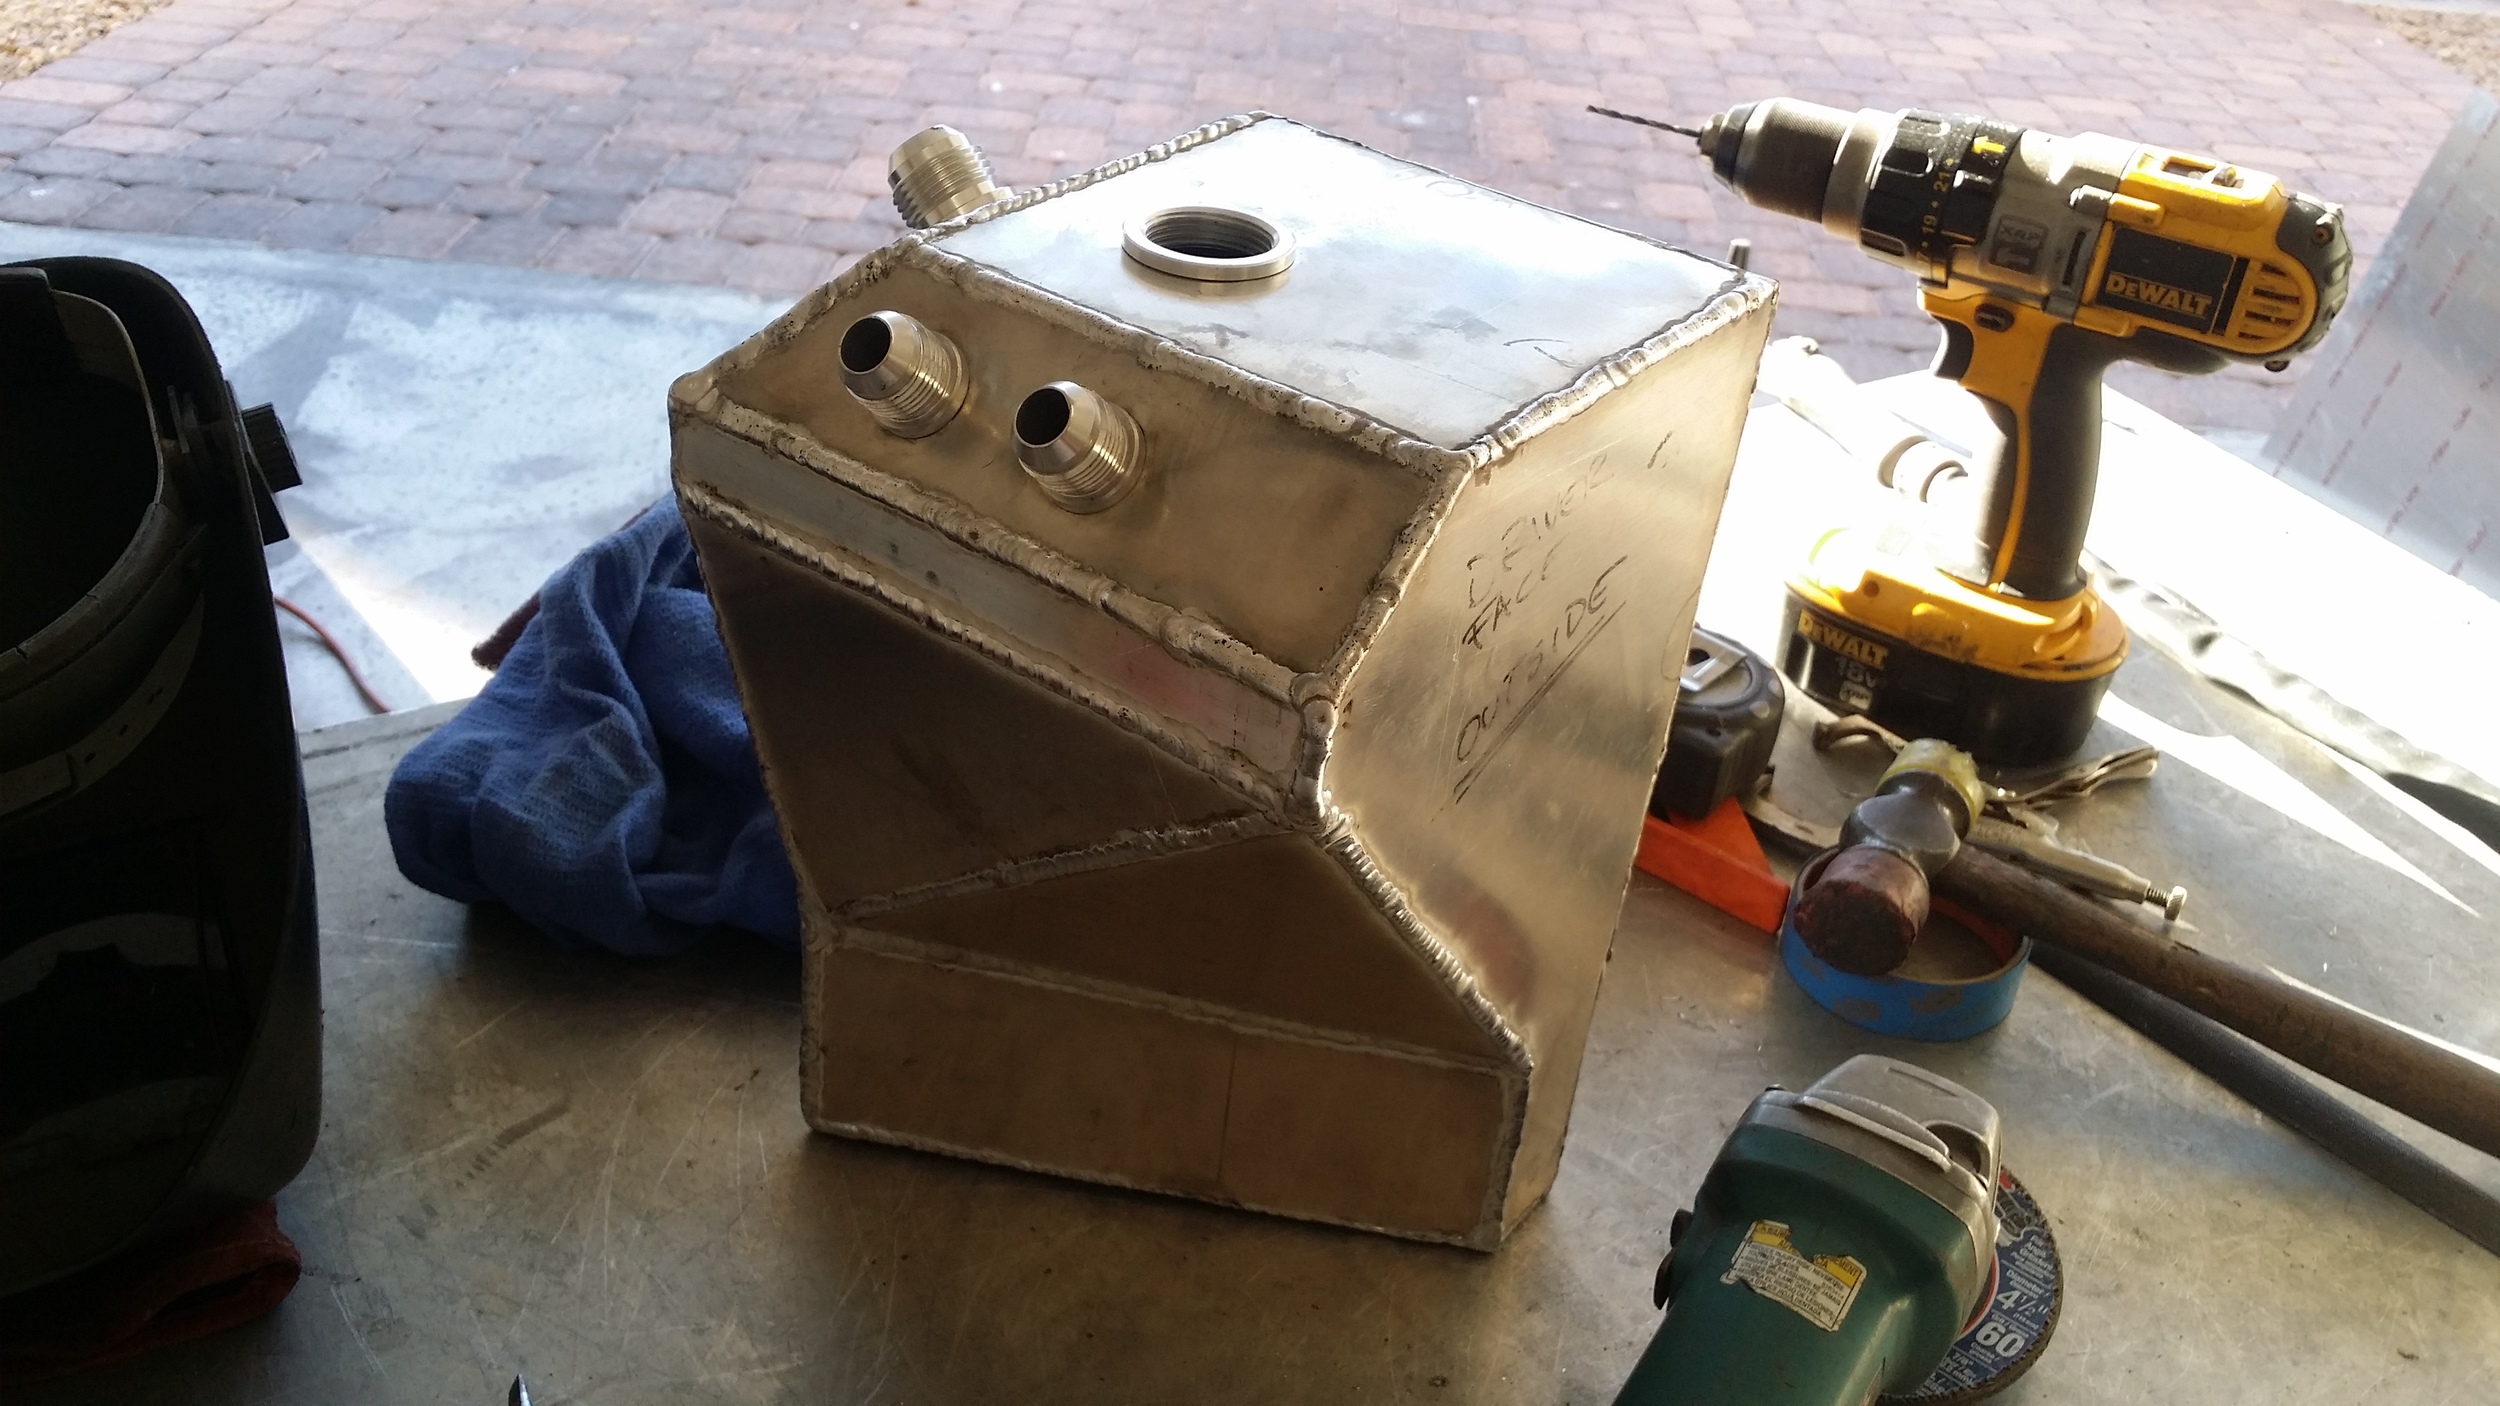
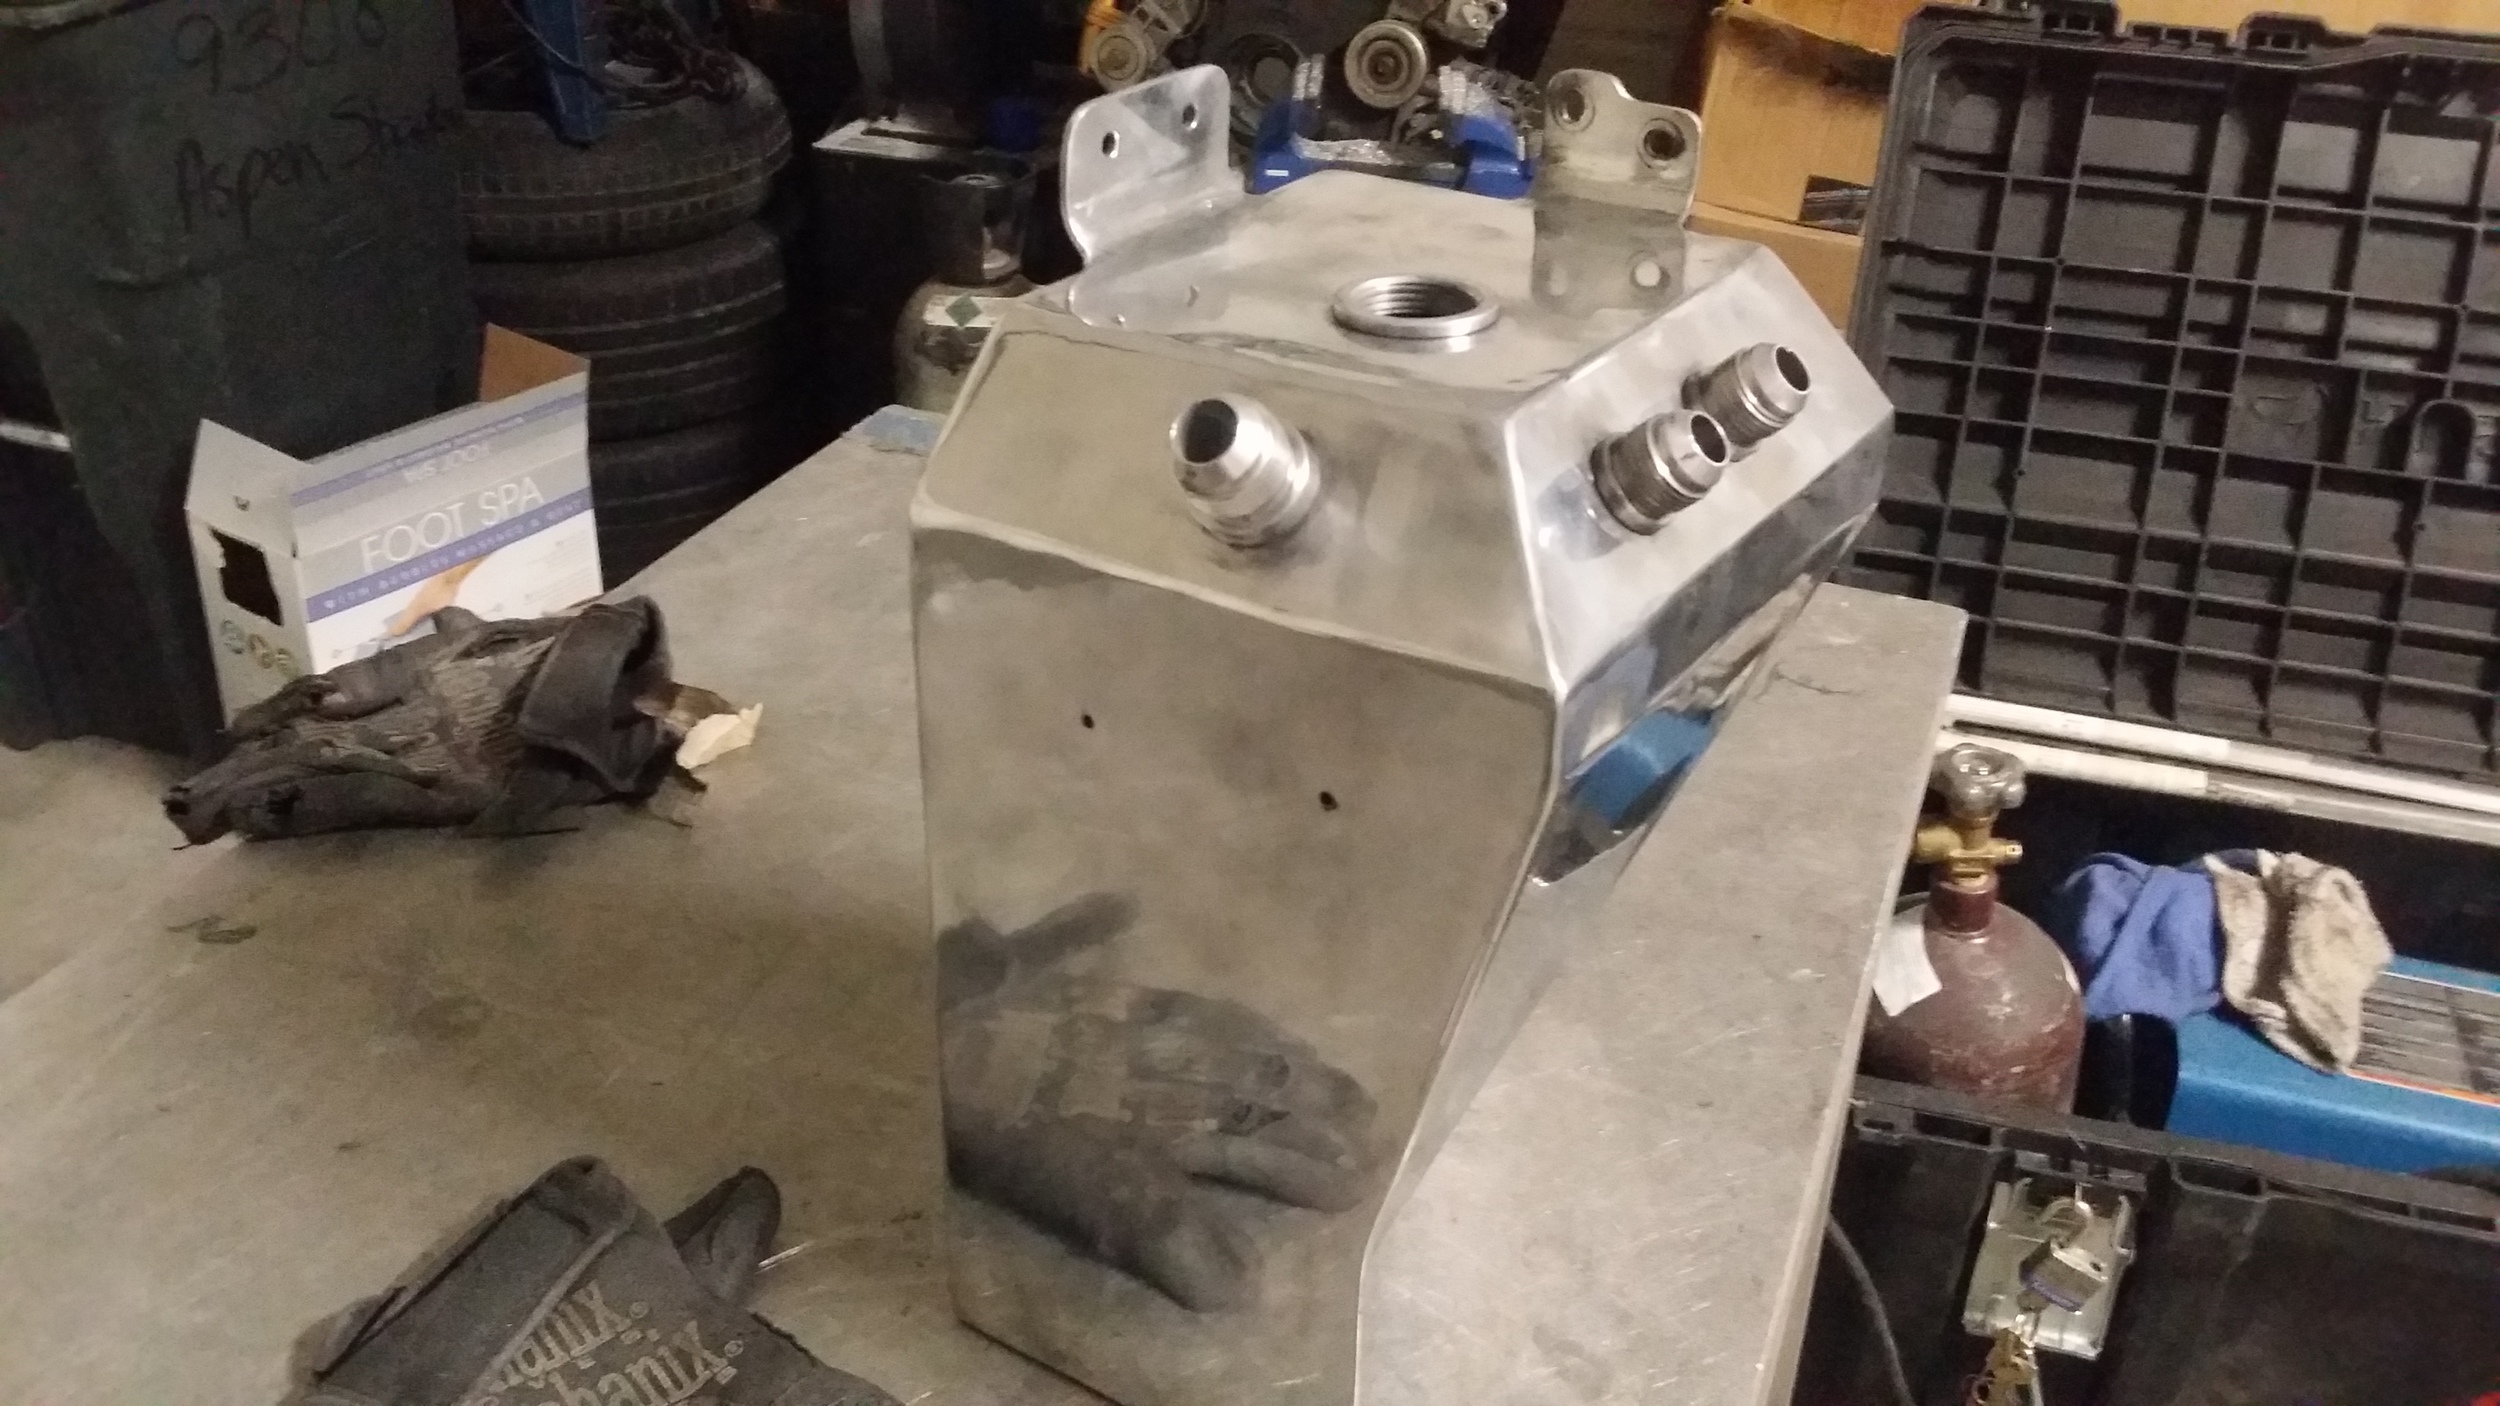
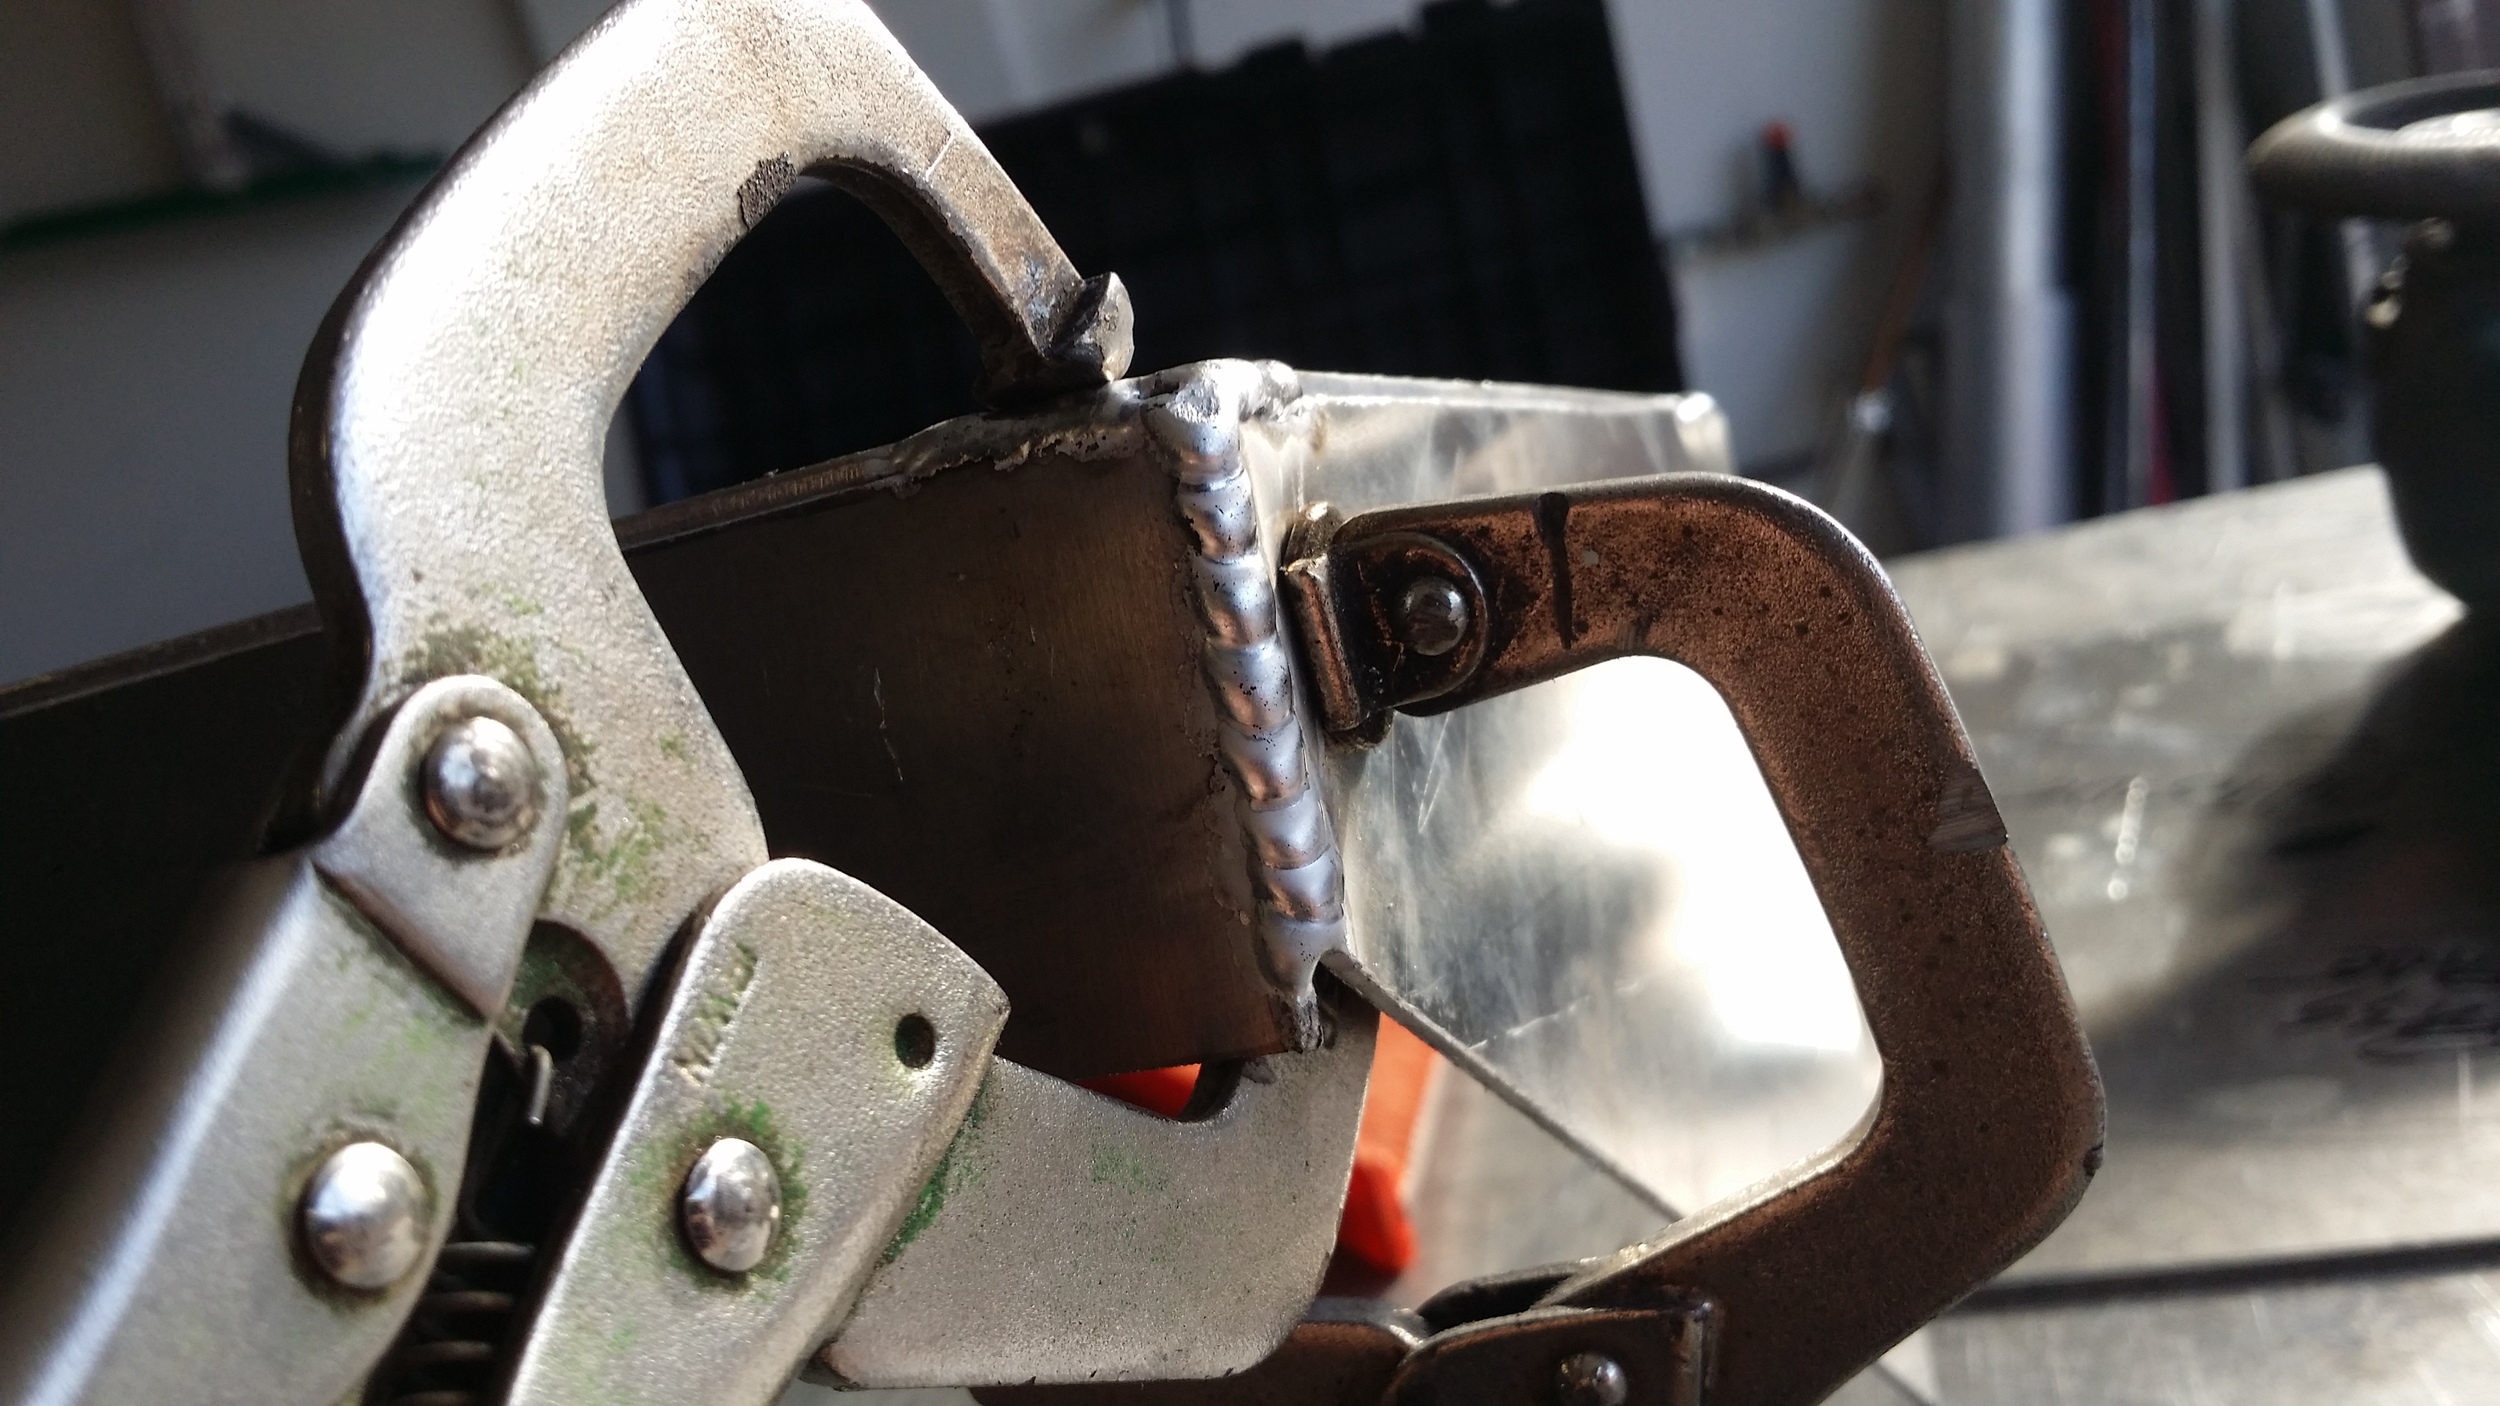
With the baffles complete, all that remains to be done is some welding and finish work. Nothing about finish work is considered "simple" or "quick" to do. Good clean finish work is time consuming and very easy to ruin. Aside from all the welds and progressive grinding, of those welds, the polishing work needs to be spot on or else the final product simply will not look well at all.
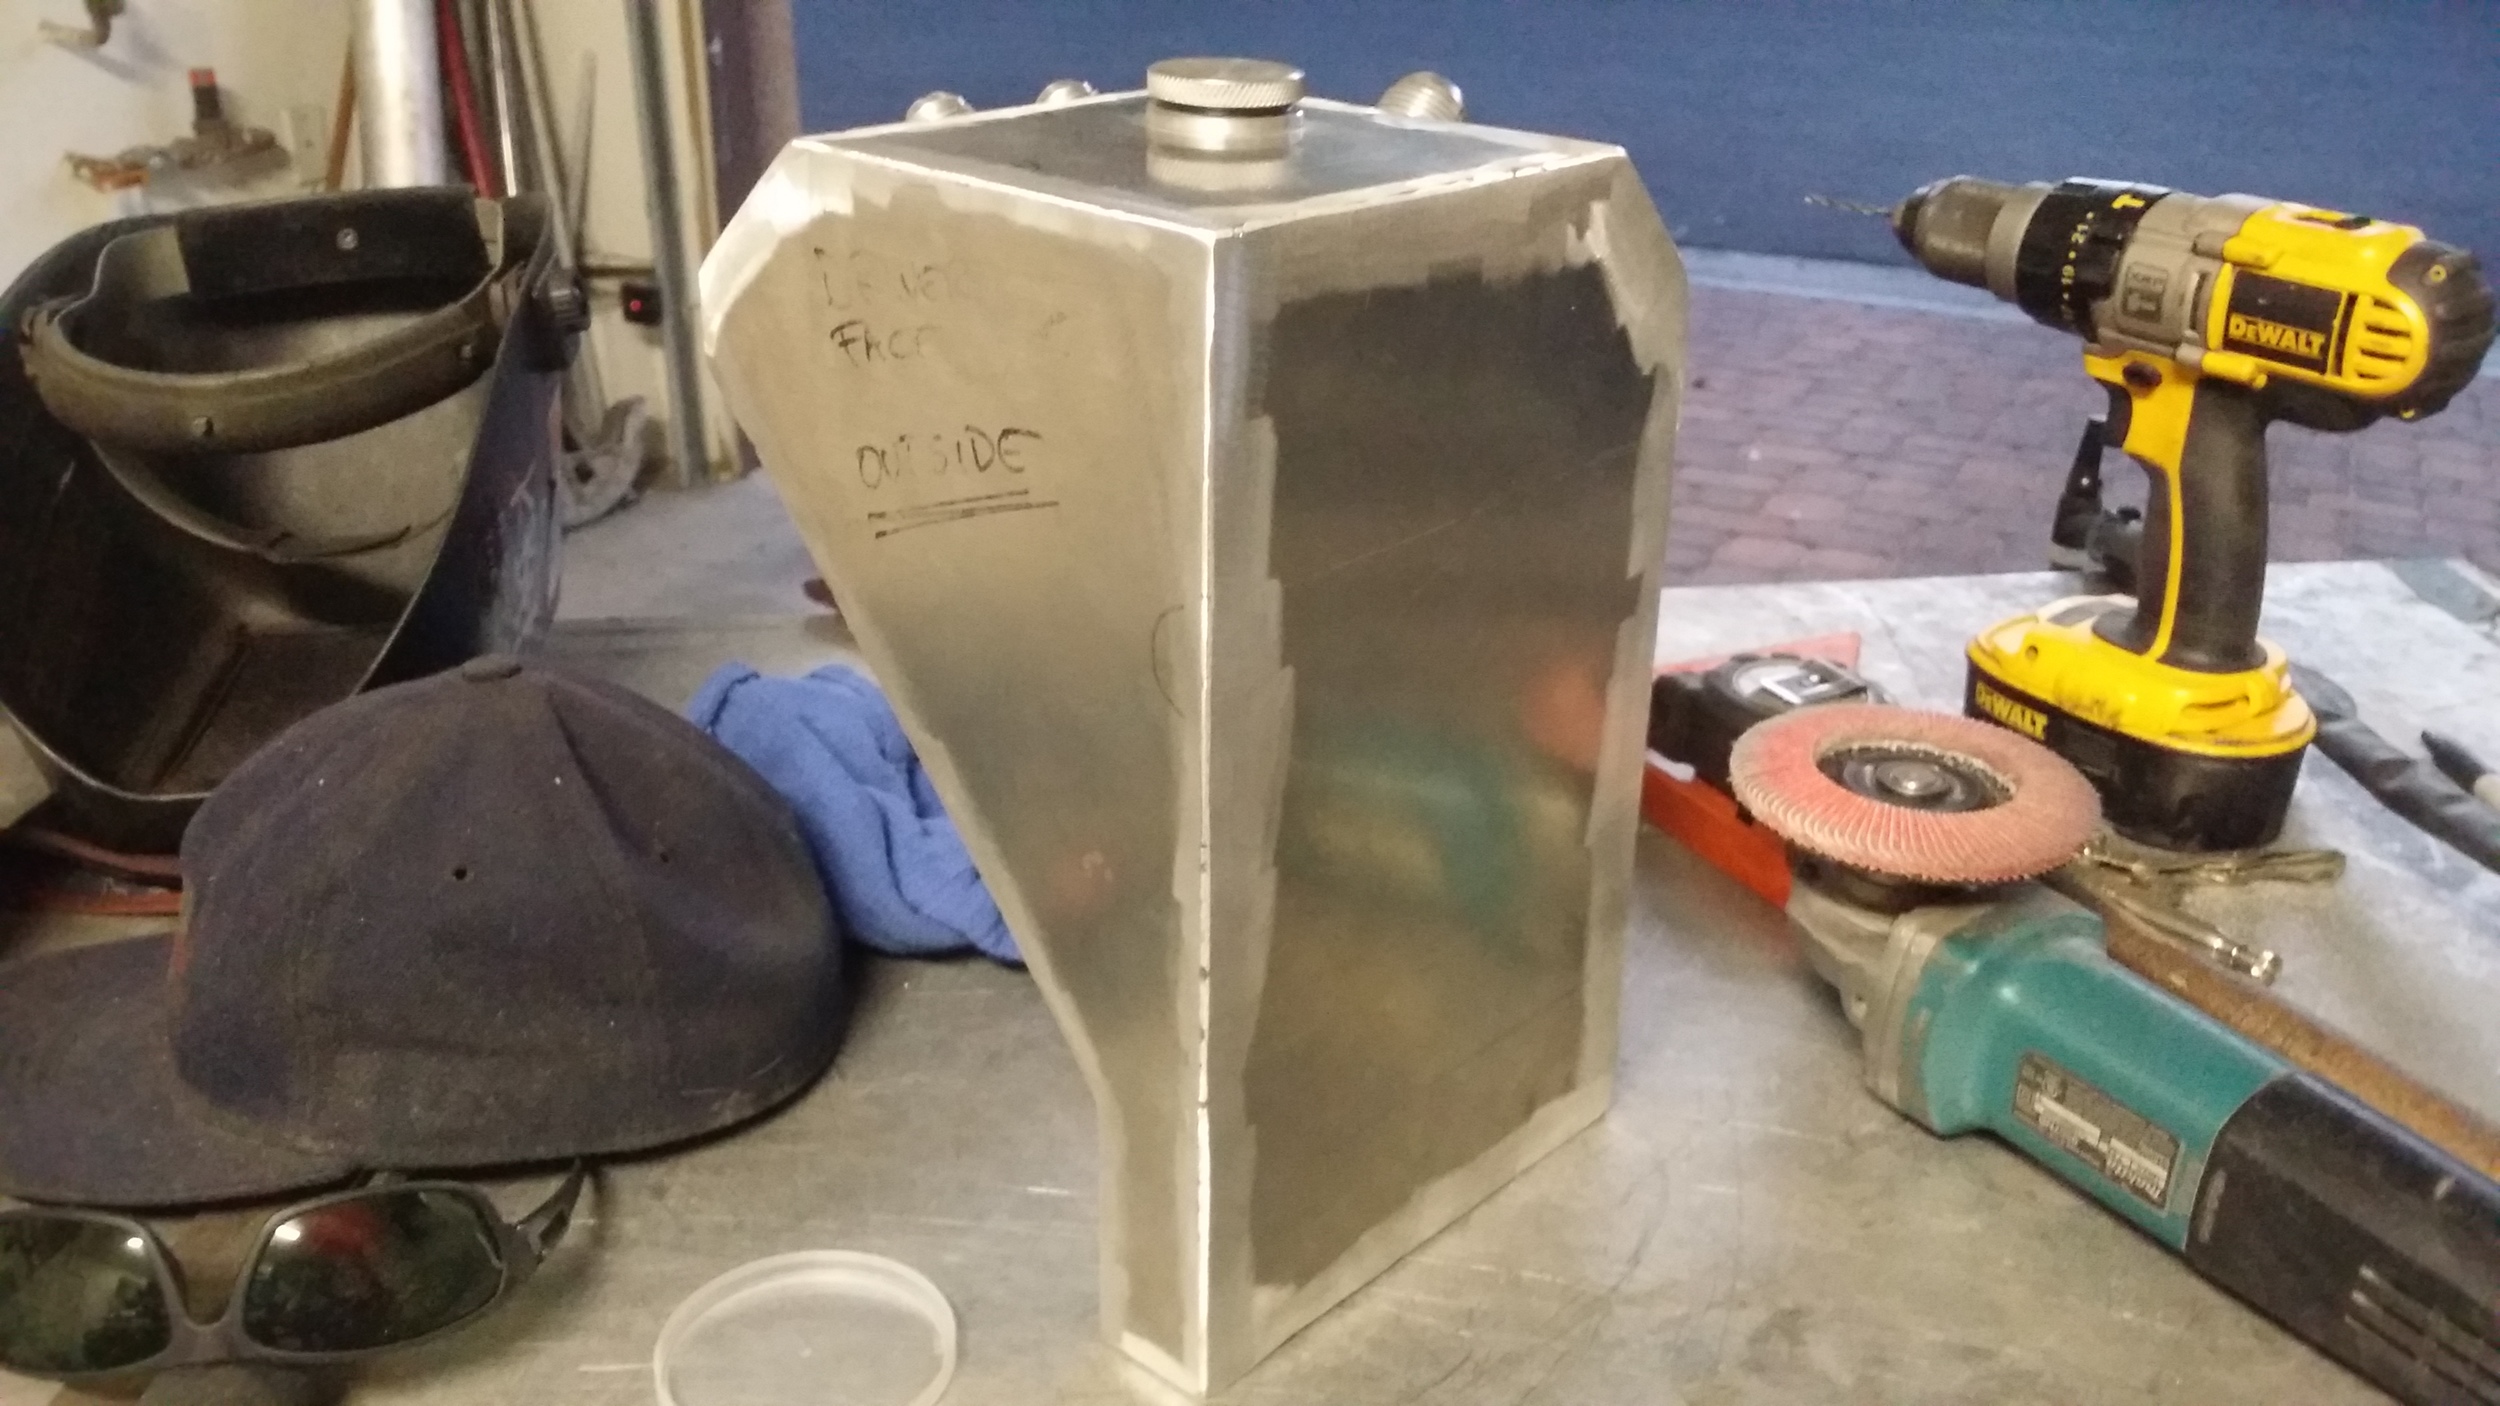
Progressive grinding and sanding is required along with additional welding to fill in small pits. After many hours and a few fit checks, the polishing can begin to finish this piece off.
Finally, the finished product. It started out as nothing more than a few sheets of cardboard, and turned into one of the most beautiful custom built oil tanks created. With an Engineers brain, a Fabricators hands and a little attention to detail, anything can be built. Tell me what you think in the comments below!