
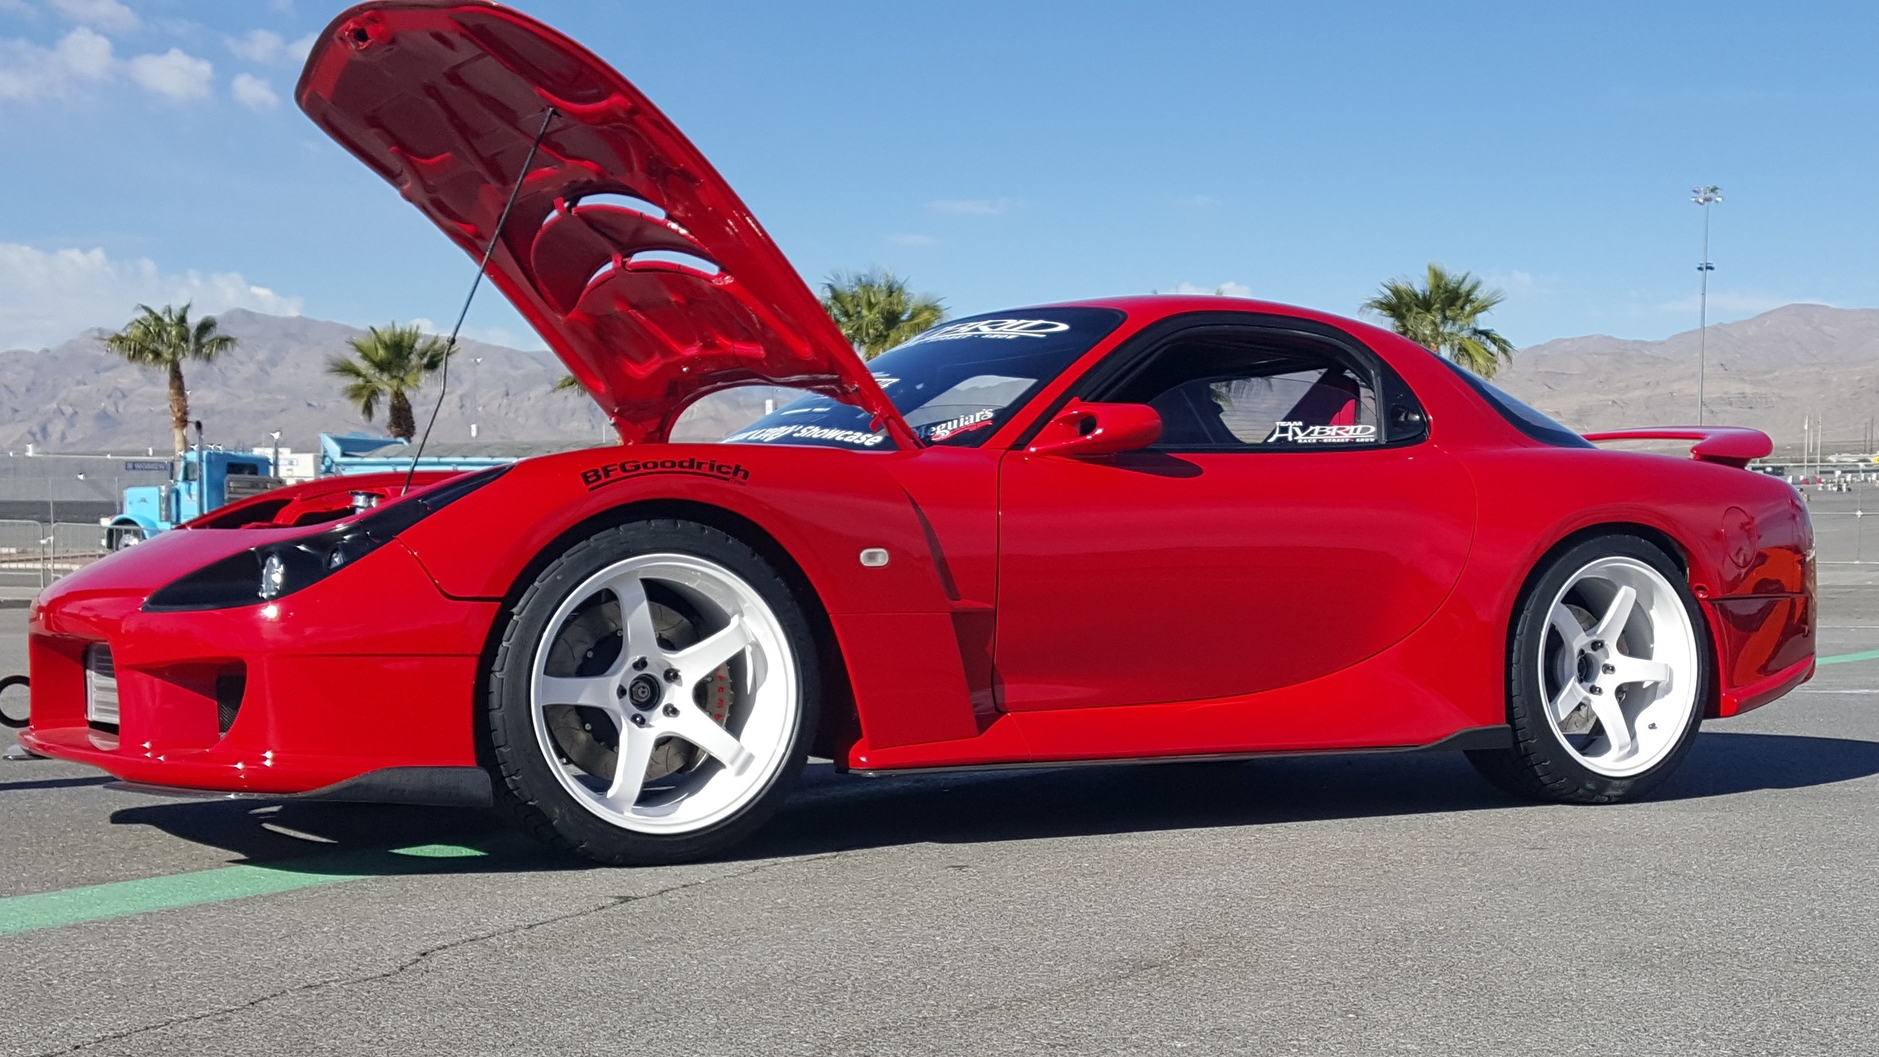
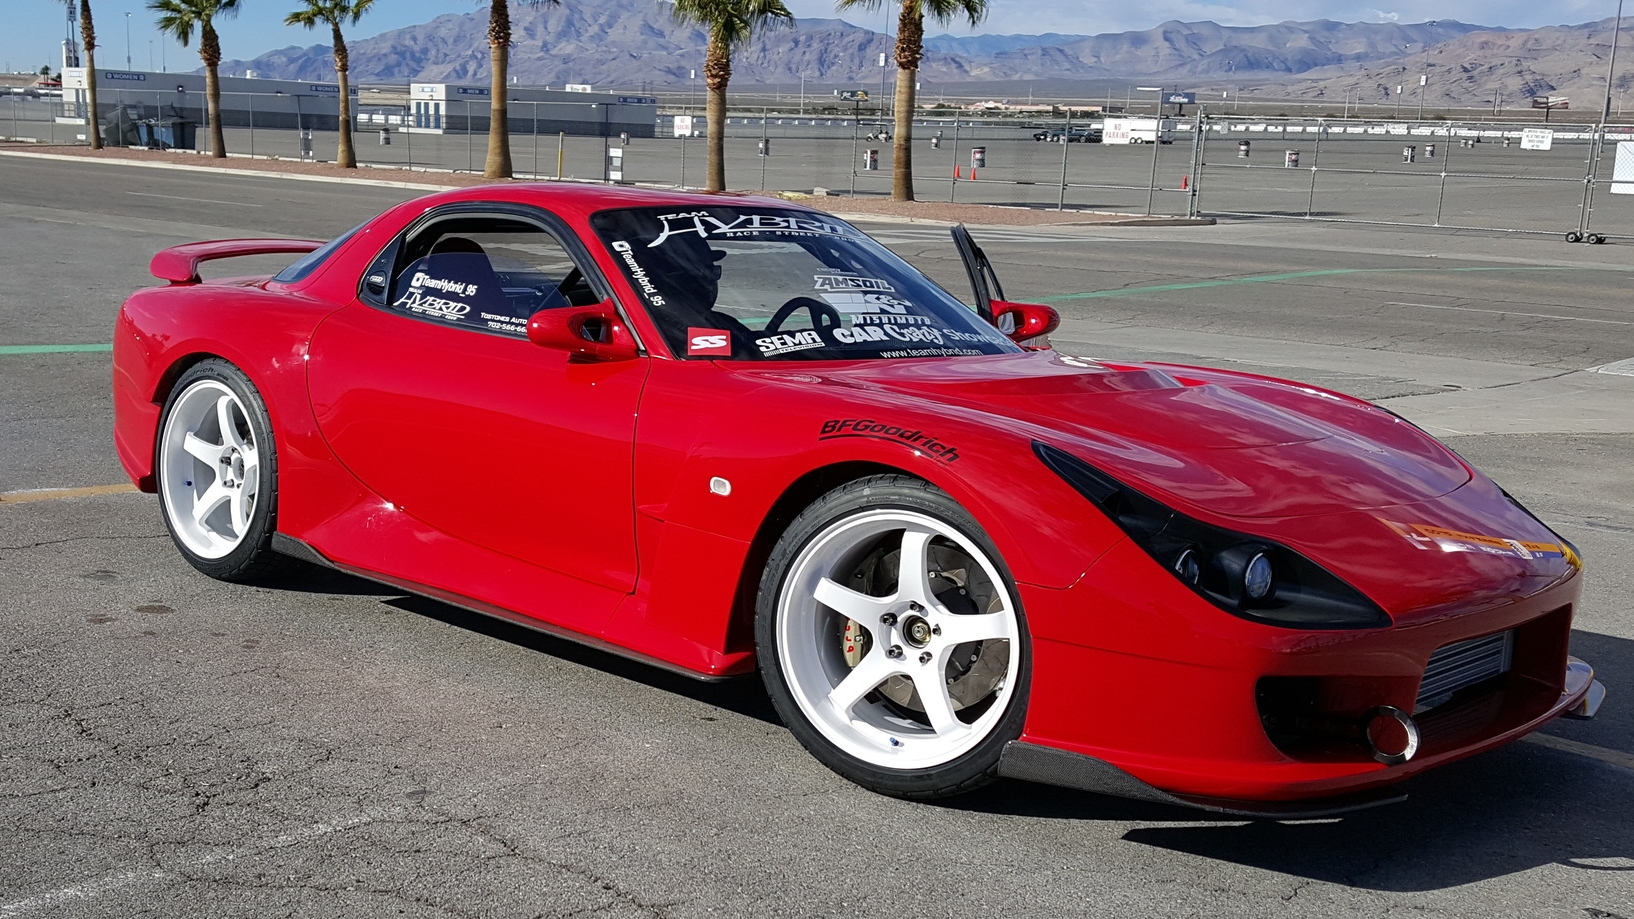
One of the most anticpated magazine features has final hit! Robert Green's Four-Rotor powered 1993 Mazda RX-7. This particular build is also fitted with an extremely rare Fujita Engineering Evolutional Development (FEED) body kit which happens to be serial number 12, and the only one on US soil. What's even better than that? How about the fact that absolutely nothing on this build has been left unmodified? Yeah, it's the epitome of a limitless build.
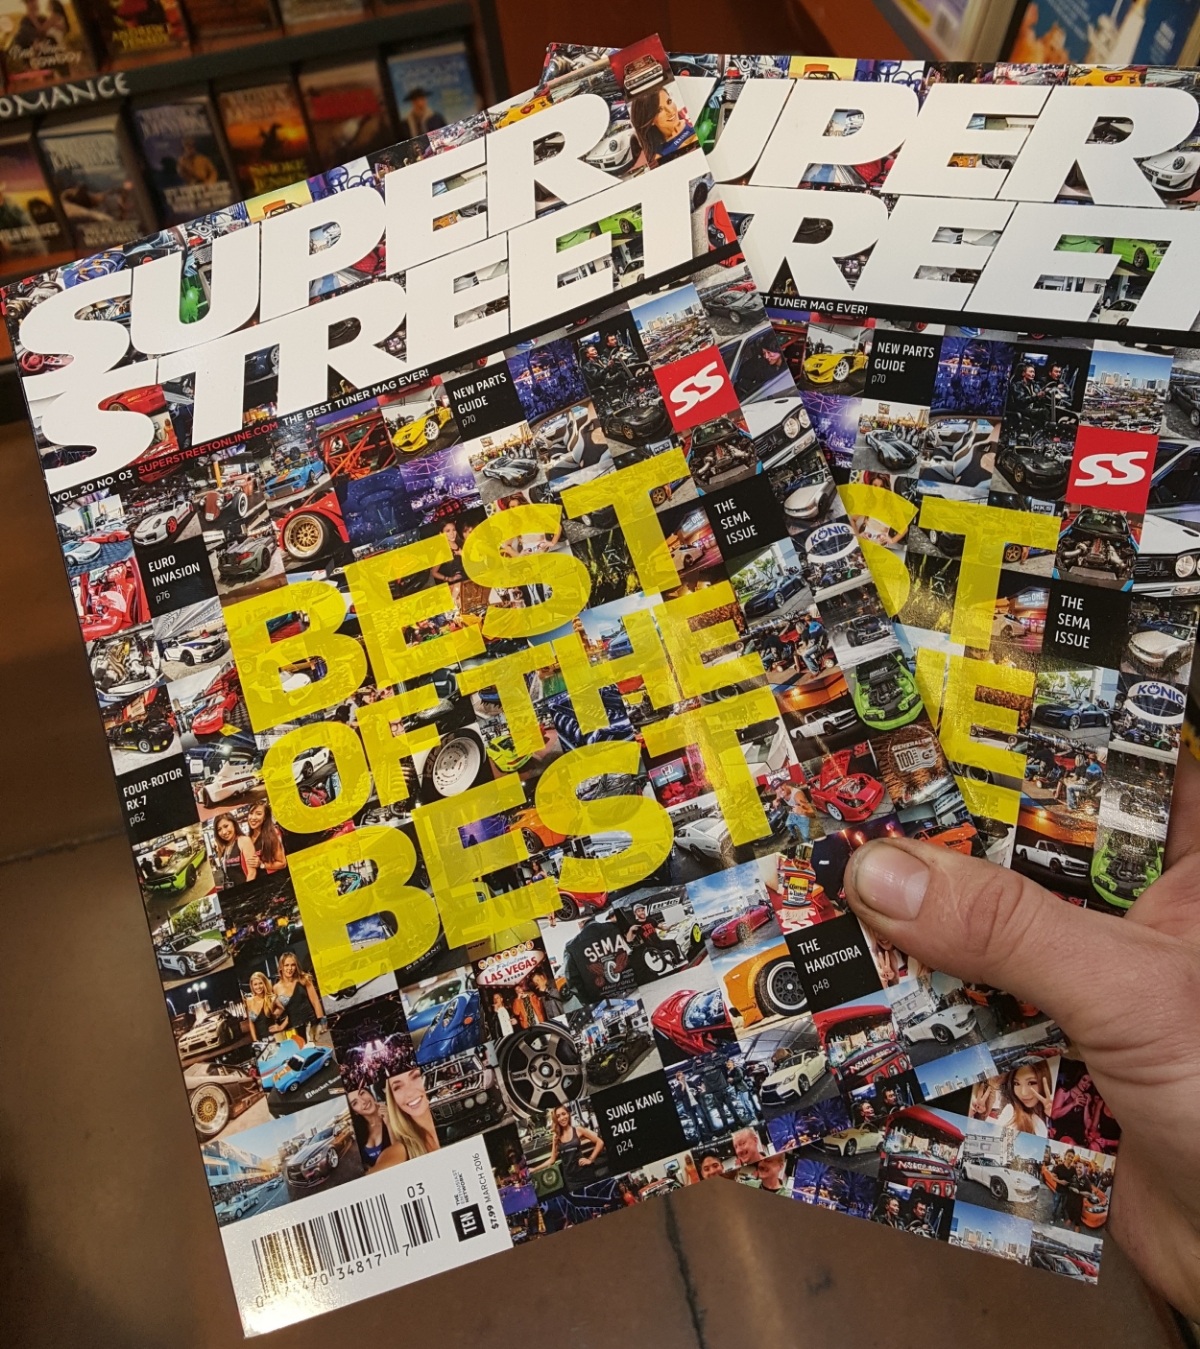
While most were being kept in the dark about it, myself in conjunction with a select few were working for years to create this masterpiece of a car that landed a spot in the March 2016 issue of Super Street magazine.

The mod list is extremely long. It is so long that just about all of the pages showing pictures could almost be filled with list upon list of mods. Mod lists, while great to cruise over, really don't paint an accurate picture of all the work involved.
This actually brings me to a point where I can offer up an interesting view (that I follow) regarding the fabrication industry. After the article was Playboyed (looking at the pics first, then reading the article), some people asked me what it is like to get a mention as one of the builders and to see my product on display with some of the best in the business.
The answer is I am very humble and honored to be a part of it and I still get excited when my work shows up regardless of mentions. Seeing my work in print is not an expectation, but does deliver an extreme amount of satisfaction. The same car that I had a big hand in engineering and building is printed in the same magazine as the Fugu Z! That is a huge honor to be a part of.
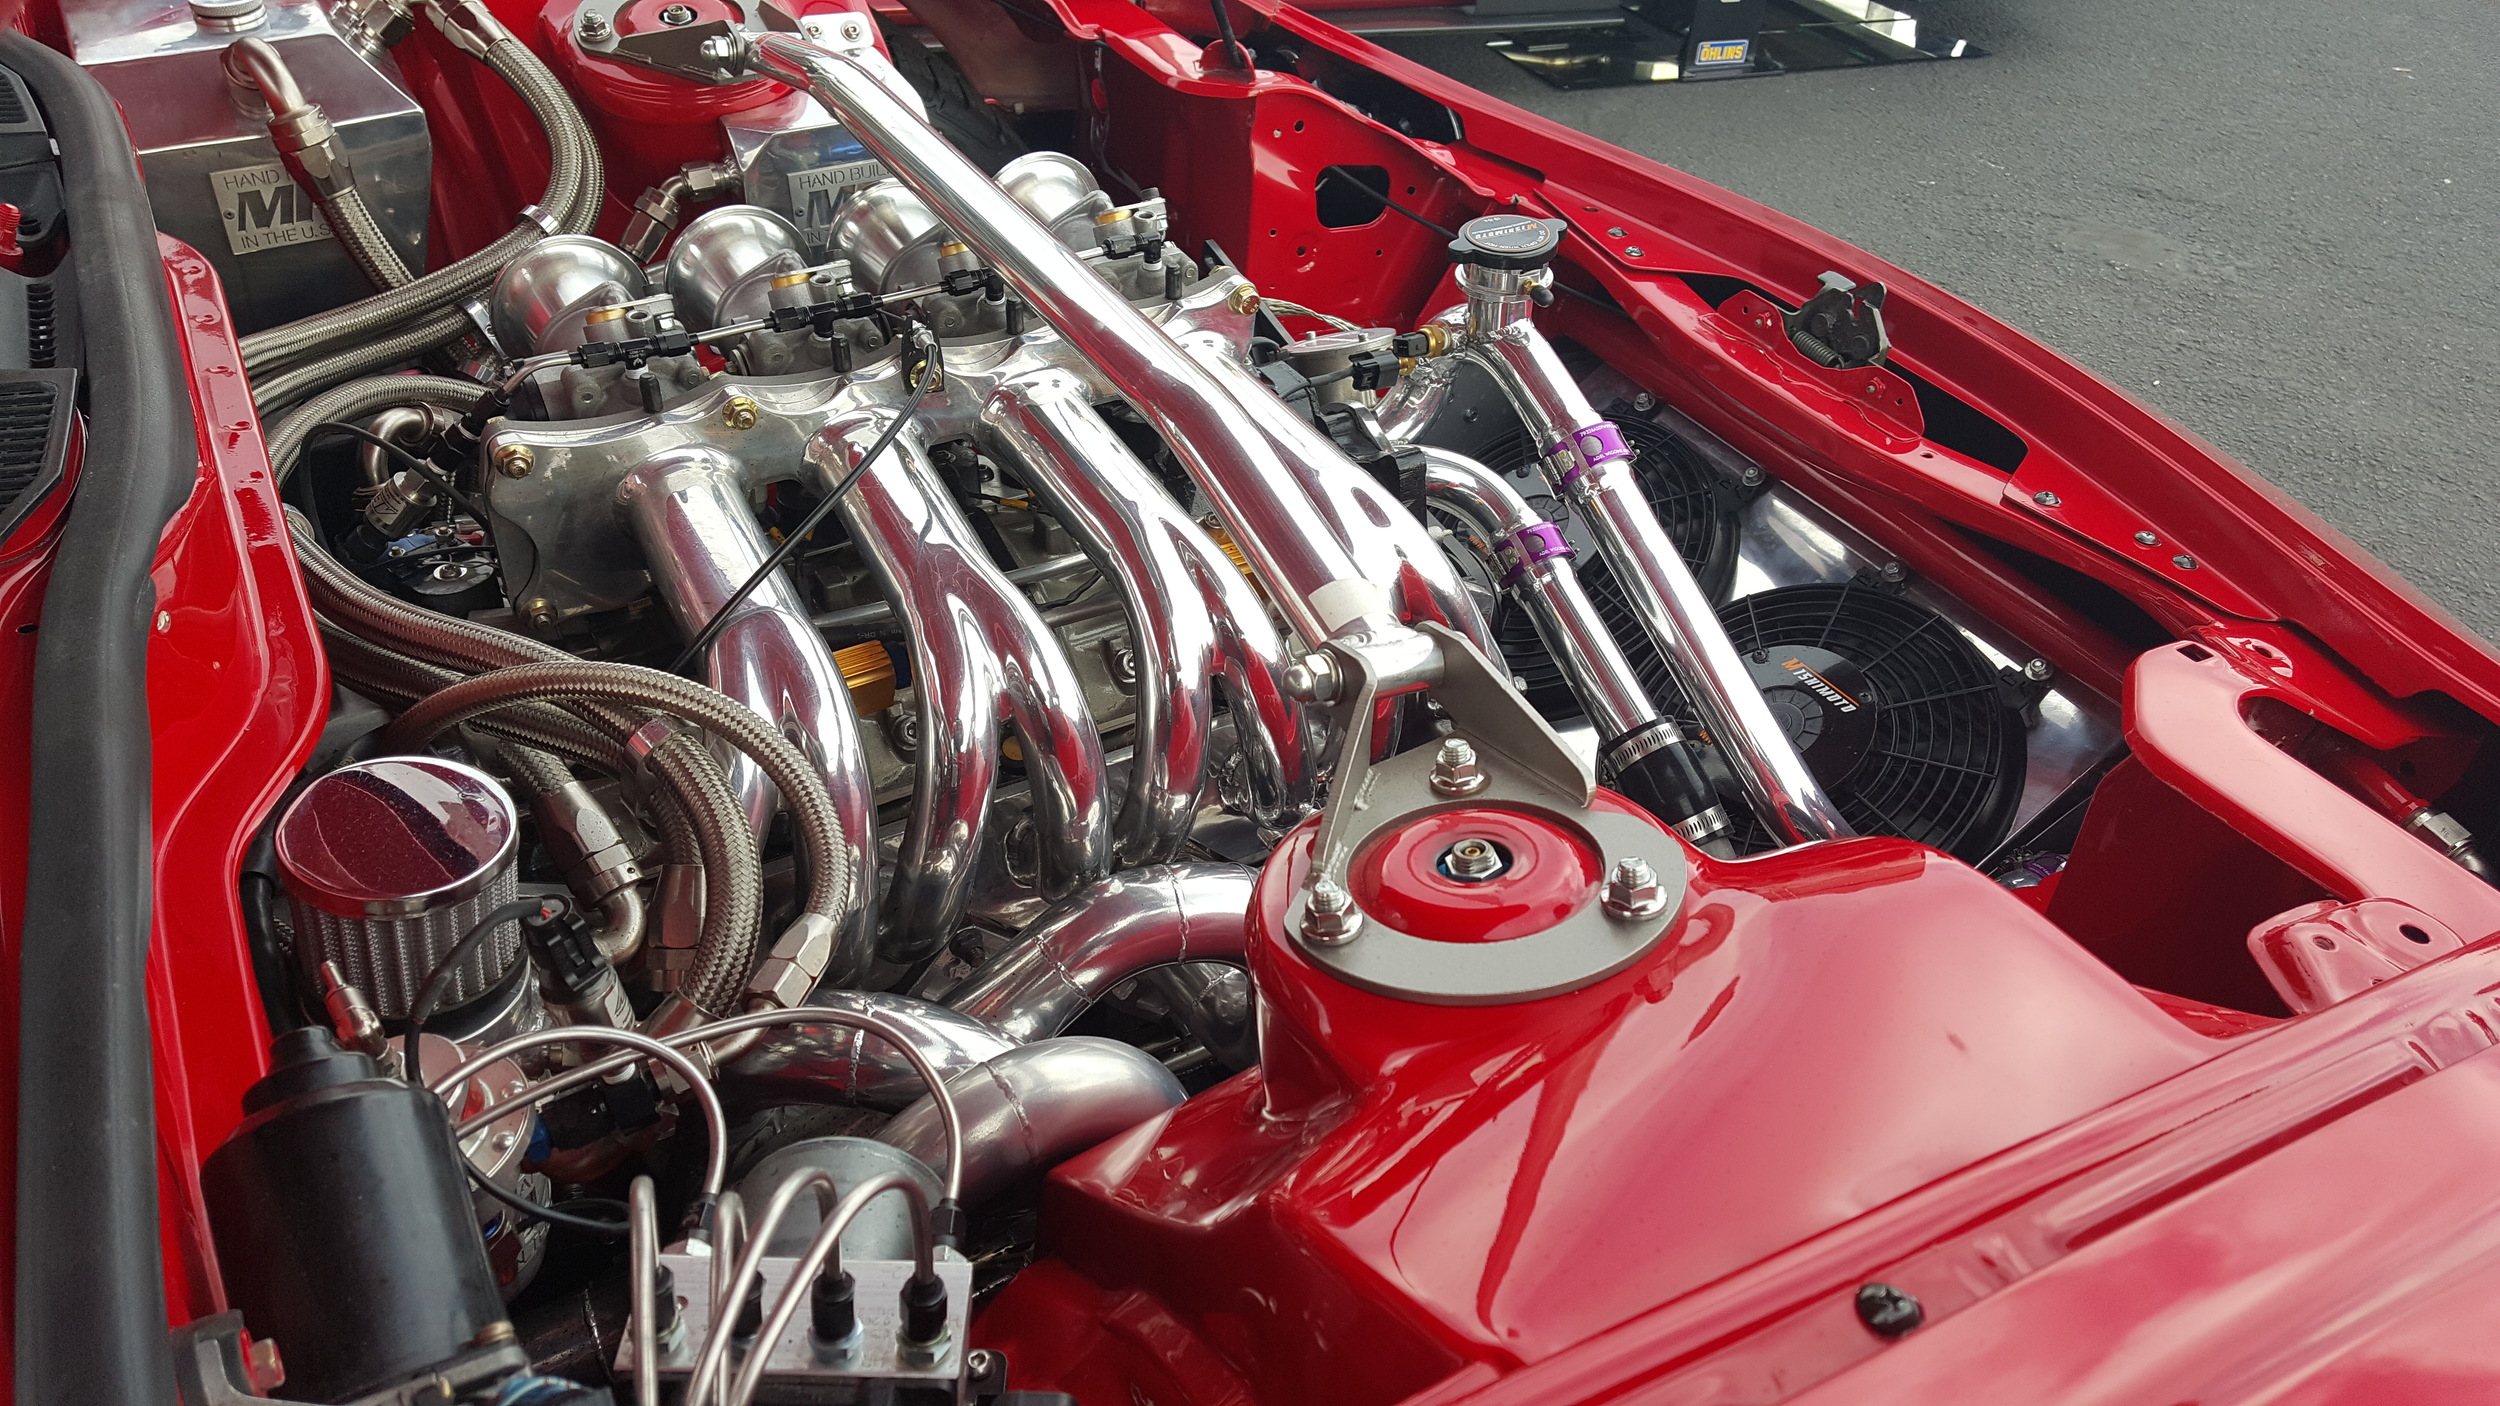
If you jump into the fabrication industry chasing fame - get out now before disappointment has the opportunity to overwhelm you. Fabrication is a dedicated profession driven by passion in which you are often left out as the person behind the scenes. Think about it - When you are meticulously crawling over an epic looking build on display, do you pay mind to pretty welds under a coat of paint or the ugly ones? Pretty welds will almost always go unnoticed. Ugly welds are still ugly when painted. Do you notice when a square shaped fluid reservoir is sitting next to a round fluid reservoir and think that both of them should have been the same shape? My point is, the best work often gets missed because it is designed to blend seamlessly instead of stand out.
People might not want to know your name as the person who laid down a great weld on a tube, or designed two well engineered and placed reservoirs when there is an insanely built power plant of an engine staring them in the face. You have to be in this industry for the right reasons. You must be proud of your work no matter what the job is and you absolutely must never expect any kind of fame or notoriety for it. While it may be a serious achievement for you and your talents, it may be something completely overlooked by someone else.

My primary task on this entire build was to engineer and create the systems that made all of the main components work together and function as one. Every demand for this build needed to be met with a product. Every interference needed to be solved with a carefully designed solution. Every system that doesn't exist for this engine and chassis combination needed to be created. Everything that can't be bought off the shelf, or otherwise doesn't exist, had to be created.
If the work stood out like a single florescent light in a black and dark room, my job was done incorrectly. If you noticed it above the main features of this build - I failed. My job was to make it all blend together which is only complimented by not being noticed as an overtaking feature to the main components.
Since the mention of the steering rack mod is in the article, and it is a must for 3 and 4 rotor swaps, here is how I did it.
In order to clear the bottom of the 26B, the steering rack had to drop a an inch and a half. This is pretty difficult considering that the sub-frame itself is just under 2 inches tall at this point.
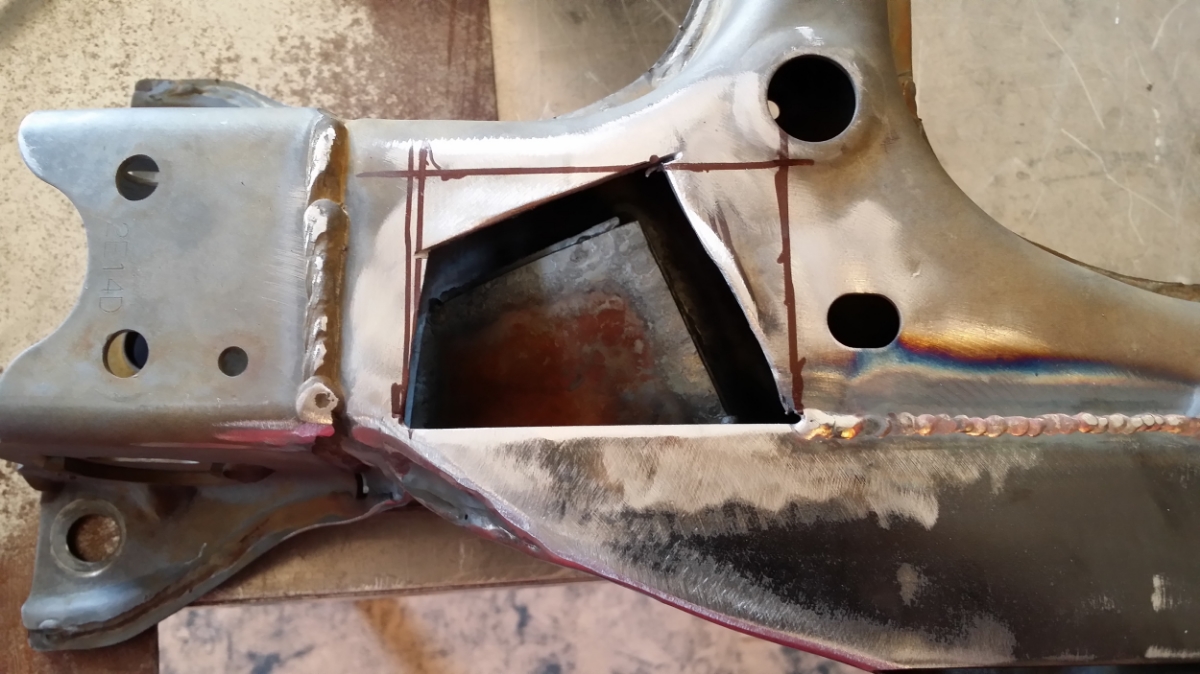
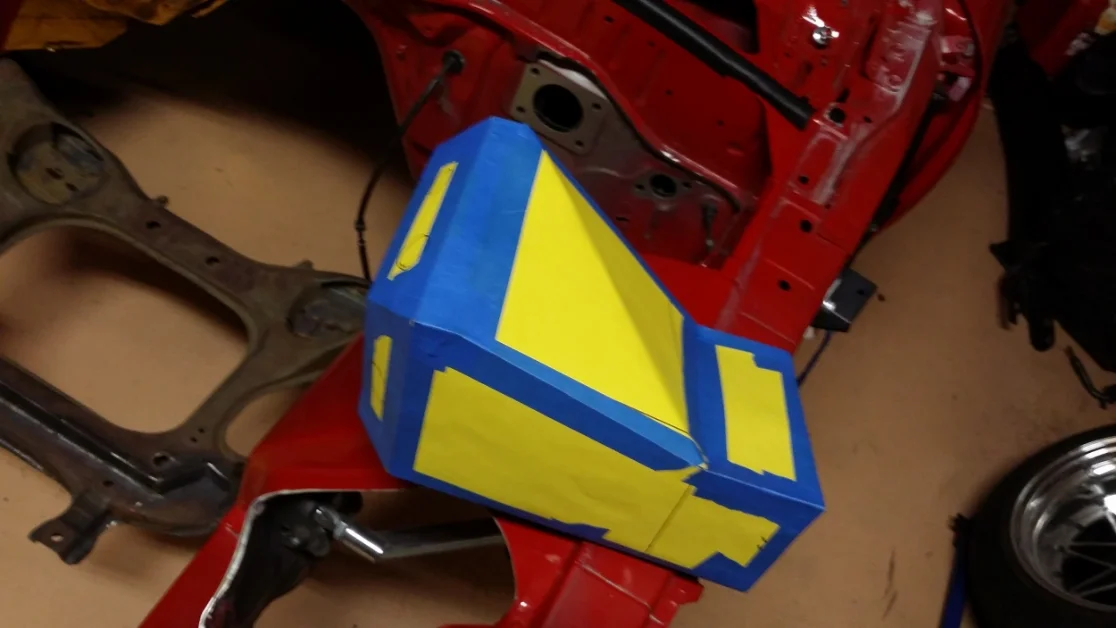
After a few initial measurements were complete, the sub-frame was removed an the steering rack was assembled to it in order to trace it out. Tracing the steering rack allowed me to see the boundaries without having to keep the steering rack attached. This means I can flip it, twist it, turn it, and measure it easily.


Once the boundaries and measurements were established, the cutting could begin. A quick process often called "skimming" would remove the excess metal which now sits below the bottom of the sub-frame so that the top section could be tacked into place on the lower portion. Once it was tacked in, a test fit and measuring for the correct mounting angle could begin.
Expecting the lower portion to hold the weight of the rack at the new position even without the applied forces of steering to it is rather wishful thinking. In order to strengthen it back up, a process often referred to as "Boxing" was done to connect the now dropped section of the sub-frame back to upper section. This took no more than a piece of 1/8" steel flat stock.


Once the upper portions were boxed in, the sub-frame was flipped over to complete the new lower section. It is very important to completely close this section in just the same as it was when it was unmodified because it will be one of the first points of contact with anything in the road since the vehicle is lowered. Just the same as above, 1/8" flat stock was used.


It is rare to find a perfectly fitted mod once you have cut it, in that, you don't need to fill in a few gaps once the original position has been changed. This particular mod was no different. Both left and right sections of the now dropped steering rack needed false corners to fill blend them into the main portion of the sub-frame. The section below the pinion housing of the steering rack also needed to be filled in since that section was skimmed earlier. Some simple sheet metal segments were cut and welded in to give this modded rack a near unmodified appearance. Steering rack bolt access holes were also cut once the rest of the sheet metal filling to the forward section of the steering rack mount was complete.


With all of the welding and blending complete, the sub-frame was flipped back over to test fit the steering rack. The fit was perfect!


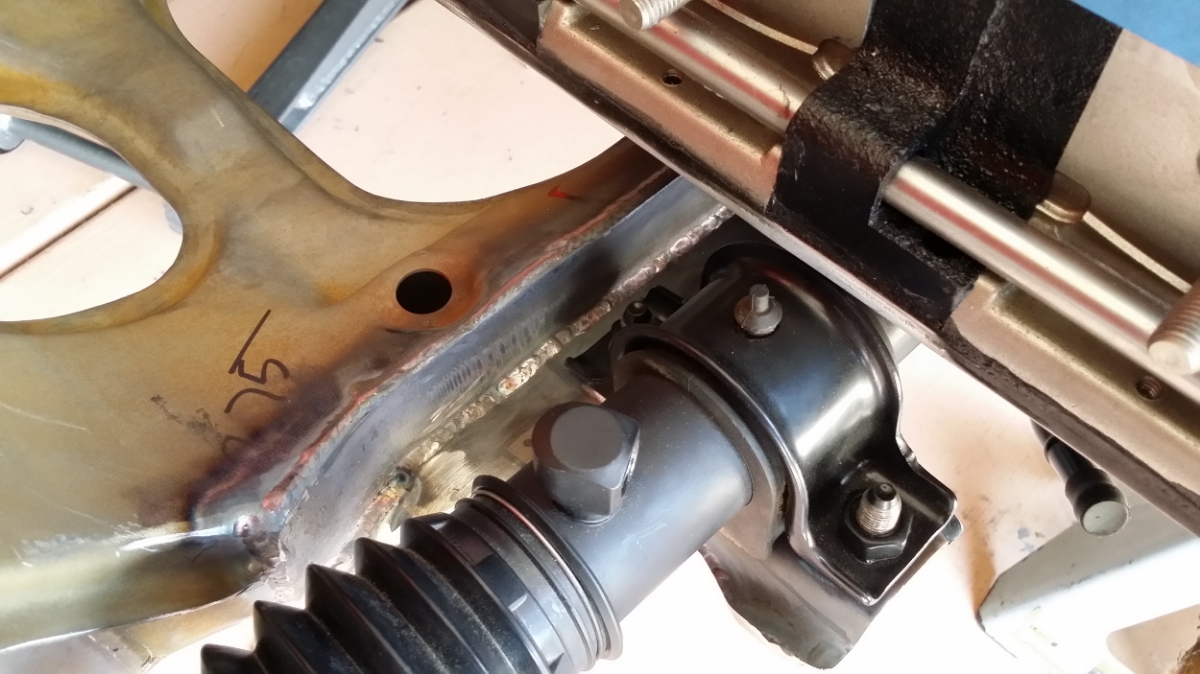
Once the steering rack was fitted back up to the sub-frame, the entire assembly was mated back up to the chassis for a fit check.
Once the entire assembly was bolted back down, it was clear that we were running into steering shaft issues. Initial fit checks revealed that the steering shaft was too short to be secured to the pinion spline using the OEM bolt. The steering shaft needed to be lengthened.
In addition to the steering shaft coming up a bit too short, the steering shaft U-joint was now interfering with the sub-frame which must be notched out for clearance.


After a quick trace to mark the area of the steering shaft U-joint, the entire assembly was removed again to make the final modifications.
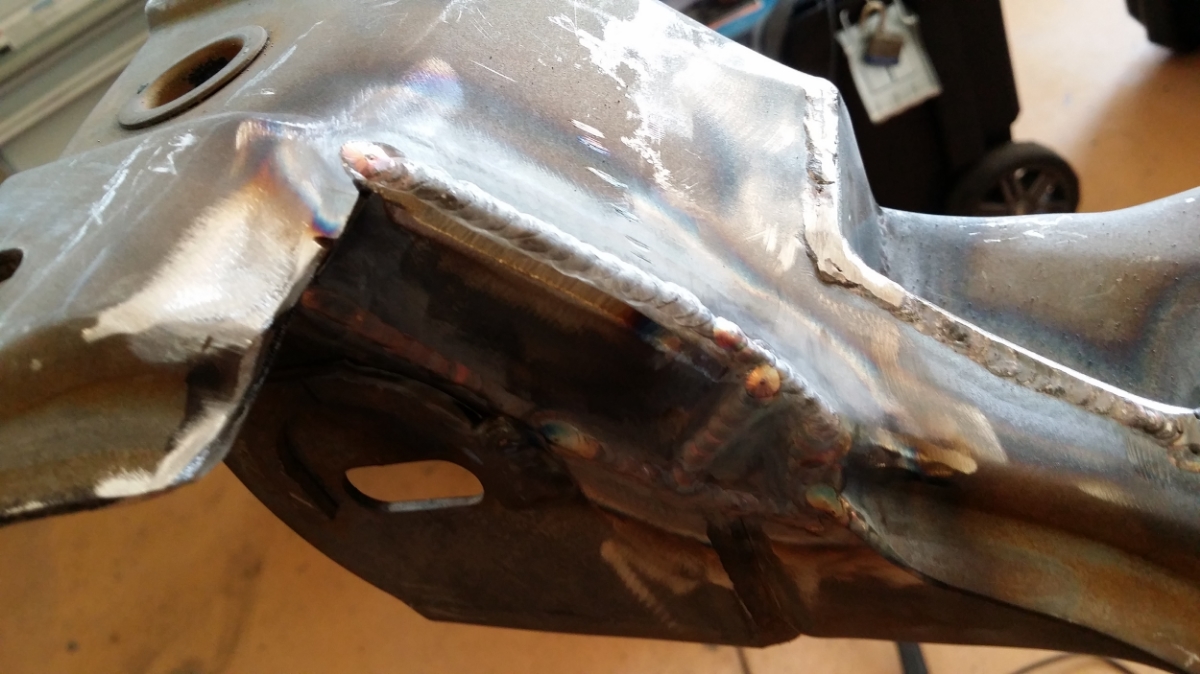
Just the same as with the steering rack mounting surface, the U-joint cutout was cut and boxed for clearance and strength.


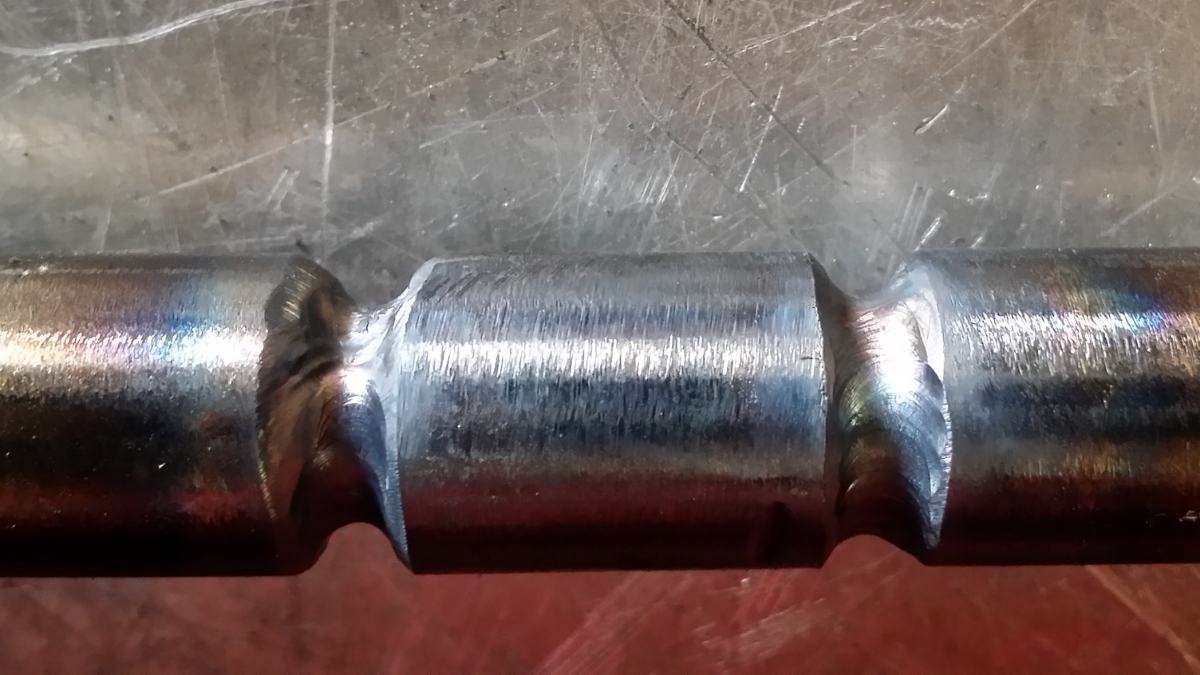
In order to lengthen the steering shaft, about an inch of round stock was cut and welded in. The first pass was an autogenous pass to hold itself together while a second pass using filler could be made. This helps to keep the distortion low while laying down the pass that counts, even when it is clamped an an angle vise.
With the steering shaft lengthened, all that remained was final assembly


Not bad. A pretty simple modification with a neat reveal to it. All it takes is a little attention to detail and a little understanding of the job at hand to make a one of a kind piece that will make all the systems come together. If you were not already aware of the modification, you might not have ever even noticed it. Mission accomplished.
Help fund future episodes of The Fabricator Series with your Donation and receive exclusive SnapChat access! Even the smallest donations go a long way.
Questions? Drop them in the comments below or Email The Fabricator
Likes, Comments, and Shares appreciated by all!


A necessary sub-frame and steering rack modification for 20b and 26B Rotary Engine Swaps in the FD3S Chassis.